Configure the desired screen capture settings. Note that the setting displayed in this panel vary depending on whether the Quick Capture mode is enabled or disabled.
You can add custom notes to be saved along with your screen capture. By default, the notes are saved each time a new screen capture is taken. To clear your notes after each screen capture, select "Clear After Image Saved".
Notes will be saved as an ASCII text file (.TXT file extension) with the same file name as the screen capture. No formatting of the text is available.
This option is available only when the Quick Capture mode is enabled.
Select the graphic file format for the screen capture. Select from PNG, JPEG, or BMP. Use the field below "Notes" to specify the file name (see Export Path below to specify the location to which store the file).
This option is not available when the Quick Capture mode is enabled.
Refresh the current screen image from the instrument at the specified time interval. Specify an interval between 1 second and 86,399 seconds (24 hours). To stop the continuous generation of screen images, click the Stop Auto Refresh button.
This option is available only when the Quick Capture mode is enabled.
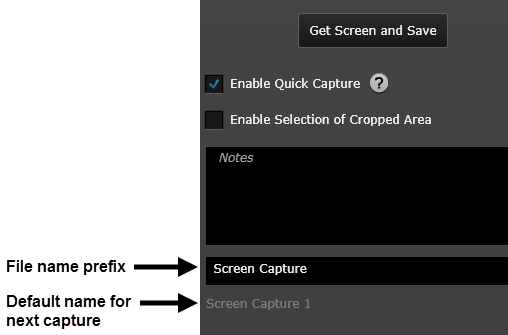
You have the option to include or exclude the date, current time, and numeric index as part of the file name. The date is in the form yyyy-mm-dd and the time is in the form hh-mm-ss (24-hour time format). For example, Screen Capture 2018-09-20 11-40-26 1 – September 20, 2018 at 11:40:26 with a numeric index of 1.
As shown below, the file name is shown near the top of the panel, under the "Notes" field.
This option is available only when the Quick Capture mode is enabled.
Click on the folder icon to the right to select the file path to which store the screen capture. If the file already exists, an overwrite message will be displayed.
Note: By default, export operations are stored in the "My Documents" folder on your computer. For example – C:\Users\<user_name>\Documents\Keysight\BenchVue\LCR Meter\Exports\.
This option is available only when the Quick Capture mode is enabled.
Click on the folder icon to the right to append a screen capture to an existing Microsoft Word (.DOC or .DOCX) file.