Open topic with navigation
Using Gamma Table
Gamma Correction adjusts for the impedance difference between the Device-Under-Test (DUT) and the power sensor. You can choose between Single Point Gamma correction (default) or Table-Based Gamma correction, depending on your test setup.
Instructions
Single Point Gamma
- At the bottom of the Instrument Setup tab, click the Gamma Corrections... button from the Corrections pane.
- The Gamma Correction dialog box is displayed containing two tabs. Select the "Single Point" tab.

- Enter the desired magnitude and phase angle in degrees, according the following ranges:
- Magnitude: 0 to 0.999
- Phase: -180° to +179°
- From the "DUT Gamma Mode" drop-down list, select the desired "Single Point".
- Select the "Enable Gamma Correction" checkbox to enable the correction.
- Click "X" in the upper right corner to return to the main interface.
Table-Based Gamma
- At the bottom of the Instrument Setup tab, click the Gamma Corrections... button from the Corrections pane.
- The Gamma Correction dialog box is displayed containing two tabs. Select the "Tables" tab.
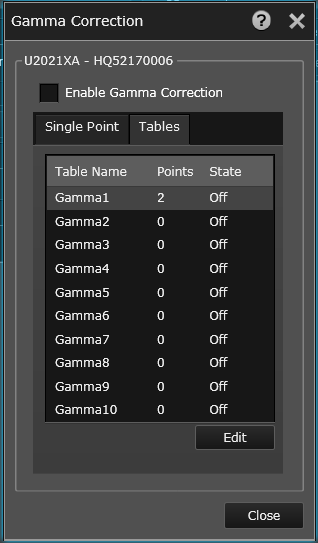
- Select the desired table from the list and click the Edit button to modify the table parameters.
- From the Gamma Correction Edit dialog, you can edit existing parameters and add or delete points in the table.
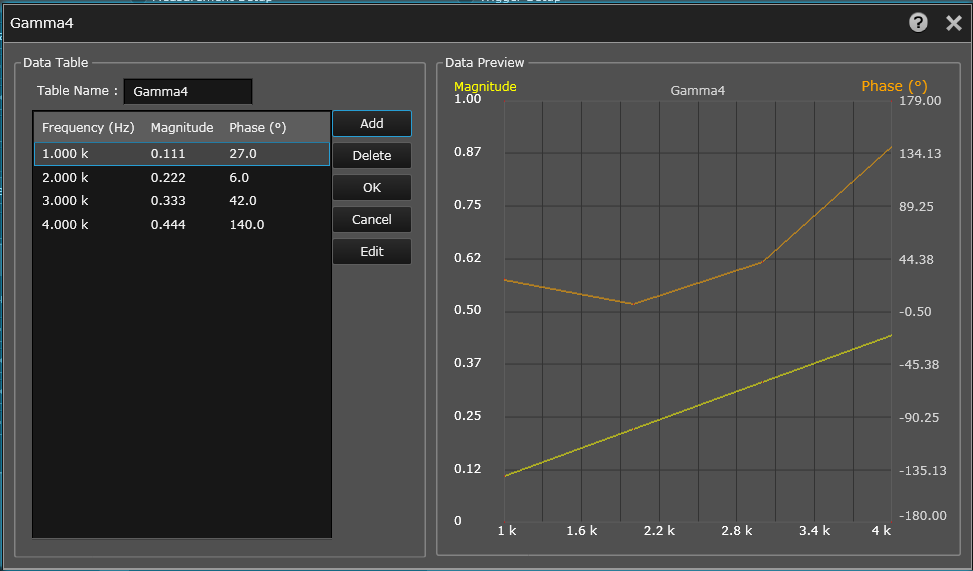
- If desired, you can enter a new name in the "Table Name" field.
- To edit an existing point, double click an entry in the table and change the table parameters.
- For new points, enter the desired frequency, magnitude, and phase angle in degrees, according to the following ranges:
- Magnitude: 0 to 0.999
- Phase: -180° to +179°
- Click OK to save the data to the table.
Repeat Steps 7 and 8 for up to 1024 entries.
- Click OK to save the Gamma table.
- From the "DUT Gamma Mode" drop-down list, select the desired Gamma table.
- Select the "Enable Gamma Correction" checkbox to enable the correction.
- Click "X" in the upper right corner to return to the main interface.