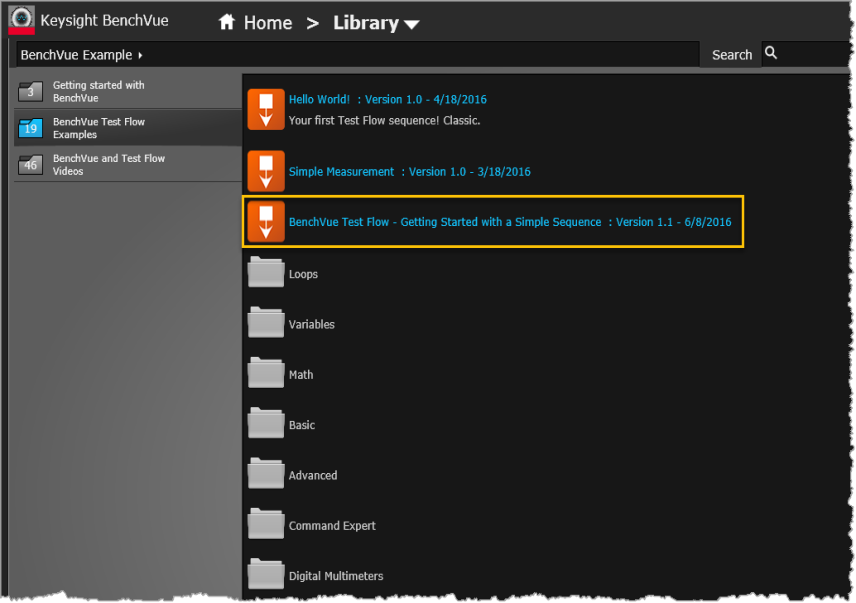
Note: The specific Test Flow examples included in the Library are subject to change.
To introduce you to Test Flow, we will start by loading an example Sequence previously stored in the BenchVue Library.
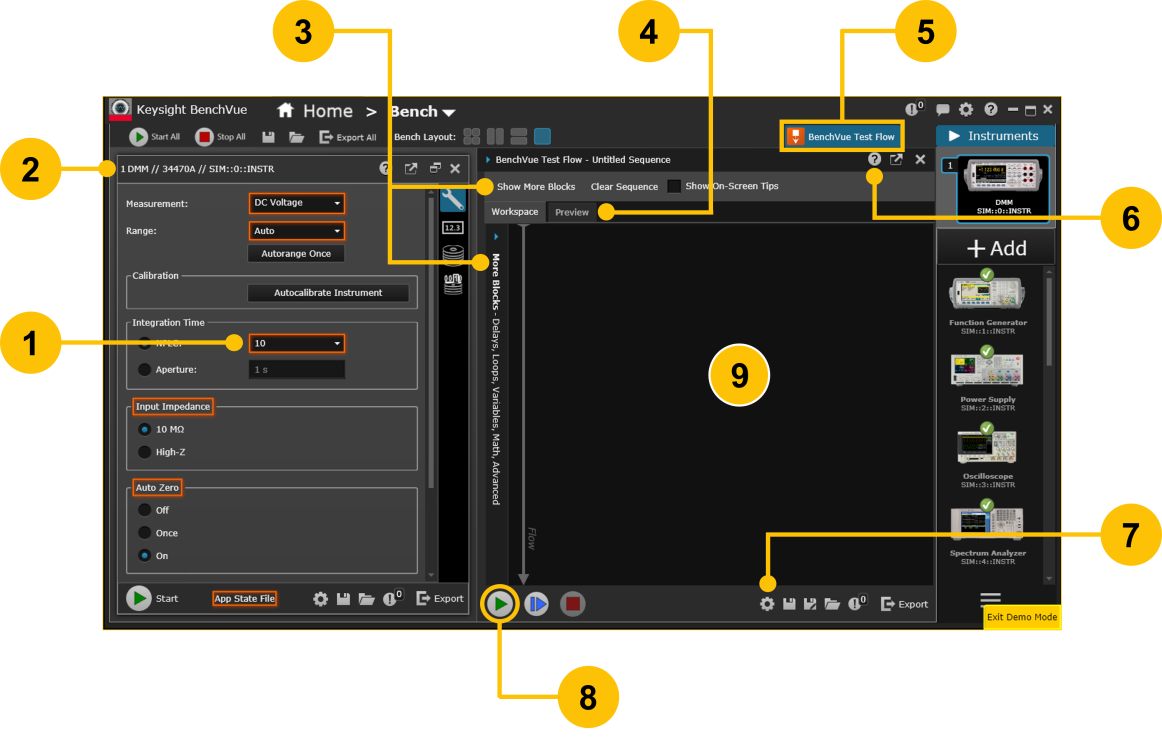
| 1 | Instrument controls and properties outlined with orange rectangles can be added to a Sequence. To add a control or measurement block to the Sequence, use your mouse to drag the block from the bench application and drop it in the Sequence Workspace. The controls and properties supported will vary depending on the instrument and model number. | |
| 2 | Test Flow uses controls and measurements from launched bench applications to create a Sequence. When Test Flow is running, launched bench applications occupy the left-hand panel of BenchVue user interface. |
|
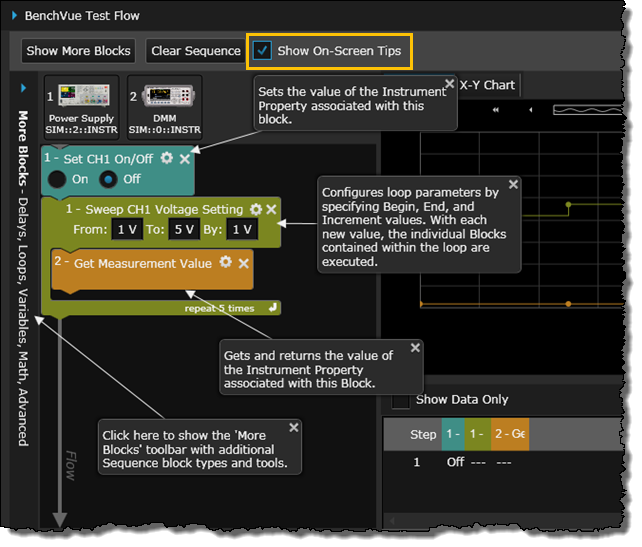
| 3 | Click on the "Show More Blocks" button, or the "More Blocks" panel on the left, to get access to additional Sequence block types and tools. | |
| 4 | Click the "Preview" tab to verify your steps in chart form before executing the Sequence (if necessary, use the slider bars to resize the Preview area). | |
| 5 | Click here to launch the Test Flow application. | |
| 6 | View this Help file for the Test Flow application. | |
| 7 | Use the Settings menu to configure Test Flow options or view the Welcome Screen. | |
| 8 | Click the 'Start' button to execute the current Sequence and store the test data. | |
| 9 | Sequences are created in the Sequence Workspace area. Use your mouse to drag blocks from a running bench or PathWave application and drop them here in the Workspace. |
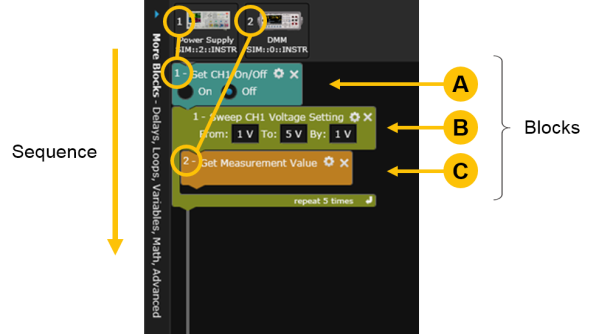
In the next step of this tutorial, we will add additional blocks to the Sequence and move existing blocks to new positions within the Sequence.