N8486AQ
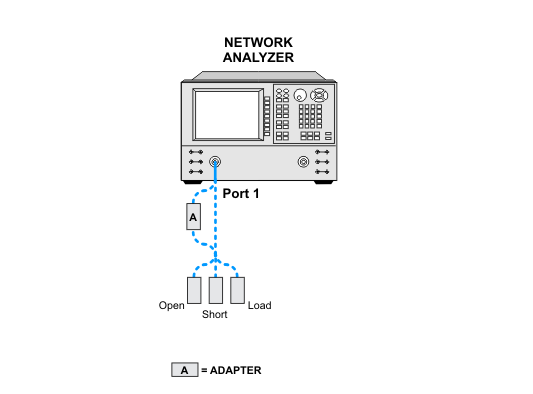
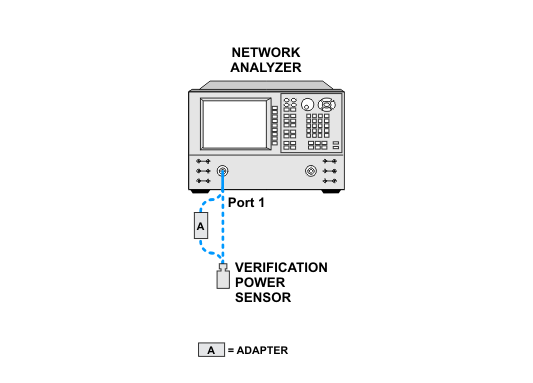
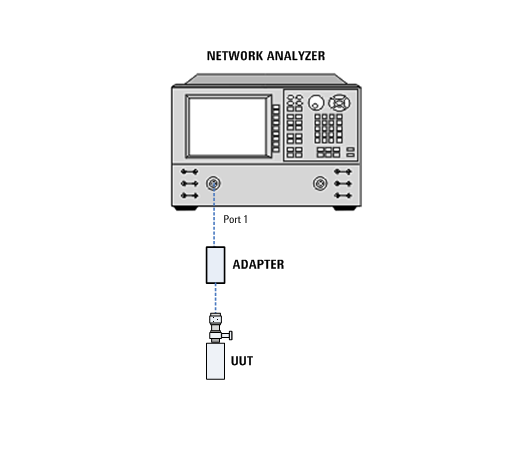
This test measures the Voltage Standing Wave Ratio (VSWR) of the power sensor's coaxial calibration port at 50 MHz. A network analyzer accompanied with a calibration kit or electronic calibration module is used to perform this test.
| Instrument | Recommended product | Alternative product |
| Network Analyzer | ||
| PNA | N5247B |
N5247A/AS E8361C N5230A[1] |
| Calibration Kit/Electronic Calibration Modules | ||
| 50 Ω Calibration Kit | 85032F | 85054B, N4690D[2] Opt M0F, or N4690B Opt M0F |
| Power Sensor[3]/Verification Kit | ||
| Power Sensor | N8481A | N8482A or N8481B or N8482B or N8481H or N8482H or 8481A or 8482A or 8481B or 8482B or 8481H or 8482H or Verification Kit 85055A |
| Adapter | ||
| 2.4 mm (f) to Type-N (f) | 11903B | - |
[1] Supported N5230A and N5230C Options: This calibration application supports any option that covers the entire frequency range of the UUT.
[2] D-model ECals can only be used with the following network analyzer models and firmware versions:
[3] Supported power sensor options:
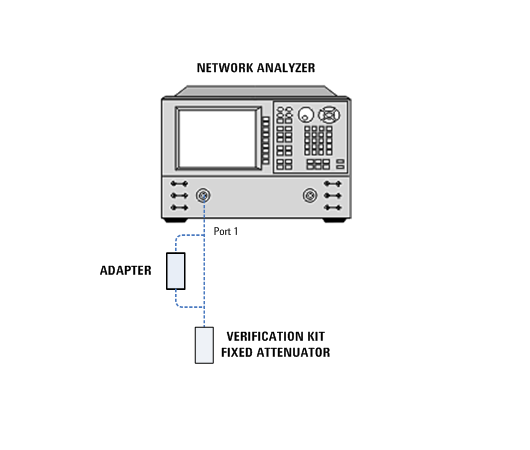
The verification kit can be used instead of a power sensor to verify the network analyzer calibration. The software will only use one item in the Verification Kit to verify the calibration — this item will be the largest fixed attenuator in the kit.
85055A - 50 dB attenuator
Each verification kit comes with a 3.5 floppy PNA Verification Data Disk or a USB flash disk which contains the data we need to verify the network analyzer calibration.
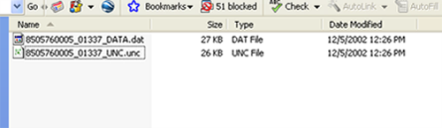
In order to use the verification kit, save the .unc and .dat file for the largest fixed attenuator to this location:
C:\Documents and Settings\All Users\Application Data\Agilent Technologies\Test Management Environment\VerificationKit
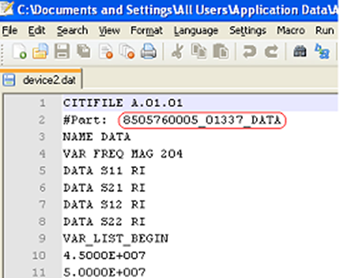
You will need to rename the file by opening the file and copying from the second line everything that follows “#Part: “ This number contains the model number and serial number of the fixed attenuator. When mapping the verification kit in TME, enter the five-digit serial number located on the largest fixed attenuator in the kit.
Copy the files here:
Open the file and copy the part number:
Rename the files using the part number:
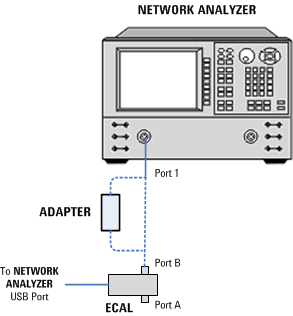
An E-Cal may be used for the Network Analyzer Calibration instead of a mechanical calibration kit. When using the E-Cal, connect it to the network analyzer using a USB cable. Before using the E-Cal, ensure that the ready light has turned green on the unit. When mapping the E-Cal in TME, the serial number should be a 5 digit number with no letters. If there is no 5 digit serial number printed on your unit, then follows these instructions using your network analyzer to locate your serial number: