


Introduction
DirectDataConnectivityWpfDemo is an example program that shows the user how to configure the VSA’s .NET API to use direct data input to VSA. Like the console application, it sends data to VSA based on setting up the UserInput classes, although is more involved since it demonstrates the use of event handlers to indicate when to send data. Configuration is also done through a GUI with concise steps for the user to follow.
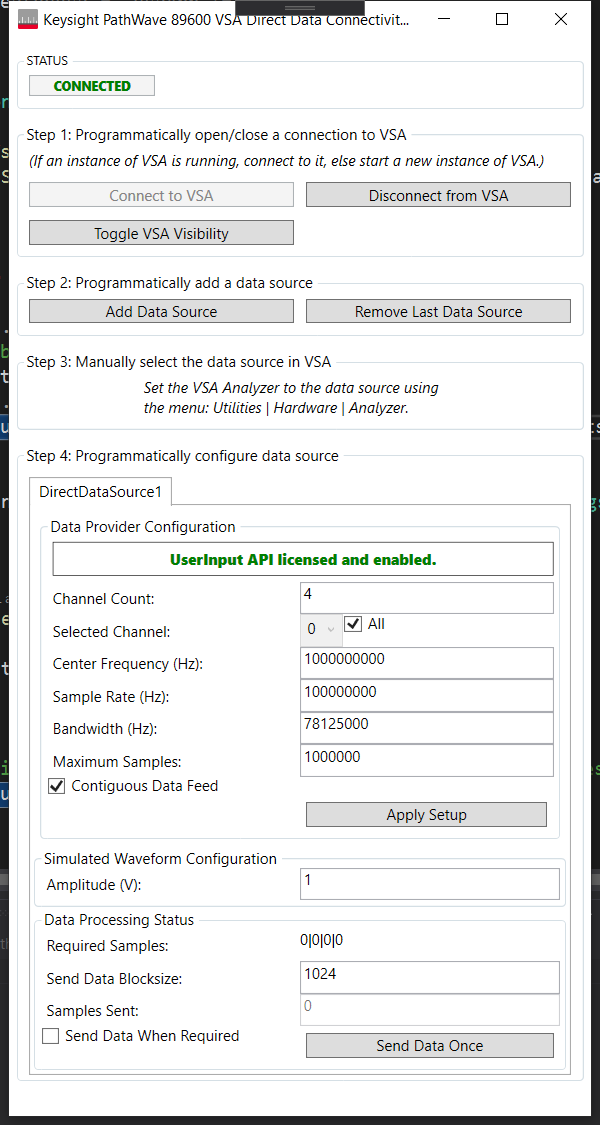
Figure 1. The GUI for the WPF Direct Data Connectivity Example.
Requirements
The following are required to successfully build and run this application:
- Visual Studio 2017 or 2019 with the C# and .NET desktop development environment configured.
- VSA version 2022 Update 1 or newer with the 89601101C license or a Trial license.
Order of Setup and Execution
The Direct Data Connectivity example application can be found in the following directory of the VSA user installation:
…\Examples\DotNET\C#\DirectDataConnectivityWpfDemo
 |
You will need to copy the contents of the Examples directory to your Documents directory or some other location that is writable before compiling and running the example programs since the contents of the VSA installation directory are read-only. The examples depend on API interfaces under the Interfaces directory of your VSA software installation, so you may also need to repair references to these interfaces before the example will run. |
For this code to compile and run, a reference to the Agilent.SA.Vsa.Interfaces.dll assembly is required. Opening this solution with Visual Studio in the installed location will find this assembly. If you need to move the solution to another location to build and run, a new reference to the assembly will need to be added.
The following items are required to successfully build and run this application:
- Visual Studio 2017 or 2019 with the C# and .NET desktop development environment configured.
- VSA 2022U1 or newer with the 89601101C license or a Trial license.
This example application goes through four main steps to demonstrate the capability. The user is shown these steps from within the examples WPF GUI interface, to make the application easy to use.
- Connect to an existing VSA instance or start a new one. If an instance of VSA is not running on the same machine, the application will start VSA for you automatically
- Create a direct data transfer data source (configuration) by selecting the Add Data Source button.
- Through the VSA’s Utility > Hardware > Analyzer menus, manually select the data source to be the selected analyzer.
- Configure the data source parameters and then send the data to VSA. Default values are show in the text boxes, which is a good place to start. Data to the VSA can be controlled to send data once on a button press (SendDataOnce button) or continuous by checking the Send Data When Required checkbox.
Upon successfully sending data to the VSA, the output should look similar to the screen capture below.
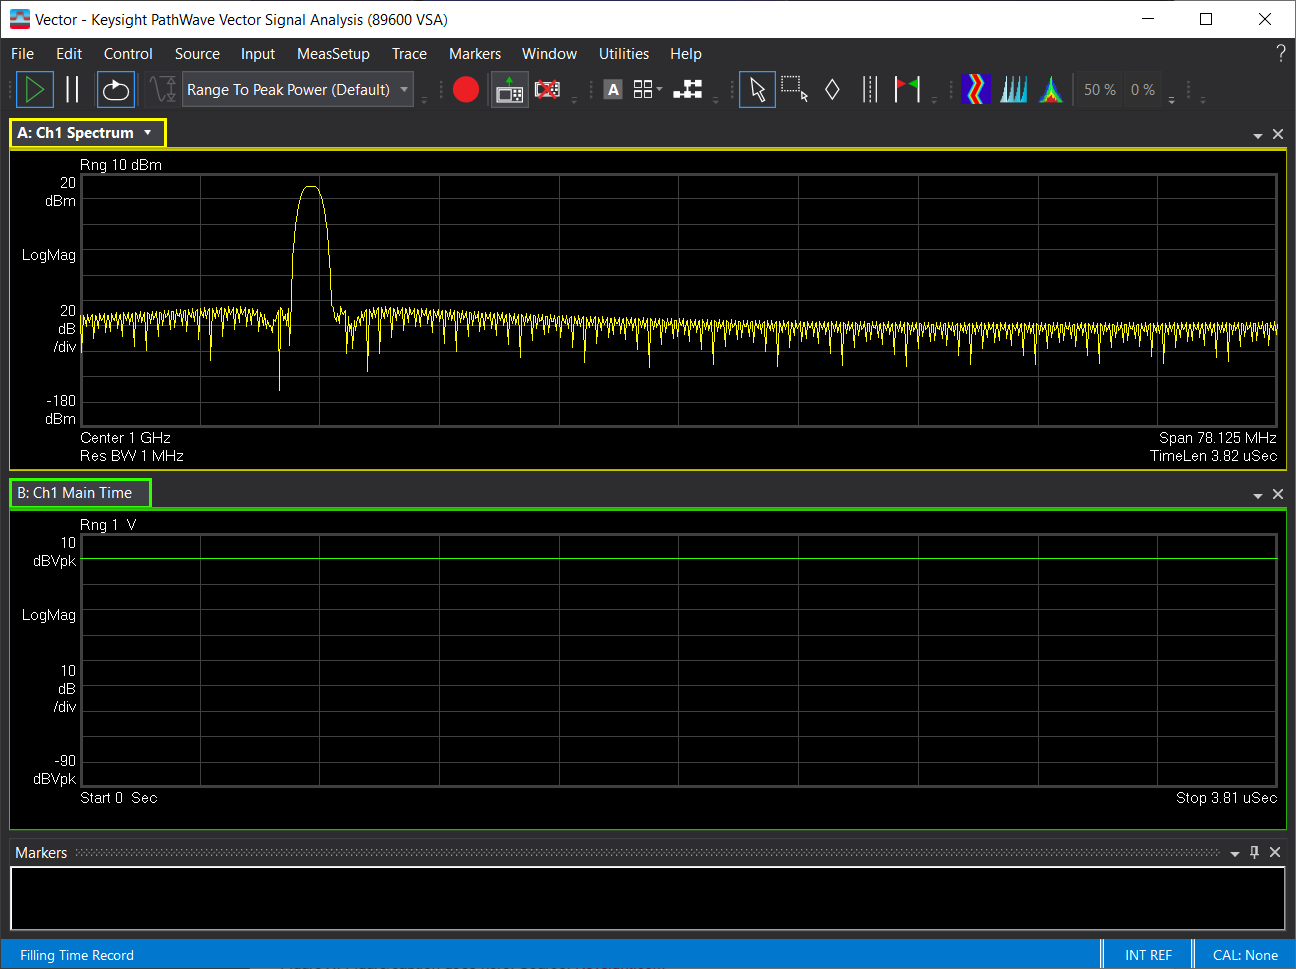
Figure 2. A single channel of data being viewed in VSA.
By default, 4 channels of data is being sent to VSA. To view all channels, through VSA’s Input->Channels->User: menus, the number of channels can be selected to show all 4 channels. The resulting output should look similar to the screen capture below.
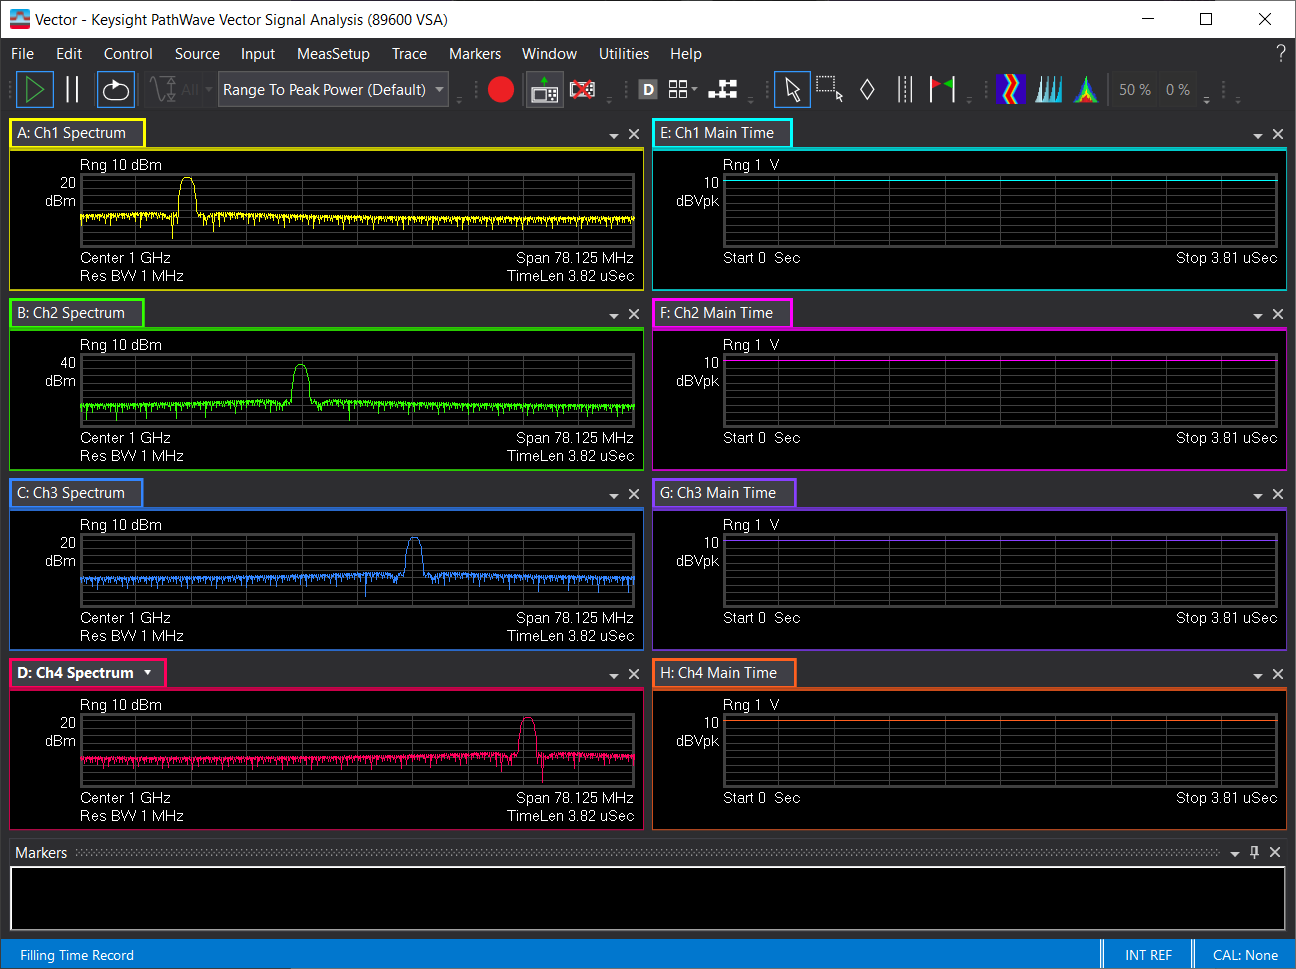
Figure 3. Four channels of data being viewed in VSA.