Managing trace windows
There are several ways to manage the trace windows that are visible on the 89600 VSA user interface. This information is provided in the following sections.
You can also use the Traces dialog to define trace visibility and trace data selections.
Adding a trace
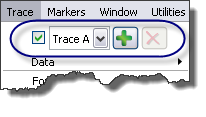
To add a trace to the display, click the menu and click the plus (+) button.

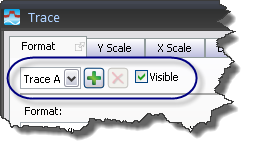
You can also do this from any of the tabs on the dialog:

When there are hidden traces, the Add button will make hidden traces visible before adding a new trace. Hidden traces will be restored to their former location. Newly created traces will be added to the same tab group as the active trace.
To make a particular trace visible, click the menu, select the desired trace, and select the check box to the left of the trace name.
Removing/hiding a trace
To remove a trace from the display, you can click the close button on a tab bar to hide the active trace. Closing the trace will also set the underlying trace data to .
The close button is located to the left of all the tabs in a tab bar, as shown in the following illustration:

You can also uncheck the check box in the menu or any of the dialog tabs (see the Adding a Trace section above).
None of these operations actually remove the trace from the list of traces. To remove a trace from the list of traces, open the menu and select the last trace in the list. This will enable the Delete (red X) button which will remove the last trace out of the list of traces.
Activating a trace
Only one trace at a time can be active. You activate a trace in several ways:
- If the trace is visible, you can click in the grid for that trace.
- You can click the menu and select a trace from the trace selection drop down menu.
- You can select a trace from the dropdown menu at the top of any of the Trace property tabs (Format, Y Scale, X Scale, Digital Demod).
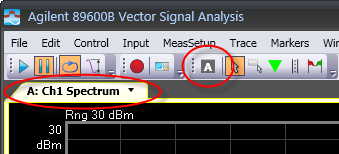
You can see which trace is active by looking at the Active Trace toolbar. In addition, the active trace's title is in bold text. In the following illustration, Trace A is active.

See Also
