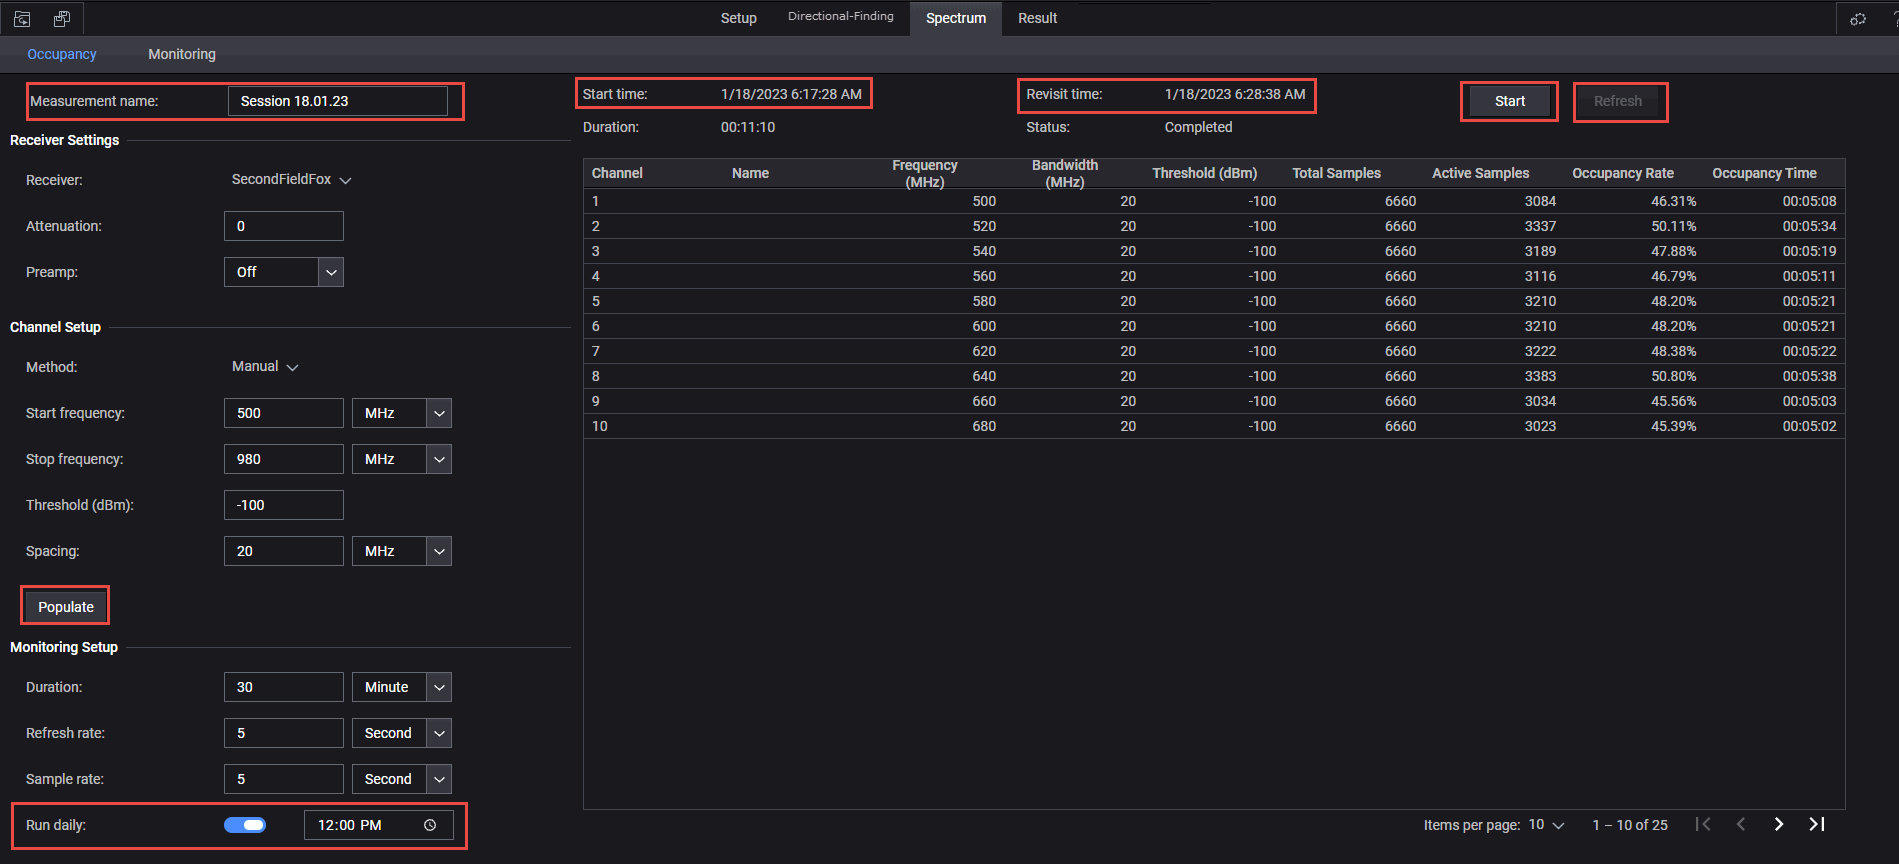
This screen displays the spectrum occupancy Settings.
This topic contains the following sections:
This section describes the Layout choices for a spectrum occupancy measurement.
Menu Choices for a Spectrum Occupancy

Populate- Once you have finished choosing your Receiver Settings, Channel Setup, and Monitoring Setup, click Populate to populate the Channel table.
Run Daily - When Run Daily is enabled, enter a daily time to start the measurement.
Revisit time- Once the measurement has been started by clicking the Start button, the Refresh button becomes active. Revisit time indicates the last time the Channel table data was updated with Refresh.
Run Daily - When Run Daily is enabled, enter a daily time to start the measurement.
Start- Once the measurement has been started by clicking the Start button, the Refresh button becomes active. Revisit time indicates the last time the Channel table data was updated with Refresh.
Refresh - Refresh in inactive until Start is enabled. When Start Daily is enabled, enter a daily time to start the measurement. Each time Refresh is clicked a new measurement is taken and the Channel table is updated.
Cancel- Stops the current measurement. Refresh button is disabled and the Start button is active for a new measurement.
The Receiver Settings are used to Add and Remove instrument receivers as needed for your measurement. Only a single receiver can be selected at a time for the Occupancy graph.
The Channel Setup window enables you to select the channel settings for your measurement. This includes the source of the channel setups information (i.e., manual or csv file. Default == Manual). The Populate button is used to fill the Channel table with data for your measurement.
The Monitoring Setup sets up the Duration, Refresh rate, and Sample rate for your channel measurement. The Monitoring Setup also includes the Run Daily time set for your measurement.