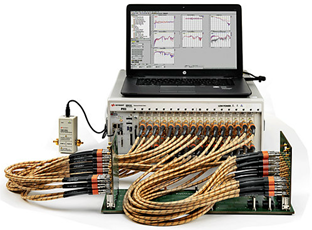
Launch
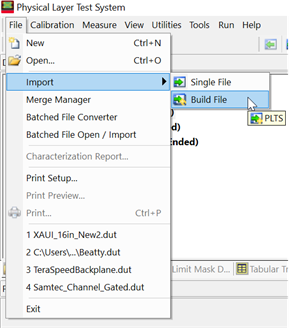
PLTS 2018 and select File
-> Import
-> Build
File.
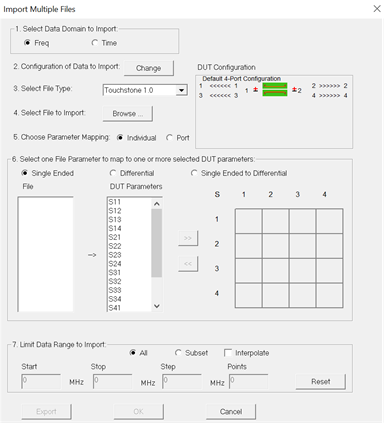
In the dialog that is displayed, click on the Change button in step 2
Configuration of Data to Import.
Using the up/down arrows in step 1
Enter the Number of Ports to Measure, change the number from
4 to 12 as shown below.
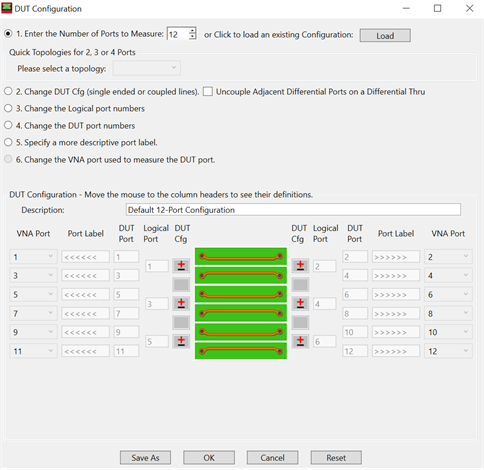
Add port labels if you wish in step 5 Specify a more descriptive port label or just leave blank as done in the graphic above.
Click on the OK button at the bottom of the dialog box to continue.
You
will now see the empty frame of the 12-port S-parameter file in the
lower right-hand portion of the dialog box as shown below. The box
shows an 8x8 matrix until you scroll vertically or horizontally.
![]()
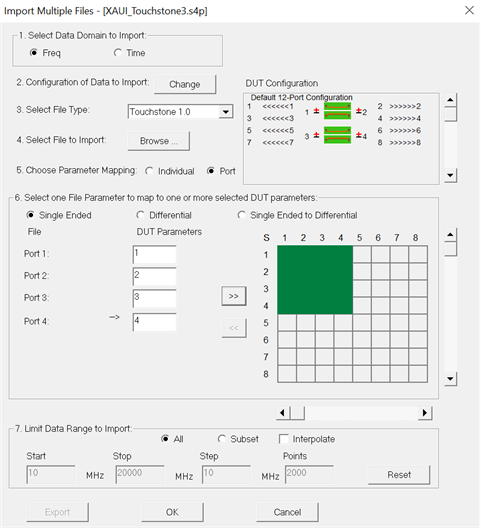
Start populating the empty 12x12 frame with real data
from 4-port measurements by going to Browse
button in step 4 Select File to Import
and point to the first of the 4-port S-parameter files saved on your
computer. After selecting the first 4-port file, click on the radio
button labeled Port in step
5 Choose Parameter Mapping.
This will allow the complete file to be imported to the 12x12 frame
at once as shown below. To get the green block to move over to the
right side, you must click on the “>>”
button. If you happen to make a mistake, you can always click the
“<<” button to correct
it.
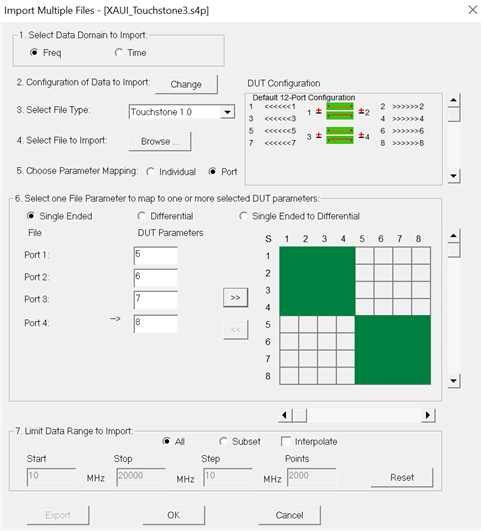
Before browsing to the next 4-port file, you must
decide where to place it inside the 12x12 frame. You do that by changing
the port numbers. In this example, we will change ports 1, 2, 3, 4
to read 5, 6, 7, 8 as shown below. Here is an example of importing
the next 4-port file:
Continue importing new 4-port files into the 12-port frame until all 144 elements in the 12x12 matrix are filled. Repeat by clicking on the Browse button in step 4 Select File to Import and adding more 4x4 blocks of S-parameters.
Add the third 4-port file and map to ports 9,
10, 11, 12 as shown below.
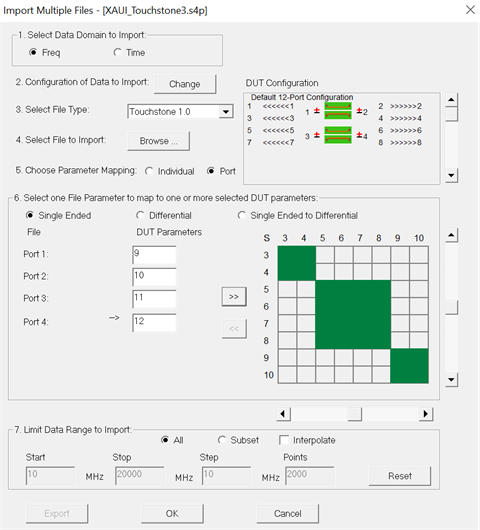
Note that you must scroll the vertical and horizontal views of the 12x12 matrix because it soon becomes too big for the dialog box. This is a practical limitation because PLTS can handle very large build files.
After filling all the green blocks, click on the OK button and then you will see
the following dialog box:
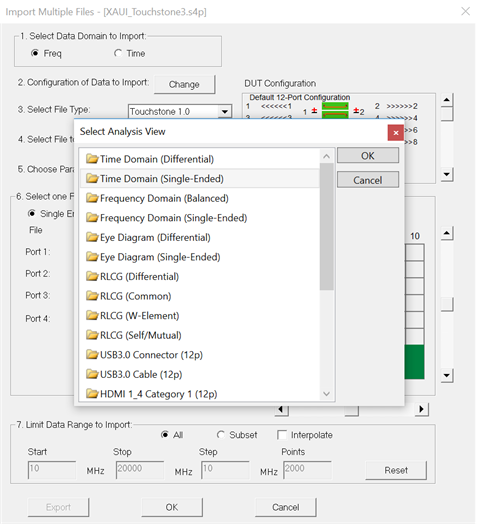
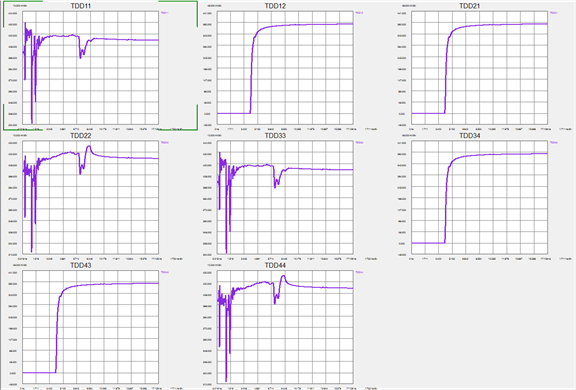
Select how you would like to view the newly created
12-port S-parameter file. You can select any of the above and most
analysis starts with Time Domain (Differential). The following is
an example of what you should see:
If you did not fully populate the 12x12 matrix, then you will get a cautionary message, but you can click through it and see the data that you did enter, regardless.
Finally, it is known that to build a 12-port S-parameter
file, it is necessary to make 16 different 4-port measurements. If
you have not done this, then there is the potential to insert ideal
lossless values for various terms by using a feature in PLTS shown
below:
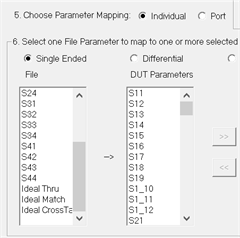
In order to activate this feature, the Individual radio button must be selected to allow individual cells inside the matrix to be added one by one.