This section describes the procedure of simulated eye diagram using the VNA with TDR option.
Connect cables to all test ports.
Click the Setup tab.
Click the Setup Wizard (under Basic).
Set the measurement condition using the Setup Wizard:
Select Deskew & Loss Compensation (under Error Correction) then click Next >.
Click the Differential 2-Port button, then click Next >.
Click the Deskew button, then click Next >.
Connect the DUT to cables. Click the Measure button, then click Next >.
Set the Rise Time to 35 ps and select 10-90% from the Definition drop-down list. When finished, click Apply to save the settings.
Click the Finish button.
Click Trace button on the tool bar and select 3 to activate Trace 3.
Click Eye/Mask tab.
Under Stimulus:
Select PRBS from the Type drop-down list.
Select 2^7-1 bits from the Length drop-down list.
Set the One Lv. (amplitude) to 200 mV.
Set the Data Rate to 1 Gb/s.
Click the Draw Eye button under Trigger.
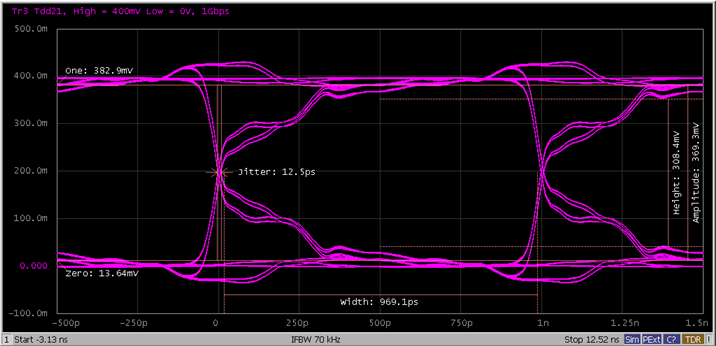
The eye diagram (Trace 3) similar to the one shown below is displayed.
Other topics about TDR Quick Start