Start the software and configure
the  hardware.
Use the default values or
configure the Multitone Settings
as desired.
Follow this procedure to set up a simple 8-tone signal and to perform these related tasks:
Start the software and configure
the hardware.
Use the default values or
configure the Multitone Settings
as desired.
Click ![]() to download and play the waveform.
to download and play the waveform.
Configure the analyzer to view the resulting multitone signal.
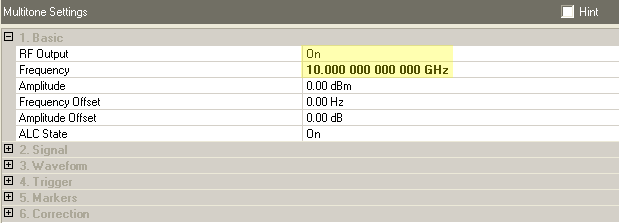
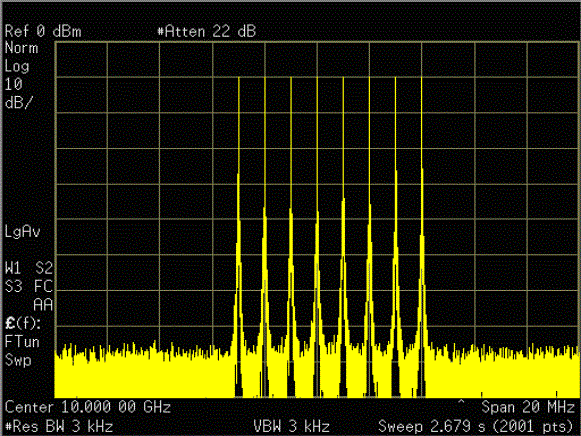
The following figures show an example of the default settings for a
Wideband Arb Waveform Generator
with a Frequency of 10 GHz.
Configure the analyzer as follows:
Center frequency = 10 GHz
Span = 20 MHz
BW / Avg/ResBW = 3 KHz
Amplitude/Attenuation man = 22 dB
Sweep/Points = 2001
The analyzer display should look similar to the figure below. Notice the IMD range and values.

|
|
All instruments must share a common 10 MHz reference in order for the corrections to work properly. |
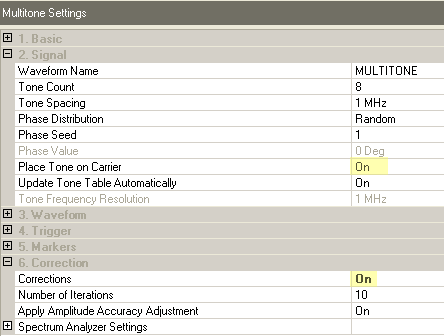
Configure the Multitone Settings
as follows:
Set Place Tone on Carrier = On
Corrections = On
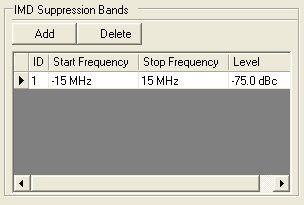
In the IMD Suppression Bands
pane, press Add.
Set the Start Frequency to –15MHz (use the Tab key to enter data and move to the next cell).
Set the Stop Frequency to 15 MHz.
Notice the Tone Preview
panel display of the suppression bands.
Click ![]() to download and play the waveform.
to download and play the waveform.
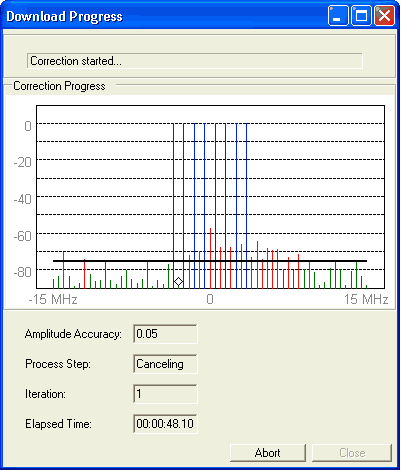
A progress window similar to the figure below will appear during the correction process.
Green indicates that the IMD suppression level has been achieved, red
indicates that the suppression level has not been achieved. The Amplitude
Accuracy field shows the achieved tone flatness.
|
|
Set the input attenuator for the spectrum analyzer to at least 20 dB so the distortion from the spectrum analyzer does not affect the multitone signal. |
Click Close after the correction process is complete.
|
|
Clicking Abort will leave the last signal generated in the Arb. This signal contains the corrections up to the abort. |
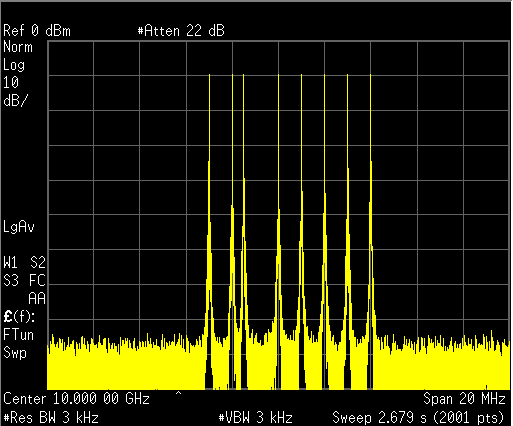
The figure below shows a corrected multitone signal based on the default
configuration for a Wideband Arb Waveform Generator.
Configure the analyzer as follows:
ResBW = 3 kHz
|
|
The correction algorithm corrects everything that is at Tone Frequency Resolution inside the specified suppression band. The correction algorithm views images as IMDs that are in-band. IMD and images can occur in the same place. The correction algorithm corrects IMD that is related to the baseband signal and cannot correct spurs that come from the PSG even if the spurs are within the suppression band. In fact, the correction may make the spurs worse. |
Click here
for additional IMD information.
Waveforms are stored in the Arb. You can play the stored waveforms directly from the user interface by changing the waveform name.
Configure the software as follows:
Waveform Name = MULTITONE2
Tone Count = 3
Corrections = Off
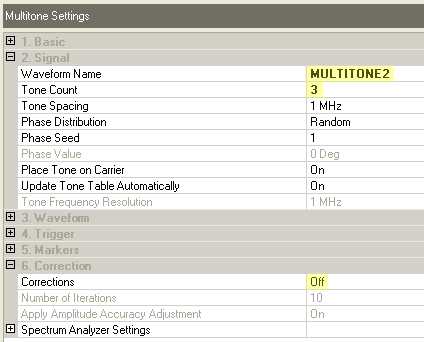
Click ![]() to download and play the waveform.
to download and play the waveform.
Change Waveform Name = MULTITONE
Click ![]() to Play the waveform.
to Play the waveform.
This will play the previously stored waveform named MULTITONE from the signal generator memory.
Notice that the signal parameters in the Multitone Settings window no
longer match the MULTITONE waveform. Clicking ![]() at this point will overwrite the MULTITONE
waveform stored in memory.
at this point will overwrite the MULTITONE
waveform stored in memory.
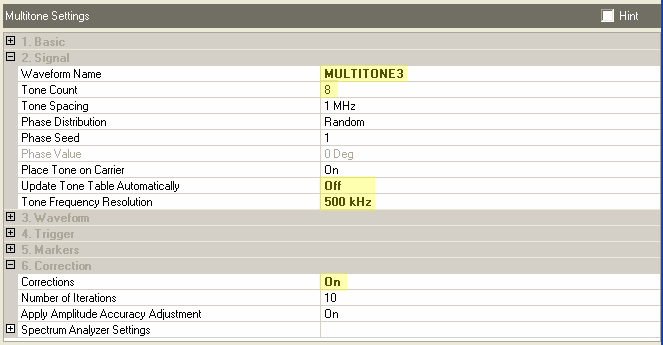
Configure the software as follows:
Waveform Name = MULTITONE3
Tone Count = 8
Update Tone Table Automatically = Off (prevents changes to the tone table from being overwritten)
Tone Frequency Resolution = 500 KHz
Corrections = On
Be sure to use the largest common denominator for the Tone Frequency Resolution to avoid unnecessary correction time.
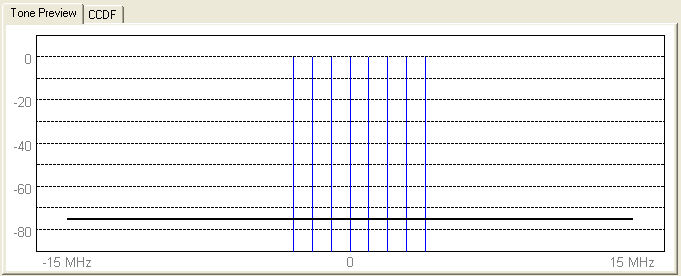
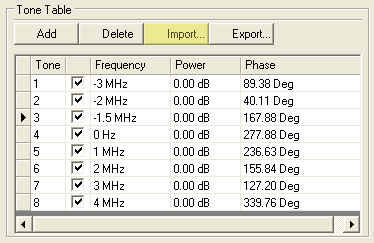
On the Tone Table, change Tone 3 to -1.5 MHz as shown below.

Click ![]() to download and play the waveform. The PSG
display should look similar to the figure below.
to download and play the waveform. The PSG
display should look similar to the figure below.
In addition to entering tone table information directly from the user interface, tone tables can be imported as .txt files. They can also be exported to .txt files for later use.
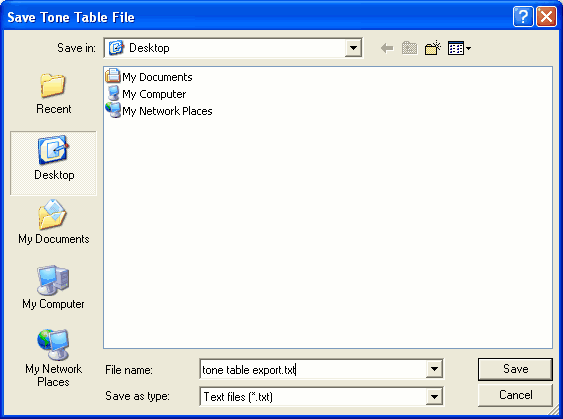
To export a tone table,
click Export
in the Tone Table pane.
Save the tone table file as a .txt file as shown below.
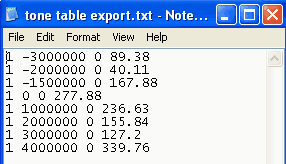
View the tone table .txt file and notice that the data is space delimited. The columns represent On or Off (1 or 0), frequency (Hz), power (dBm), and phase (degrees).
Import a tone table file
by clicking Import
in the Tone Table pane, then selecting the .txt file that contains your
tone table data.