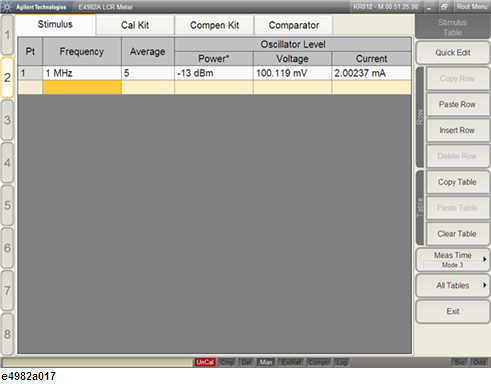
At the preset state, the measurement point number 1 of each table (table 1 to 8) has data consisting of a frequency of 1 MHz, averaging factor of 1, and oscillator level of -13.0 dBm.
To add new measurement points to those already entered in the specified table, perform the following steps.
If you add frequency as a new measurement point, the same settings of the averaging factor and oscillator level as those of the previous measurement point are automatically entered.
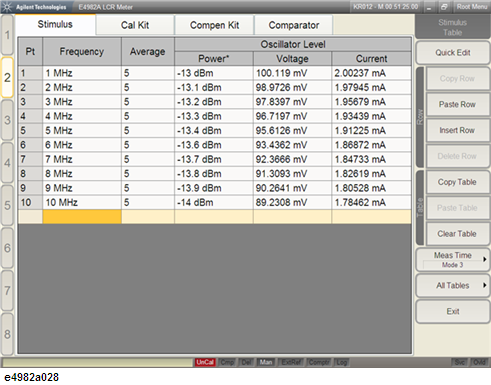
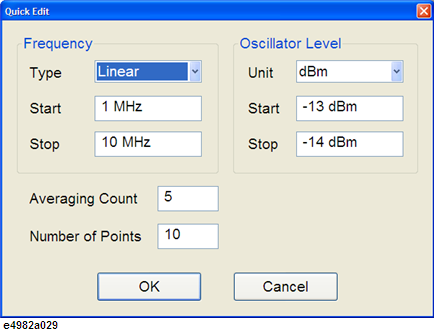
Optionally, you can use the Quick Edit table to enter the frequency, averaging count and oscillator level for several number of points at once. From the Stimulus Table softkey menu, click on Quick Edit softkey. At the Quick Edit window, enter the desired frequency type (Linear or Log), start and stop frequency, oscillator level unit, start and stop oscillator level, averaging count and the number of points you desire to enter. The setting shown in the figure below will give the same results as figure e4982a028.
Another option to add a row is by using Stim Table > Stimulus Table > Copy Row and Paste Row.
Press Stim Table > Stimulus Table > Delete Row to delete any undesired row.