Other topics about Measurement Example
Prepare the E4990A for measurement by taking the following steps. This procedure assumes that the E4990A has been correctly installed and set up.
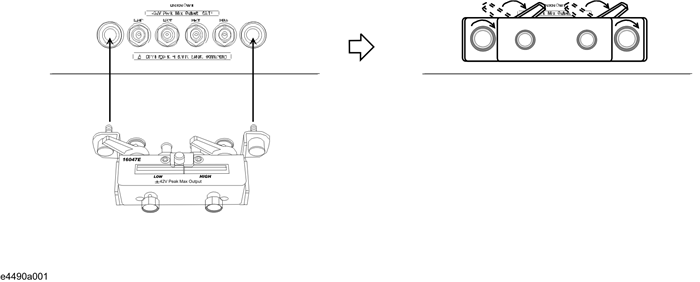
Connect the E4990A to the 16047E Test Fixture for Lead Components.
Attach the 16047E test fixture to the test connectors on the front panel of the E4990A by gradually coupling the four BNC connectors and fastening screws of the fixture with the test connectors and accessory mounting holes of the instrument until they are in complete contact.
Fasten two of the four BNC connectors to the corresponding test connectors by gradually turning the BNC connectors' rotation levers until each pair of connectors is securely connected. Be sure to align the grooves on both sides.
Simultaneously turn the fixture's two fastening screws clockwise so that the fixture is secured to the instrument.
Finally, secure the remaining two BNC connectors of the fixture by turning their rotation levers clockwise.
Reverse the above procedure when removing the 16047E Test Fixture.
Press the power switch to turn ON the power to the E4990A. The E4990A performs a power-on self-test. During the self-test, the model name, firmware revision number/date, options, copyright notice, and other information appear on the LCD. When the self-test is completed, the measurement screen appears on the LCD.