AM Noise Measurement for 1GHz signal
Measurement Setup
-
Press Meas/View > AM Noise to select the AM noise measurement window. Press Window Max to maximize the window.
-
Press Trigger > Trigger to AM Noise > Continuous to start measurements.
Press Trigger > Source > Internal.
-
Press Setup > Auto Setting.
-
Press Start/Center (Stop/Span), set Start > 1Hz and Stop > 40MHz.
-
Press Avg/BW > Avg factor 5 > Averaging > ON to reduce fluctuation, then press Averaging Restart.
-
Press Scale > Auto Scale.
-
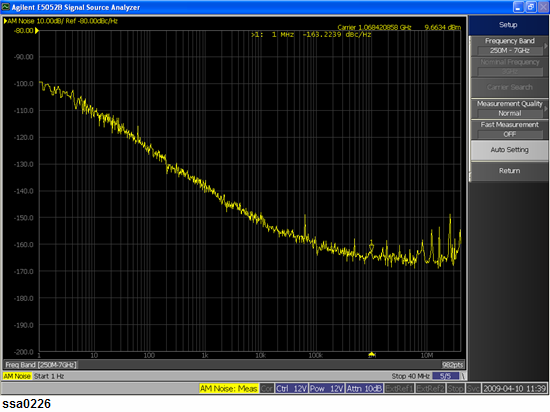
Press Marker > Marker1 > 1 > M/u to check phase noise at 1MHz offset.
The marker value is displayed in the upper part of the trace screen.
Analysis
Correlation
If the 1GHz signal is a clean signal, the correlation function can be used for noise floor reduction.
-
Press Avg/BW > Correlation > 1, then set Avg factor > 5 and turn Averaging > ON, then press Averaging Restart.
-
In the bottom right part of screen, Averaging Status n/m is displayed. When the average status becomes “5/5”, press Trigger > Hold.
-
Press Setup > Auto Setting.
-
Press Trace/View > Data -> Mem, then press Display Trace > Data & Mem
-
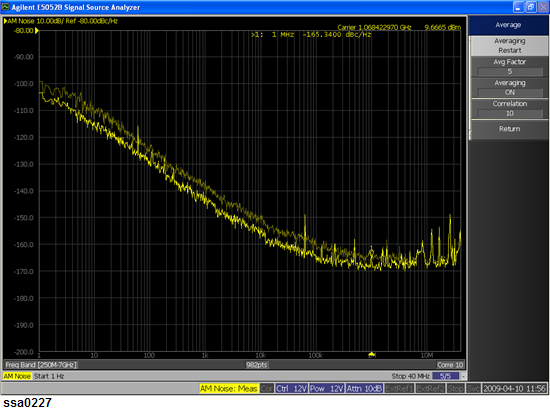
Press Avg/BW > Correlation > 10, then Averaging Restart.
The measurement result (Data trace) is improved about 5dB.
Spurious
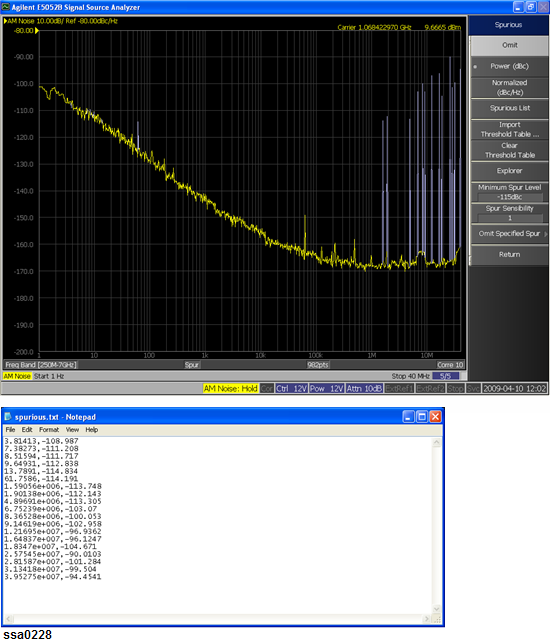
1. Press Trace/View > Spurious > Power (dBc). Then set Spur Sensibility > 1 and Minimum Spur Level > -115 dBc.
2. Press Scale > Auto Scale.
3. Spurious are displayed by high light. Then press Spurious List, you can view response values for the spurious in a text file.
More Information
For more information about AM Noise Measurement, see AM Noise Measurement.