
For M9484C with Option SNC
Prerequisites for Multi-Instrument Setup
Steps to Configure Multi-Instrument Setup
Step 1 - Configure Follower(s)
Make Cable Connections Between the Leader and Follower(s)
GUI Settings and SCPI Commands for Multi-Instrument
You can use the multi-instrument feature to set up a system of multiple signal generator instruments that are cabled together enabling all channels of the system to be coherent in phase and trigger synchronously.
You need to configure one of the participating instruments in a multi-instrument setup as the leader and all other participating instruments as followers. Also, the multi-instrument setup requires cabling between the leader and follower(s).
The following two configuration options are supported for a multi-instrument setup. You can select the required configuration option while configuring the Leader in the Control Followers screen.
|
Multi-instrument synchronization |
Multi-instrument user interface |
|---|---|
| In this configuration, all participating instruments have phase coherent repeatability and can be synchronously triggered. | In this configuration, all participating instruments have phase coherent repeatability and can be synchronously triggered. |
| The user interface, GUI, and SCPI control of Leader and Follower(s) is independent for all operations except Synchronization Alignment and Global Trigger; these operations are performed on the leader. |
The user interface, GUI, and SCPI control of follower(s) is managed through the leader.
SCPI commands that directly control physical hardware characteristics raise an error if sent directly to the followers.
|
| All channel configurations are allowed. | The channel configurations available are: 2, 4, and 8 channels. Channel configurations of 3, 5, 6, 7, and greater than 8 channels are not allowed. |
|
Option AN1 is only allowed to be used for the instrument designated as leader. If Option AN1 is installed on a follower, it will not be able to make use of AN1 capabilities. |
License Option SNC to be installed on all instruments to enable the multi-instrument feature.
License Option PCH to be installed on all instruments to enable synchronization.
Leader and Follower(s) must have the same firmware version installed.
If any of the Followers in the setup has 2.4 GHz In port, the Leader must be an instrument with 2.4 GHz Out port.
Step 1 - Configure Follower(s)
Make Cable Connections Between the Leader and Follower(s)
Always begin with setting up follower(s) in your multi-instrument setup.
On each follower instrument:
Access the Configure Launch screen.
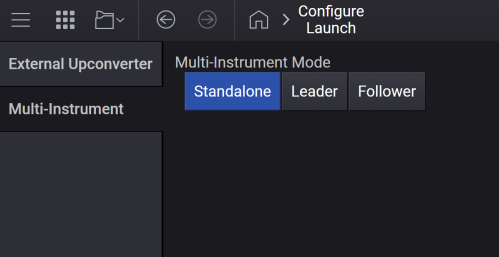
Select the Multi-Instrument tab.
Notice that by default, the Multi-Instrument Mode of an instrument is set to Standalone.
Make cable connections as described below.
Basic Sync Cabling - In this cabling method, the rear-panel SClock and Strig connectors of the instrument are used. See Basic Sync Cabling to know more.
With Basic Sync, the maximum number of end points is eight. End points are counted as follows:
One channel instrument is one end point.
Two channel instruments with Option 503, 506, 508, 514 or 520 are two end points.
Two channel instruments with Option 532, 544, or 554 are one end point.
Four channel instruments are one end point.
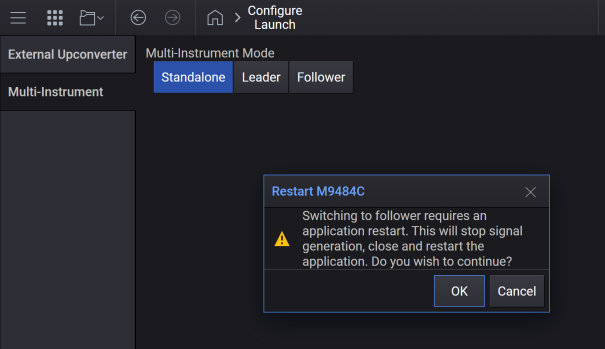
After the cabling is complete, select the Multi-Instrument Mode as Follower and then click OK on the message box to restart the signal generator application in the Follower mode.
Complete this step for all followers in your setup.
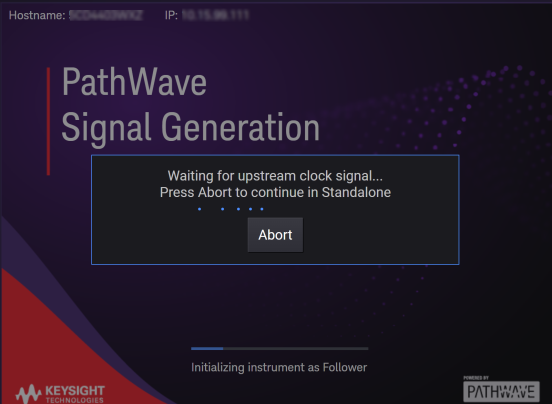
On clicking OK, the application begins the reboot process and then waits for the leader to be configured. The reboot screen displays the follower’s hostname and IP address and an indicator showing the follower is waiting. The follower instrument will wait as long as it takes for the leader to be configured. At any time, you can press Abort which will return the follower instrument to the Standalone mode.
When the cabling is in place and all followers have been launched in the Follower mode and are waiting for the leader, configure the following settings on the leader instrument.
Access the Configure Launch screen.
Select the Multi-Instrument tab.
Click the Leader option to configure the instrument as the leader.
On clicking the Leader option, the following screen is displayed. Use this screen to add followers.
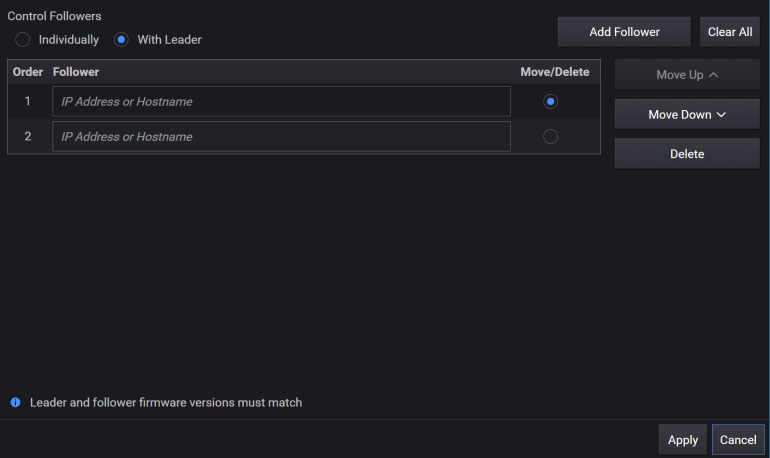
In the Follower table, specify the IP Address of the first Follower in your multi-instrument system.
If there are more than one Follower, press the Add Follower button and repeat steps 1 and 2 until all Followers have been added.
The order in which you add Followers to this table must match the cabling order used for Followers.
If needed, use the Move Up and Move Down buttons to change the ordering of the entries in the table.
As described in the beginning of this topic, there are two configuration options available for the multi-instrument feature.
Multi-instrument user interface
Multi-instrument synchronization
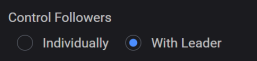
To set the required configuration option, configure the following setting on the Leader instrument.
For Multi-instrument synchronization, select the Control Follower > Individually option.
For Multi-instrument user interface, select the Control Follower > With Leader option.
After completing the required configuration settings on leader, press Apply to apply the leader settings in your multi-instrument setup.
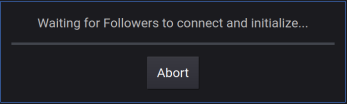
On pressing Apply:
A message is displayed on leader that it is waiting for the follower(s) to connect and initialize.
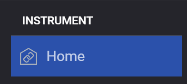
When the connection between the leader and follower(s) is established, a link indicator is displayed in the follower’s Home button.
If you have selected the Control Followers > With Leader option on leader, each follower’s home screen will display the following information along with the leader and connection status.

After the instruments have been successfully launched and configured as leader and follower(s), perform the alignment.
On the leader:
Access the Sync menu using the Status icon in the top bar.
In the Status Viewer, navigate to the Synchronization page using the SYNC indicator.
Press the Clear Alignment button and then the Perform Alignment button.
This operation will take several minutes depending on the number of instruments in the multi-instrument system.
Once the alignment is performed, you need to redo the Clear Alignment and Perform Alignment only when:
you reconfigure the instruments back to their individual instrument configuration. For instance, Follower to Standalone.
make changes to the Multi-Instrument mode of a participating instrument.
make cabling changes.
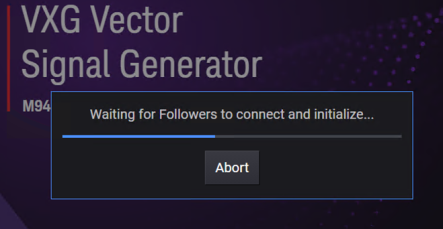
Once the initial configuration of leader and follower(s) has been established, if the instruments are rebooted, the follower(s) will begin to boot and wait for the leader. The leader will begin to boot and then wait for the follower(s) to connect. While waiting, the leader will display a progress indicator, with the opportunity to Abort. On pressing Abort, the leader instrument starts in the Standalone mode.
In a system of multiple signal generator instruments, each instrument must be configured for the role it plays in the physical connections of the system. You can set an instrument in one of the following three modes.
Standalone - When an instrument is not configured for multi-instrument, its role must be set to Standalone.
Leader - The instrument that you want to consider as the Leader in the multi-instrument arrangement.
Follower - All instruments other than the one designated as the Leader in the multi-instrument setup, should be configured as Followers.
|
SCPI Command |
SYSTem:SYNChronize:ROLE STANdalone|LEADer|FOLLower SYSTem:SYNChronize:ROLE? |
|
SCPI Example |
SYST:SYNC:ROLE LEAD SYST:SYNC:ROLE? |
|
Notes |
Attempting to change the value of this setting on instruments without Option SNC raises the error 703,"Feature not supported; Multi-Instrument requires Option SNC" |
| Preset |
Not reset by Preset Set to STANDalone with Restore System Settings to Defaults |
|
State Saved |
Persistent, survives preset and power cycle but not saved in the instrument state. |
|
Initial S/W Revision |
A.14.00 |
Configures the networking address and order of the Follower(s) on the Leader instrument. The order of the addresses for the followers much coincide with the physical cabling of the multiple instrument arrangement.
|
SCPI Command |
SYSTem:SYNChronize:FOLLowers <string>,… SYSTem:SYNChronize:FOLLowers? |
|
SCPI Example |
SYST:SYNC:FOLL "instrument2","192.168.0.100","instrument4" SYST:SYNC:FOLL? |
|
Notes |
The supplied <string>,… is a string list. Each string is separated with a comma. The strings in the list is the IP Address or hostname of the instruments configured in a multi-instrument system. The order of the entries in the list of followers must match the physical connections of the instruments in the system. Attempting to change the value of this setting on instruments without Option SNC raises the error 703,"Feature not supported; Multi-Instrument requires Option SNC" |
| Preset | Not reset by Preset |
|
State Saved |
Persistent, survives preset and power cycle but not saved in the instrument state. |
|
Initial S/W Revision |
A.14.00 |
Remote Command only.
Query only command. Returns the total number of followers configured for multi-instrument setup.
|
SCPI Command |
SYSTem:SYNChronize:FOLLowers:COUNt? |
|
SCPI Example |
SYST:SYNC:FOLL:COUN? |
|
State Saved |
No |
|
Initial S/W Revision |
A.17.02 |
Establishes the personality of multi-instrument user interface. The user interface is supplied on the Leader to present a multi-channel representation of all instruments in the configuration; the GUI on the Leader shows Configure Channel choices covering all of the channels. SCPI commands are sent to the Leader for all channels in the configuration.
In the personality of multi-instrument user interface, the channel configurations available are: 2, 4, and 8 channels. Channel configurations of 3, 5, 6, 7, and greater than 8 channels are not allowed.
|
SCPI Command |
SYSTem:SYNChronize:UINTerface ON|OFF|1|0 SYSTem:SYNChronize:UINTerface? |
|
SCPI Example |
SYST:SYNC:UINT ON SYST:SYNC:UINT? |
|
Notes |
Attempting to change the value of this setting on instruments without Option SNC raises the error 703,"Feature not supported; Multi-Instrument requires Option SNC" |
| Preset |
Not reset by Preset Set to OFF with Restore System Settings to Defaults |
|
State Saved |
Persistent, survives preset and power cycle but not saved in the instrument state. |
|
Initial S/W Revision |
A.14.00 |
Only supported on the instrument designated as Leader in the multi-instrument setup
At times, changes to Configure Launch require rebooting all instruments participating in the multi-instrument setup. In such situations, this command is recommended to initiate the reboot for all participating instruments.
|
SCPI Command |
:SYSTem:SYNChronize:REBoot |
|
SCPI Example |
:SYST:SYNC:REB Executes a shutdown and reboot of all instruments in the multi-instrument arrangement. |
|
Notes |
You cannot use *WAI or *OPC? to synchronize operation after a restart. This command stops and restarts the instrument application, thus the SCPI operation is terminated and restarted. A remote program must wait until instrument shutdown completes before sending any connection request to avoid connecting to the shutting down instrument. It should then attempt a connection. Some connection methods such as GPIB might require repeated attempts until successful. |
|
Initial S/W Revision |
A.15.00 |