Using Signal Studio .NET APIs in LabVIEW
This topic provides instructions (outlined below) for using Signal Studio .Net APIs in LabVIEW.
Load .NET Mixed-Mode Assemblies
The .NET Framework 4.0 allows you to load pure managed assemblies built in any version of the .NET Framework and LabVIEW loads the .NET Common Language Runtime (CLR) 4.0 by default. However, for some Signal Studio applications, API usage involves assemblies that are not pure .NET CLR. In these cases, you must configure LabVIEW to load .NET mixed-mode assemblies using the following steps:
-
Open a text editor.
-
Copy the following text into the text editor:
<?xml version ="1.0" encoding="utf-8" ?>
<configuration>
<startup useLegacyV2RuntimeActivationPolicy="true">
<supportedRuntime version="v4.0.30319"/>
</startup>
</configuration>
-
Save this new configuration file in the same directory as LabVIEW.exe. Typically the directory is C:\Program Files (x86)\National Instruments\LabVIEW 2014. Name the file LabVIEW.exe.config.
-
Re-launch LabVIEW.
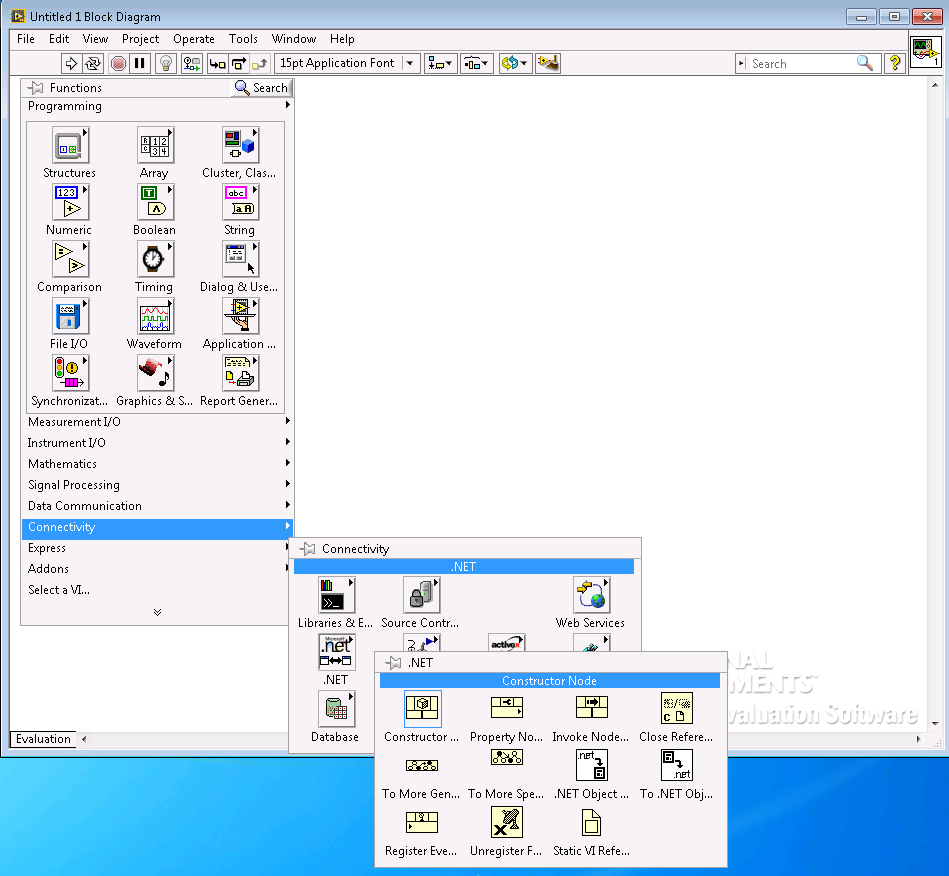
Creating .NET Objects in the Block Diagram
Signal Studio APIs do not provide graphical controls, so most of the usages of APIs should be done in the Block Diagram view of LabVIEW (Window > Show Block Diagram).
Step 1: Configure the Constructor Node
-
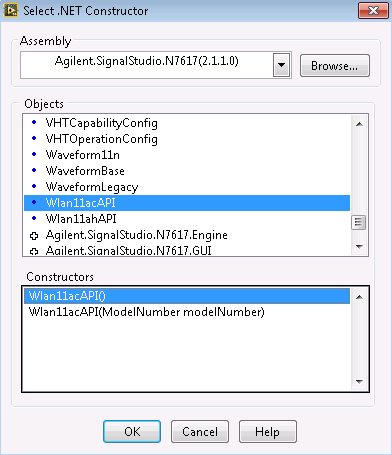
Add the Constructor Node to the block diagram to launch the Select .NET Constructor dialog box.
-
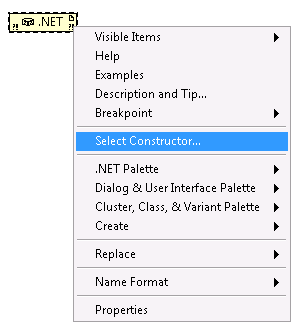
Select an assembly, objects, and constructors for a .NET object.
First, right click to “Select Constructor” and in the pop-up window “Browse” to the Signal Studio software installation directory to select the assembly (.dll or .exe) that provides the API interfaces. Then, select the appropriate Object and Constructor.
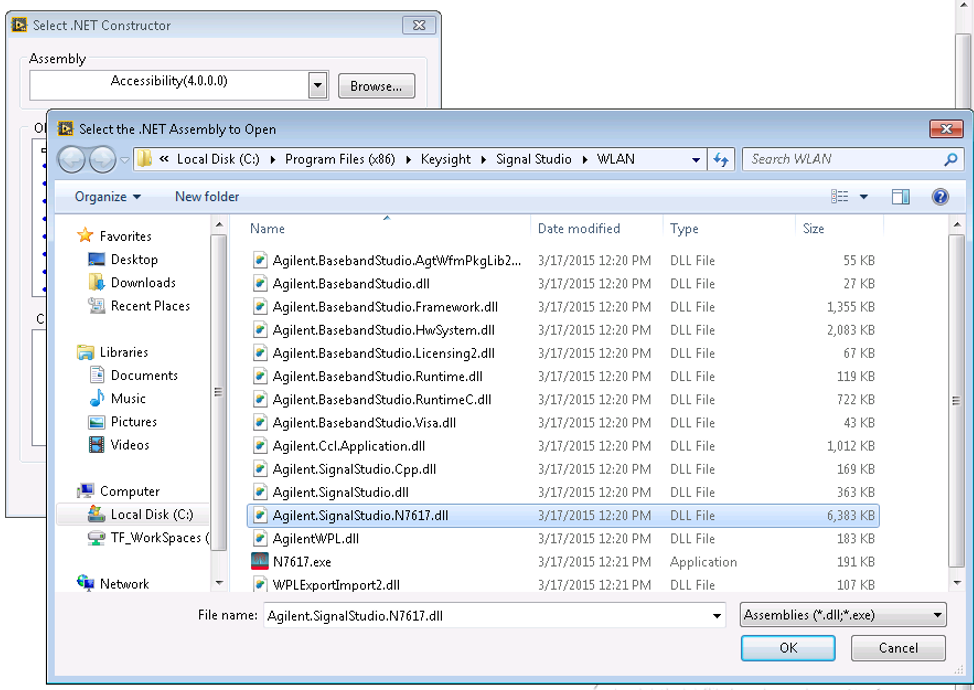
Choose which assembly, object, or constructor according to your testing needs and also by looking at the related API help contents shipped with the Signal Studio software.
-
API related topics in the main help file (Help > Contents)
-
API referenc help file (Help > API Reference)
-
Step 2: Configure Properties for Methods for the .NET Object
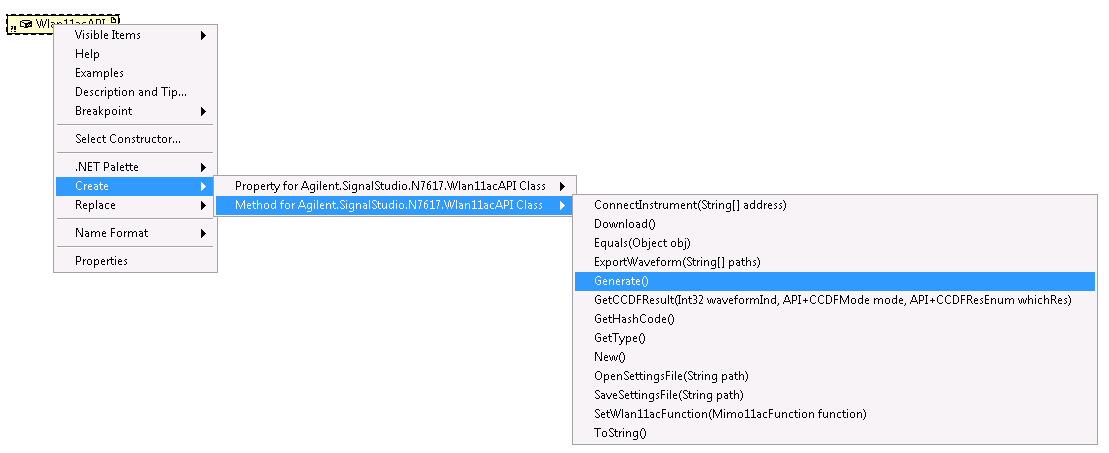
Right click the Constructor node to create Property or Method node.
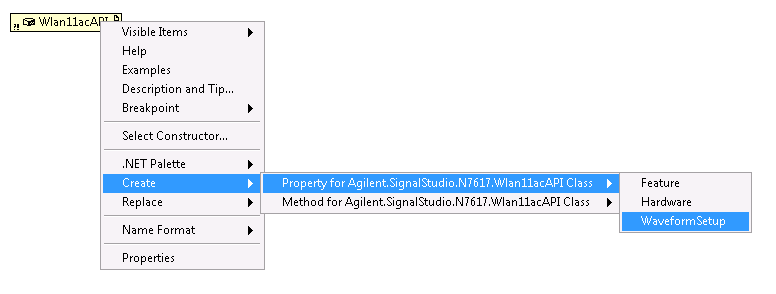
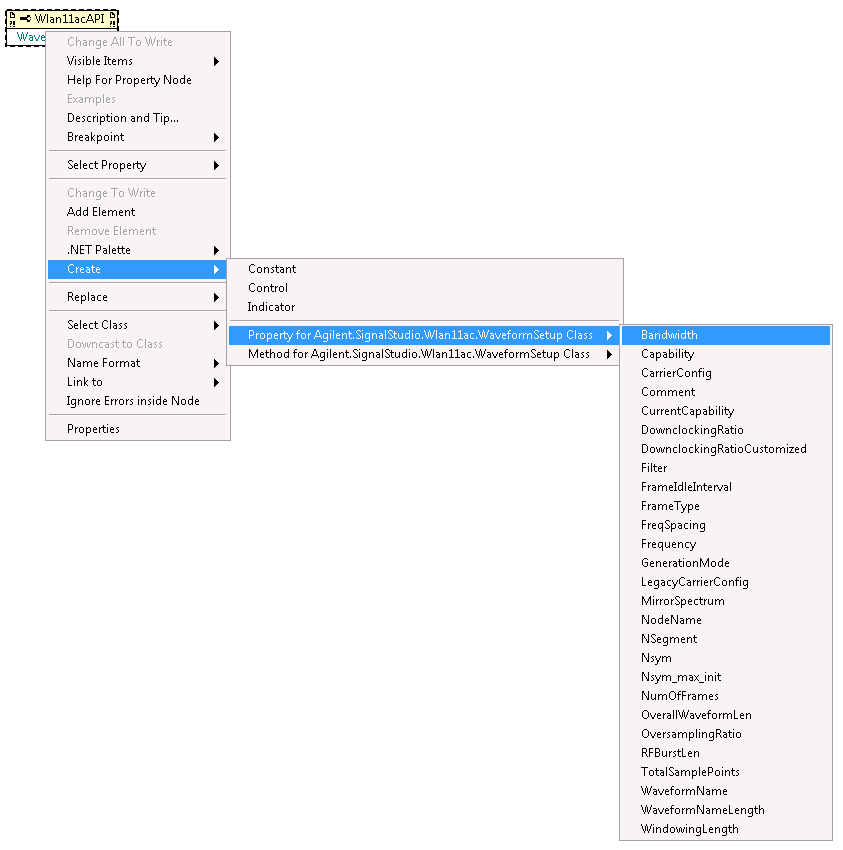
You can also right click the name of the Property to create sub Property or sub Method nodes.
Step 3: Wire the Added .NET Nodes
After all the needed nodes are created, wire them up (using the reference and error input/output connectors of the nodes) to execute the API test flow/procedure.
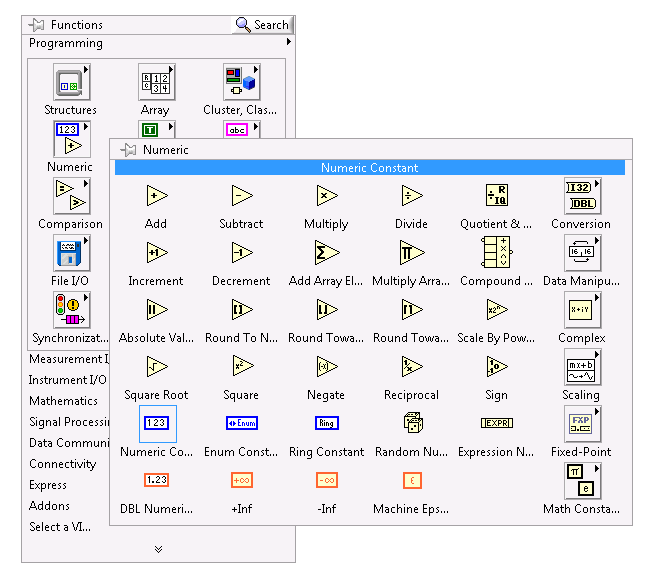
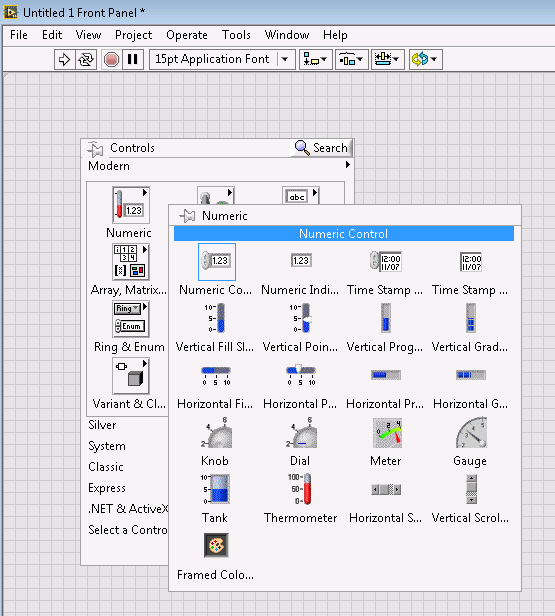
When wiring the whole test procedure up, you may need to add other nodes (e.g. a numeric constant), or a front panel control (in the Window > Show Front Panel view, to do runtime control) to the block diagram as appropriate.
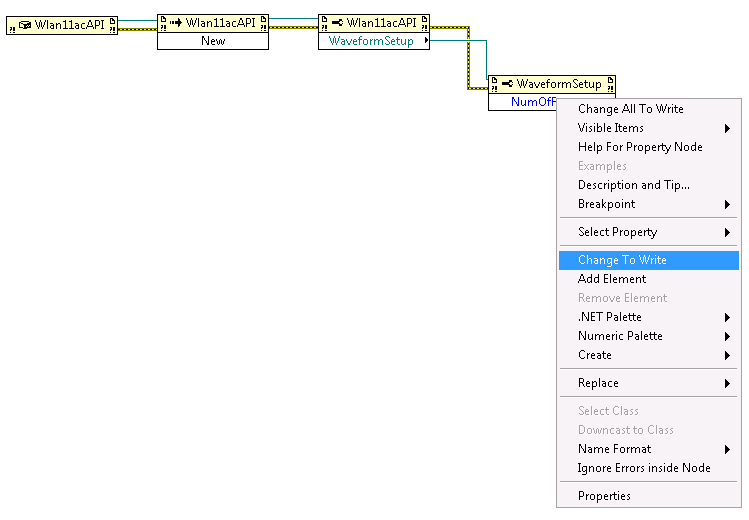
Some properties may be “Read,” so you may need to “Change To Write” to assign value to the property.
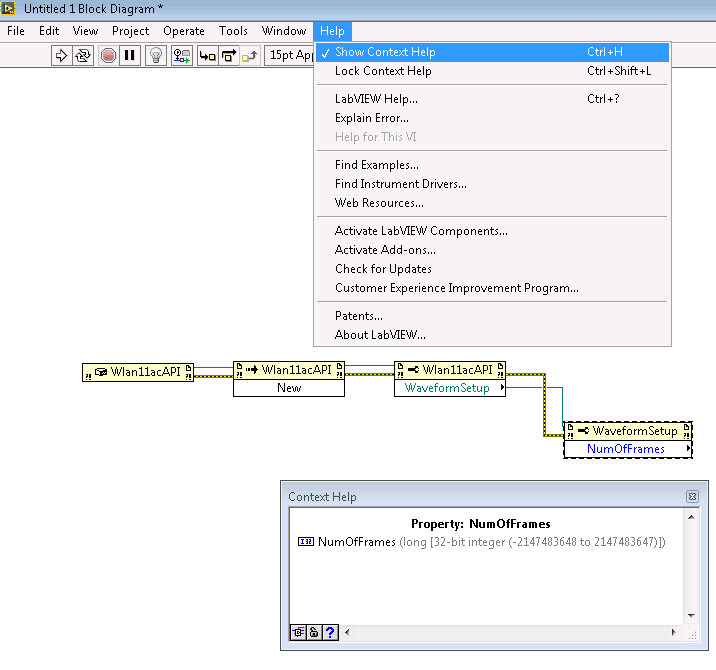
From the context help in LabVIEW, you can know the type of a certain property node, which is helpful to wire the correct type of node/control to the property node.
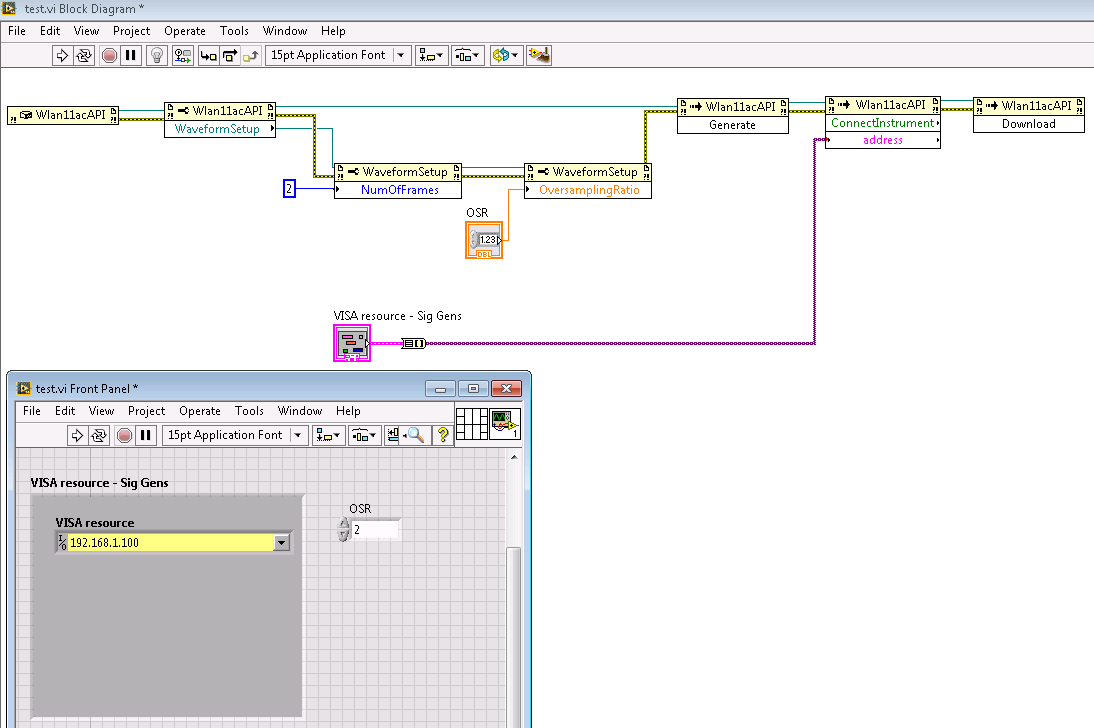
Step 4: Run the VI
After all the nodes/controls are wired up correctly, you can try to run (click the toolbar button) the VI. Below is a completed small VI whose function is to set some basic configurations of 802.11ac waveform then generate 802.11ac waveforms and download it to a Signal Generator.
Some Signal Studio apps provide Close() and/or Dispose() methods in the constructor class. It is important to add a method node to call Close() or Dispose() as the last step in the block diagram to release/clean up some resources associated with the API usage.
Example LabVIEW VIs using Signal Studio APIs
Attached are two example VIs for a coupleSignal Studio applications:
-
N7614B.vi performs a simple waveform downloading procedure for the Power Amplifier Test application
-
N7617B.vi is a relatively complex example that uses different WLAN 802.11ac waveform configurations, including MIMO
To run the VIs, LabVIEW and the Signal Studio software need to be installed on your PC.
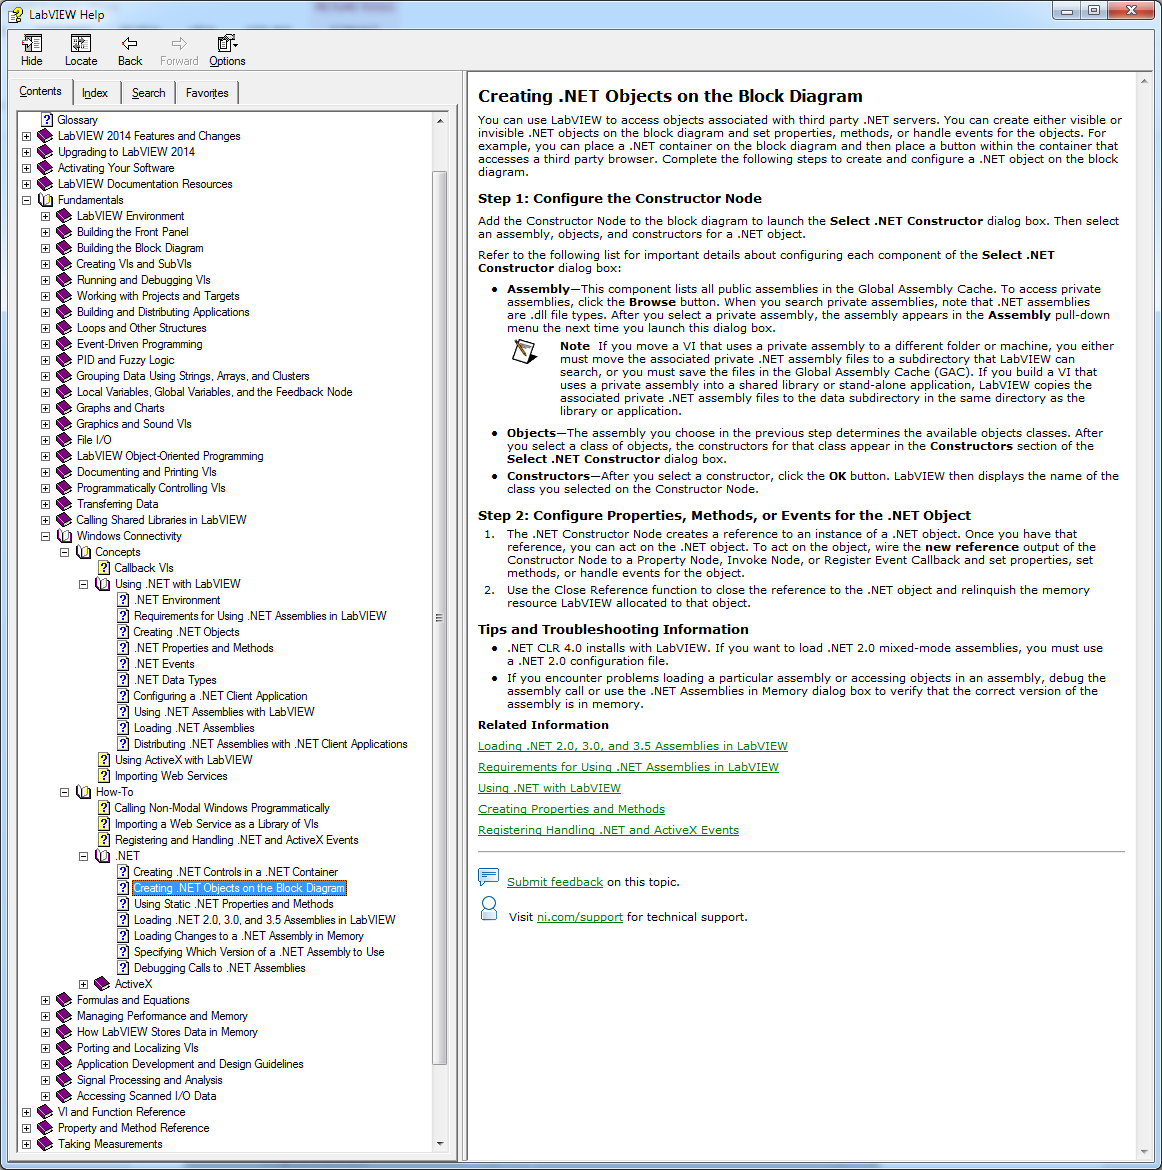
.NET Topics in LabVIEW Help
Refer to the LabVIEW help for more detailed information about using .NET objects. The image below shows where to find this information or you search on "Creating .NET Objects on the Block Diagram."