CELL_FACH Pattern Editor
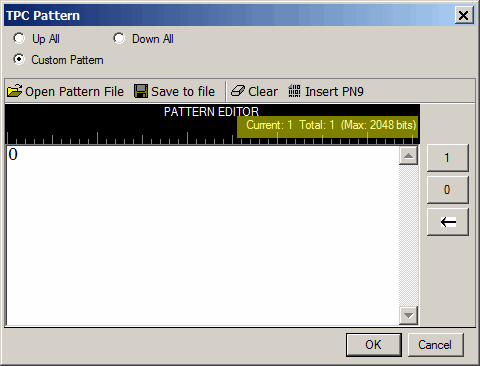
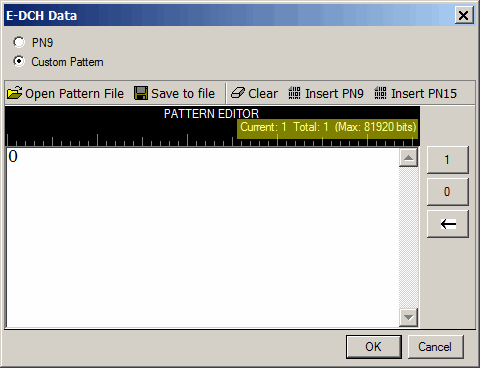
This topic, while it shows the different selections, concentrates on the PATTERN EDITOR that appears with the Custom Pattern selection.
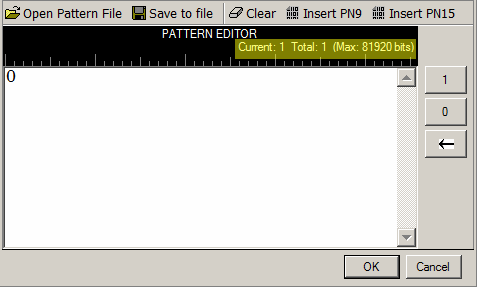
In the following figures, notice that each pattern editor displays the current, total, and the maximum number of bit.


Pattern Editor
Use the PATTERN EDITOR to create custom bit patterns.The  PATTERN EDITOR area contains buttons to open, save, or clear user data along with the ability to insert PN9 or PN 15 data.
There are multiple ways to insert data:
-
using the 1 and 0 keys on the keyboard
-
using the Insert PN9 or Insert PN15 buttons
-
load a pattern file
-
use the 1 and 0 buttons on the PATTERN EDITOR
-
pasting data from a file or from within the current view
(The keyboard shortcuts Cntl+C and Cntl+V work for user data entry.)
To use the keyboard to insert data, simply place the cursor within the data entry area or highlight existing bits, and insert data.
To delete data, simply place the cursor at the desired location within the data or highlight bits, and delete the data using the backspace button, keyboard Delete key, keyboard Backspace key, or the keyboard shortcut Ctrl+x.
The maximum number of bits for the PATTERN EDITOR entry area is dependent upon the parameter.
Pattern Editor Buttons
Open Pattern File
This button loads a user-defined pattern from a selected location. When you select this button, the dialog box appears for navigating to and selecting the desired file. An imported file automatically updates the user data entry area.
If the imported file is larger than maximum number of bits, the software truncates the bits to conform to the maximum file size.
Save to file
This button saves the current data pattern shown in the PATTERN EDITOR entry area, to a file. When you select this button, a dialog box appears for navigating to the location where you can save the file.
Clear
Use this button to clear all data from the PATTERN EDITOR.
Insert PN9 | Insert PN15
These buttons insert a fixed pattern pseudo-random bit sequence into the user data entry area. The software generates this fixed pattern in accordance with the CCITT recommendation O.153 and ITU standard for the selected PN sequence. Repeated clicking of this button adds additional PN9/PN15 sequences until another insertion of the PN sequence would exceed the maximum number of bits. When this happens, the software displays a warning that it cannot insert another PN sequence.
If more bits are required after this warning and the there are less than the maximum number of bits showing, insert a smaller PN sequence (if using PN15, use PN9), highlight a section of the data and paste it, or use the 1 and 0 buttons.
To edit the data pattern, insert the cursor at the desired point in the file and click Insert PN9, or enter the information manually using the keyboard keys 1 and 0, or the PATTERN EDITOR 1 and 0 buttons. The software inserts the data at the cursor position and does not allow data in excess of the maximum number of bits.
Use this button to enter ones into the PATTERN EDITOR. The ones start at the current cursor location. To change the entry location in the data, simply reposition the cursor, and then click the button.
Use this button to enter zeros into the PATTERN EDITOR. The zeros start at the current cursor location. To change the entry location in the data, simply reposition the cursor, and then click the button.
Coupling: This button becomes visible with the Custom Pattern selection.
Click this button to backspace/delete data.


