Two sample API programs are provided to illustrate the basic program flow for automating signal configuration and playback in a .NET programming environment. They are installed in the directories (default) shown below when you install the software:
C:\ProgramData\Keysight\Signal Studio\cdma\Samples\SimpleControl
C:\ProgramData\Keysight\Signal Studio\cdma\Samples\ControlByGUI
Create API object.
Configure the instrument connection.
Clear the waveform
Clear all carriers
Add carrier
Generate and download the waveform to the signal generator.
Turn on RF output.
End program and turn RF output off.
Before editing the sample programs, make backup copies of all files. You will need to right click each file, select , and de-select the Read-only attribute.
The Simple Control project (...\Samples\SimpleControl\SimpleControl.sln), provides a simple basic program to generate and download waveforms using API commands.
To view the code, open the SimpleControl.sln file using the Microsoft Visual C# .NET application, or open the Main.cs file using another text editor, such as Notepad. Since the SimpleControl.sln program flow does not use a GUI, you will see only the source file code contained in the Main.cs file in the code editor, as shown below.
Figure 1: Source code of main.cs displayed in Microsoft Visual Studio C# .NET
In the Microsoft Visual C# .NET, open the API_TEST.sln application (...\Samples\ControlByGUI\API_TEST.sln). This displays a .NET graphical user interface (see Figure 2) with two application modes.
Make
sure that Keysight.SignalStudio.N7601
appears as a reference to your API Project in the  Solution Explorer.
Using Microsoft Visual Studio .NET 2003 IDE, follow the steps below to
add this reference, if needed. The steps may vary depending on your development
environment.
Solution Explorer.
Using Microsoft Visual Studio .NET 2003 IDE, follow the steps below to
add this reference, if needed. The steps may vary depending on your development
environment.
In the Project window, select > from the menu.
In the popup window that appears, browse to the directory: C:\Program Files (x86)\Keysight\Signal Studio\cdma (default installation directory) and select the files to be add.
Click > to add them in the project as references.
Select the API mode in the .NET graphical user interface to use when you configure the settings.
— settings that you configure using the .NET API are displayed in the Signal Studio software interface and are sent to the signal generator through the Signal Studio software. The software graphical user interface is automatically displayed when you select Debug mode. Using this mode allows you to see how changes in your program modify the parameters at the Signal Studio software interface.
— settings that you configure using the .NET API are not displayed in the Signal Studio software interface, but are sent directly to the API instance of the Signal Studio application and subsequently to the signal generator.
To view the C# code in the API_TEST project, select the TestApiForm.cs tab in the code editor window (see Figure 3).
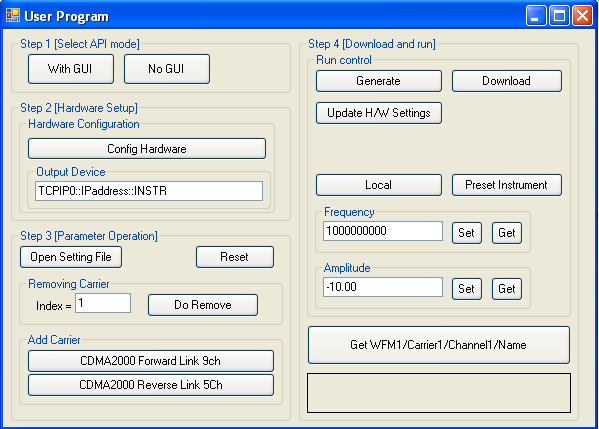
Figure 2: API Graphical User Interface displayed in Microsoft Visual Studio C# .NET
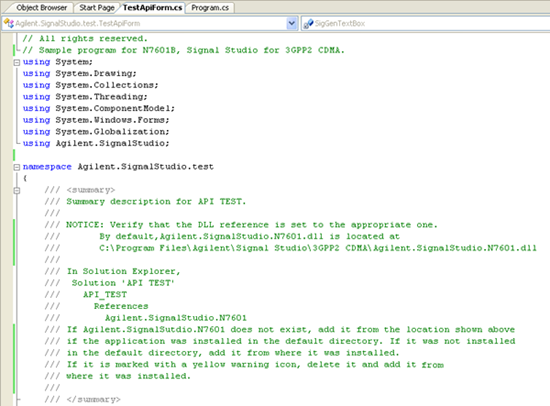
Figure 3: Source code of TestApiForm.cs displayed in Microsoft Visual Studio C# .NET