The following example procedure shows you how to configure the equipment and N7605B Signal Studio software to set up real-time fading on a signal.
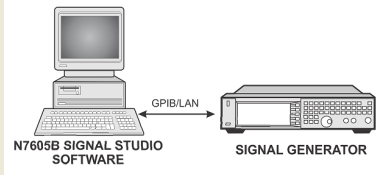
Step 1: Set up the equipment as shown below and connect the N7605B with the signal generator
Step 2: Configure the Basic Settings of the Fader
Step 3: Configure the Fader Path
Step 4: Set the Frequency and Amplitude for the Signal Generator
From the signal studio tool bar, click System > Run System Configuration Wizard.
In Step 1 of the System Configuration Wizard, select RF Signal Generator.
In Step 2 of the System Configuration Wizard, select <New>.
In Step 3 of the System Configuration Wizard, enter the hostname or IP address of the signal generator.
Wait for Step 4 of the System Configuration Wizard to test the connection.
In Step 5 of the System Configuration Wizard, enter a name for your system and click Finish.
Click the Fading node in the tree view, Set the Carrier Frequency and Random Seed to the values below. Note that if you change the Carrier Frequency value, the Doppler Frequency or Vehicle Speed under Fader Path node will be changed accordingly.
Carrier Frequency: 1 GHz
Random Seed: 0x12345678901234567890123
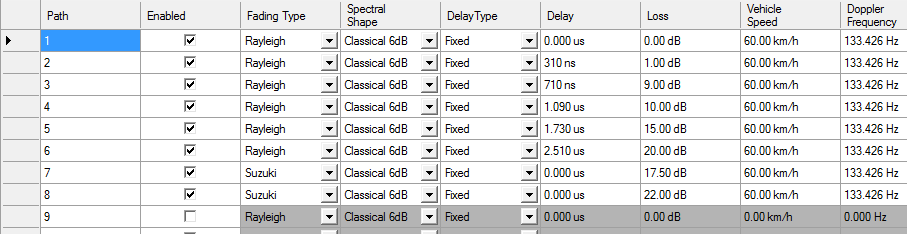
Click the Fader Path node in the tree view to enter the fader path setting window.
Click the Columns  button on the top of the window to select the parameters you want to configure and then set the fader paths as below.
Click the Instrument node in the tree view and set the amplitude as shown below.
Amplitude: -30 dBm
Click the Fader On  button on the top of the window.