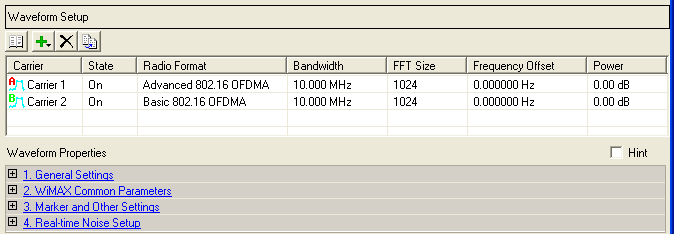
 tree view
displays the Carrier Configuration Summary table and the Waveform Properties
table in the Waveform Setup main page. Click
the plus
  box to
expand the waveform property tables and access those parameters.
box to
expand the waveform property tables and access those parameters.Clicking Waveform Setup in the  tree view
displays the Carrier Configuration Summary table and the Waveform Properties
table in the Waveform Setup main page. Click
the plus
  box to
expand the waveform property tables and access those parameters.

This table enables you to view the key parameters for each carrier in the waveform. You can also add or delete carriers using the buttons above the table (see descriptions below). Double-clicking a carrier row activates the setup tables for that carrier. You can use a maximum of 6 carriers.
 This button opens a window of
  pre-defined carrier configuration
selections. Double-clicking a configuration replaces the current configuration
in the setup table.
 This button opens a
  drop-down
menu
for selecting a carrier to add to the setup table. The carrier is inserted
below the currently highlighted carrier in the table.
 This button deletes the currently highlighted
carriers in the setup table. You can highlight multiple carriers by holding
down the CTRL key while selecting the carriers. You
can also use the SHIFT key to select a succession (group) of carriers.
 This button copies the currently selected
carrier and adds it to the bottom of the list in the summary table.
 An asterisk shown
with a carrier entry indicates that the parameters of a channel for that
carrier have changed. An 'A' next to the carrier number shows that the
advanced
carrier mode is used; a 'B' next to the carrier number shows that
the basic
carrier mode is used.
The buttons above the table do not appear in Mx2 or multiple antenna setups. Multi-carrier mode is not supported for these configurations.