Alias Manager
Aliases let you create an alternative, common-language name for a VISA address.
VISA alias names must be less than 256 characters in length, and can contain any characters except the double quote ("), vertical bar (|), space, and non-printing control characters (such as tab, return, newline, vertical tab, and form-feed).
These VISA aliases also work in the SICL (Windows and Linux) and Keysight 488 (Windows only) APIs.
The case of VISA aliases is preserved, however, case is ignored when an alias is used in place of the VISA address in a viOpen call. For example, UsbDevice1, usbdevice1, and USBDevice1 all refer to the same device.
If you create an alias for an instrument (auto-discovered or manually-added), that alias will be preserved even when the instrument connection is lost or removed. You can see aliases for disconnected or nonfunctioning instruments in the Aliases view. This allows you to use the same alias again when you reconnect the instrument; it also allows you to modify the same alias to use a different instrument in case the original instrument has been replaced.
Contents on this page:
Instrument Details Screen
The Connection Expert offers you two options to manage Aliases - Using Alias Manager and Instrument Details
Alias Manager
Aliases in Instrument Details
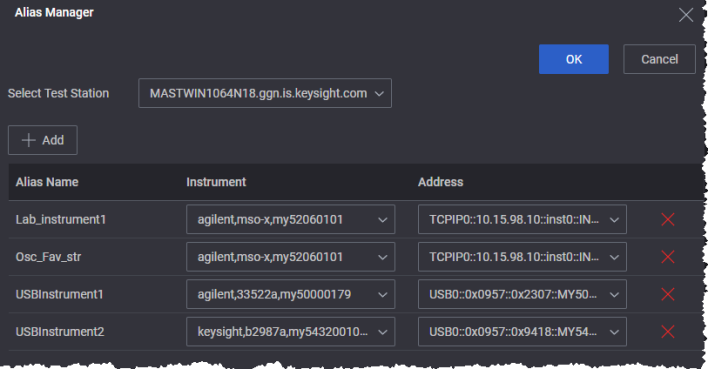
Alias Manager
Manage Aliases in a consolidated view for all the instruments connected to a test station
-
Navigate to the Instruments Group view and proceed to Tools> Alias Manager.
-
The Alias Manager slides open with the selected test station providing a consolidated view of all instruments along with their corresponding VISA Address and Alias name. The test station selection is determined by one of the following actions:
-
Choosing the test station directly from the interface list before opening Alias Manager.
-
Selecting an interface from the list, where the connected test station then becomes the selection for Alias Manager.
-
If no selection is made beforehand, the last chosen test station from the Select Test Station drop-down automatically becomes the selection.
-
-
Once in the Alias Manager, adding deleting and updating an alias is possible.
-
Add Alias
Click the Add button, a new row appears.
Enter Alias name and click OK. -
Update Alias
Click on the Alias name to update, the name box transforms to an editable field and row turns to a blue highlight.
Enter the new name and click OK.
-
Delete Alias
Click
 corresponding to Alias row.
Click Remove on the confirmation box.
-
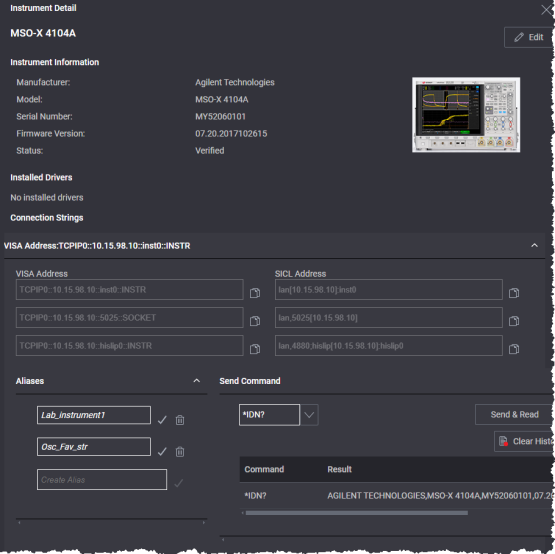
Aliases - Instrument Details
Manage Alias of an individual instrument at a time through Instrument Details.
-
Navigate to the Instruments Flat view (default instrument view) and select the instrument for which you want to create an alias.
-
Click the
 ellipses icon next to the instrument's name and select Edit Alias.
Alternatively, click Details button on the Instrument flat view action bar.
A side panel of Instrument Details slides open, providing instrument details in a read-only mode. -
Click Edit to switch to the edit mode.
-
Manage Aliases as follows:
 .
.