Firmware Update Tab
Select this tab to manage and update your instruments' firmware. The layouts that are created and configured in the Lab Configuration tab will be shown in this tab.

Firmware File Manager
To add new firmware files into the database, click on Open Firmware File Manager  on the top left corner of the application and the Firmware File Manager will appear.
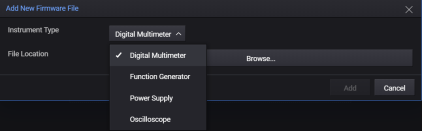
Add New Firmware File
Click Add New Firmware File to manually add a new firmware file.

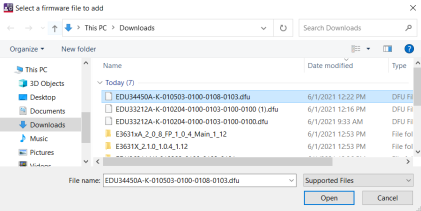
Select the Instrument Type of the firmware that you would like to add into the database, click Browse and navigate to the location of the firmware file. Click Open to confirm your selection.
When you have confirmed your selection, the Manager App will auto-populate the other required information (Model Series, Supported Models, and File Version) based on the information that it gathers from the firmware file.
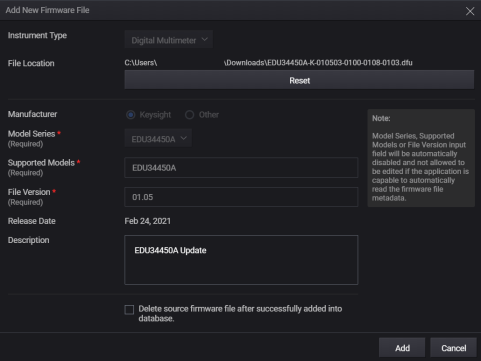
Check the Delete Source check box at the bottom of the dialog box if you would like the Manager App to delete the firmware file from your PC after adding it into the database.

Click Add to add the firmware file into the database.
Get The Latest Firmware Version
Click Get The Latest Firmware Version to download the firmware files from the Internet.

In the Get The Latest Firmware Version dialog box, select the available firmware files that you would like to download into the database and click Download.
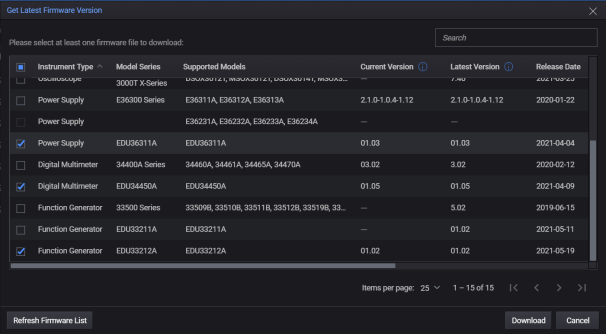
A notification message will appear below after the firmware files were downloaded into the database.

Delete Firmware File
To delete one or more firmware files, select the check boxes and click Delete.
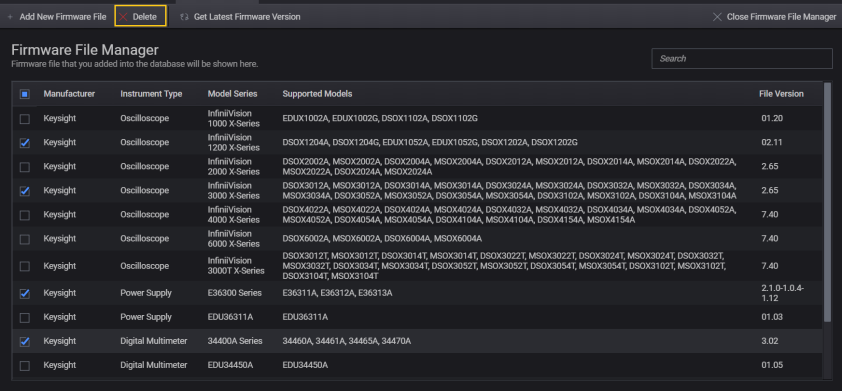
Click Close Firmware File Manager  on the top right corner of the application to exit the Firmware File Manager.
Update Instrument Firmware Version
To update the instruments firmware version, hover the mouse over the selected layout and click Open when it appeared.
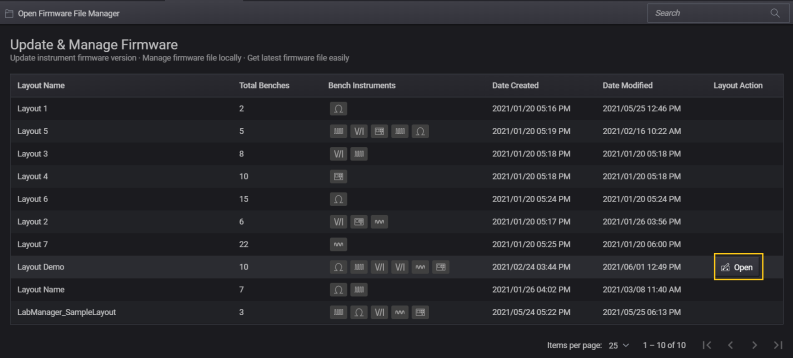
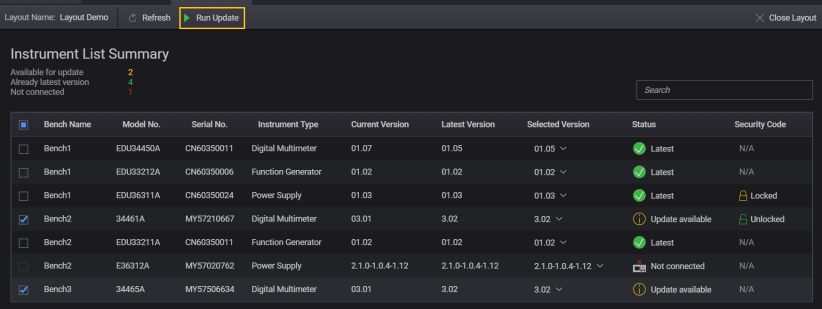
Manager App will scan the connection of the instruments in the selected layout and shows the connection status as well as the firmware version status of the instruments.

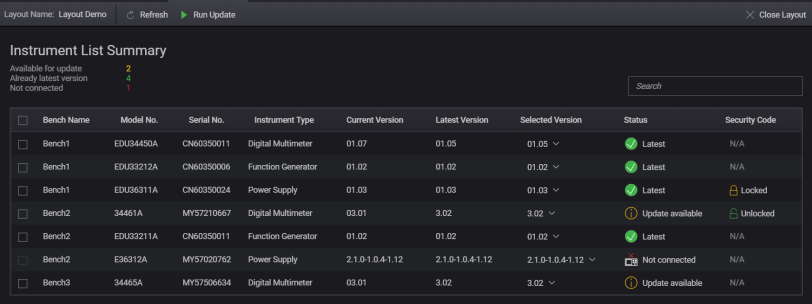
The status of the instruments shown in the list.
-
 indicates that the instrument is updated with the latest firmware version.
 -
 indicates that the instrument is not connected.
 -
 indicates that the instrument's latest firmware version is available for update.
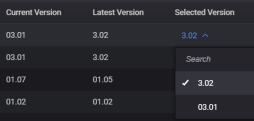
Click on the drop down menu to select the firmware version which you would like to update or rollback to. You can apply the selected firmware update version to all instruments with the same model number within the lab layout.
Click on the check boxes for instruments that you would like to update the firmware version. Unlock instrument with security lock enabled by clicking on the Locked icon to set the security code to unlock the instrument for firmware update. See Security Code for more information. Click Run Update to initiate the firmware update.
In the Run Update Confirmation dialog box, verify the number of instruments that are selected for the firmware update. Once verified, click Run Update and the firmware update process will begin.
![]()
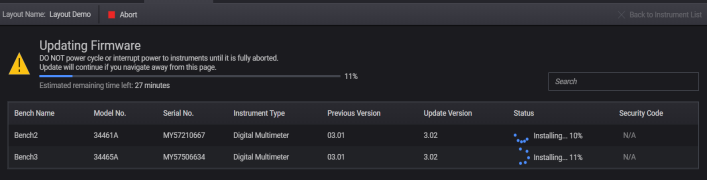
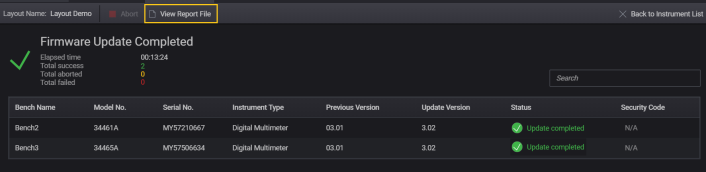
Once the firmware update is complete, you can click on View Report File to generate a CSV summary report file of the firmware update process.
Security Code
To unlock an instrument, click on the Locked icon  to set the security code to unlock an instrument.
In the Security Code Settings dialog box, enter the instrument's security code. Check the check box below to apply the same security code for all the same model number instruments within the lab layout.
to set the security code to unlock an instrument.
In the Security Code Settings dialog box, enter the instrument's security code. Check the check box below to apply the same security code for all the same model number instruments within the lab layout.
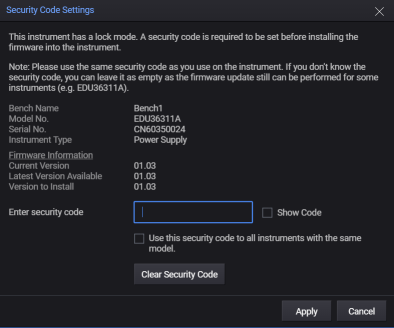
Click Apply to confirm your selection.
Once the security code is set, the Unlocked icon  will be displayed for the specified instrument.
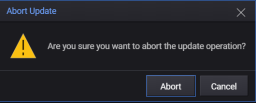
Abort Firmware Update
To abort a firmware update process, click the Abort icon  and click Abort to confirm.