34Working with the Lithium-Ion Battery
See Also:
Viewing the Battery Charge Status
You can view the battery charge status in the following ways:
—Icons in the upper right of the front panel screen.
—Battery screen - select System then Service Diagnostics then Battery.
—Built-in battery gauge. Learn more in the following section.
Icon | Status |
|---|---|
| Connected to external power through the AC/DC adapter. Battery installed and charging. The amount of charge is indicated by the number of bars shown. |
| Battery not charging with 84% battery life remaining. |
| Battery fully charged. A fully charged battery MAY NOT read 100%. |


Service Diagnostics—Battery Screen
The Battery screen displays the following information. To access the screen, select System then Service Diagnostics then Battery.
Additional battery information is available using SCPI commands.
1.Status – Fully charged, No battery, Charging, Empty, or Discharging.
2.External DC Supply – ON or OFF indicates if an external DC supply is connected.
3.Battery Present – ON or OFF indicates if a battery is installed.
| Items 4 through 8 are read directly from the battery. The information is based on the battery’s internal sensors and memory. |

1.Voltage – measured by the battery’s sensor.
2.Current – amount of current being consumed when operating from internal battery. If battery is charging, indicates amount of charging current.
3.Battery Temperature – internal temperature of the battery as measured by a sensor embedded in the battery.
4.Present Run Time to Empty – minutes of power remaining based on amount of current being used now.
5.Charge Cycles – number of charge cycles the battery has experienced. Charge cycle defined as ≥80% change in relative state of charge.
Each lithium ion battery has an LED gauge that displays its charge status. The gauge is active unless the battery is in shut down mode.
To view the LED gauge, open the FieldFox battery compartment door, remove the battery, then press the button on the battery.
The battery in your FieldFox will have either 4 or 5 LED segments.
5-segment Gauge | Charge Remaining | 4-segment Gauge | Charge Remaining | |
|---|---|---|---|---|
5 segments | ≥80% | 4 segments | ≥75% | |
4 segments | 60% to 79% | 3 segments | 50%,to 74% | |
3 segments | 40% to 59% | 2 segments | 25% to 49% | |
2 segments | 20% to 39% | 1 segment | < 25% | |
1 segment | < 20% |
When you receive your FieldFox, the lithium-ion battery is partially charged to approximately 30% to 40% to preserve battery life. Allow four hours to fully charge the battery internally, or three and a half hours by using the external battery charger (N9910X–872). A fully charged battery will power your FieldFox for about four hours. Upon receiving your FieldFox, it is NOT necessary to charge your FieldFox's battery before using your instrument.
The FieldFox circuitry ALWAYS prevents the battery from discharging to a level that is damaging. However, if the battery is completely discharged, the FieldFox may not turn ON. If this occurs, the battery can still be charged either internally or externally.
Because a lithium-ion battery has no memory effect, you can charge a battery at any time regardless of the current charge status.
Internal Charging with the AC/DC Adapter
| Read the safety information in “For the AC/DC Adapter” on page 956. |
Internal charging time for a fully depleted battery is approximately 4 hours with the FieldFox either ON or OFF.
Figure 34-1 AC/DC Adapter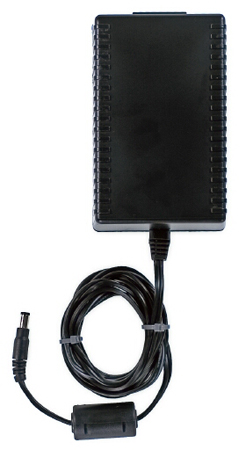
To charge a battery inside the FieldFox, insert the AC/DC adapter plug into the Power connector on the FieldFox side panel, then plug the adapter into an AC outlet.
—FieldFox ON: Charging is indicated by a battery icon in the upper right of the front panel screen.
—FieldFox OFF: Charging is indicated by the FieldFox power LED glowing amber, with its intensity increasing from dim to bright every few seconds. This pattern repeats until the LED turns off when charging is done. Learn more on “Front Panel” on page 44.
Using the External Battery Charger (N9910X–872)
| Read the safety information in “For the External Battery Charger (N9910X-872)” on page 957. |
Figure 34-2 External Battery Charger (N9910X-872)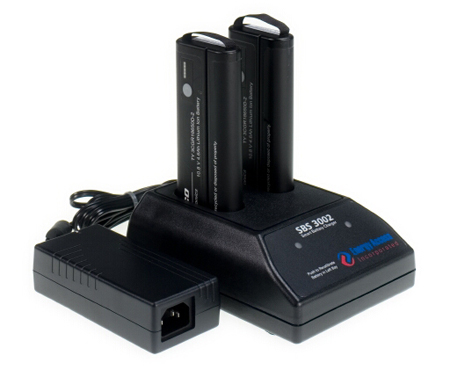
The external battery charger (N9910X–872), lets you charge a fully depleted battery in approximately three hours. It is a two bay, level–3 stand-alone battery charger that is compliant with the standard Smart Battery System. The two bays are charged sequentially on a first-come, first-served basis, though a discharge can be performed in the left bay while the right bay is charging.
External Battery Charger LED | Charging Status |
|---|---|
Green | Fully charged |
Green flashing | Fast charging |
Yellow flashing | Reconditioning – the accuracy of the battery’s internal LED charge gauge is being renewed. See “Reconditioning Battery” on page 950 |
Yellow/green | Battery is reconditioned |
Red flashing | Error |
Yellow | Standby |
For more information, refer to the Instruction Manual included with the external battery charger.
Reconditioning a battery can be performed ONLY with the External Battery Charger (N9910X–872).
1.Insert a battery into the left bay of the external charger.
2.Press the button labeled Push to Recalibrate Left Battery Bay
3.The charger will charge the battery fully, discharge it completely, then recharge it fully again. The entire process can take up to 12 hours.
4.Install the battery into the FieldFox.
5.On the System, Battery screen, verify that the battery is fully charged.
—If AC power is not continuously available (Ex: in a field environment), use the battery and recharge it when it holds a 20% to 50% charge, as shown on the screen’s battery charge icon. At this charge level, 2 or 3 segments show on the battery gauge.
—If the FieldFox is not going to be used for more than a week, remove the battery. Best practice is to store the battery with a charge of about 50%. At this charge level, 3 segments show on the battery gauge.
—Allow a battery to warm to room temperature before charging it. Temperature shock can damage the battery chemistry and in some cases cause a short circuit.
—Store batteries in a cool, dry location, away from metal objects and corrosive gases.
Storage temperature limits (20% to 50% relative charge is recommended):
Transportation: –20°C to 50°C
Within 1 month: –20°C to 45°C
Within 6 months: –20°C to 40°C
Within 1 year: –20°C to 35°C
—Battery charging limits:
Charge temperature: 0°C to 45°C (<10°C slows charge on some batteries)
Discharge temperature: –10°C to 60°C
—Operate the FieldFox on battery power between the ambient temperatures of –10 and +55°C (–14 to +131°F). Using the battery at lower or higher temperatures can damage it and reduce operating life. Cold temperatures affect battery chemistry, reducing charge capacity, especially below 0°C (32°F).
When you notice a large decrease in charge capacity after proper recharging, it’s probably time to replace the battery.
Lithium-Ion batteries need to be disposed of properly. Contact your local waste management facility for information regarding environmentally sound collection, recycling, and disposal of the batteries. Regulations vary for different countries. Dispose of the battery in accordance with local regulations.
Keysight Technologies, through Rechargeable Battery Recycling Corporation (RBRC), offers free and convenient battery recycling options in the U.S. and Canada. Contact RBRC at 877-2-RECYCLE (877.273.2925) or online at: http://www.call2recycle.org/ for the nearest recycling location.