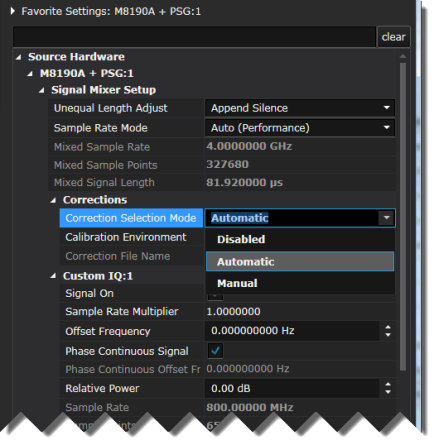
Now that the batch calibrations are completed for both the analyzer and source hardware, we'll apply the corrections to the custom IQ signal.
A batch calibration provides multiple points at which you'll see the benefit of pre-compensation. Our batch calibration consisted of 11 points with varying amplitudes covering -10 dB to 10dB. While any amplitude in that range will benefit from the pre-corrections, a measurement with an amplitude that matches that of a calibrated point will see the greatest benefit of calibration, resulting in an optimized signal. This step will demonstrate the benefit of batch calibration.
In the Source Hardware Favorite Settings property grid, set Correction Selection Mode to Automatic.

Scroll down and set PSG Settings > Amplitude to -6 dB. This value is significantly different from the -10 dB amplitude used in our single-point calibration, but it matches one of the points in the multi-point calibration we just performed.
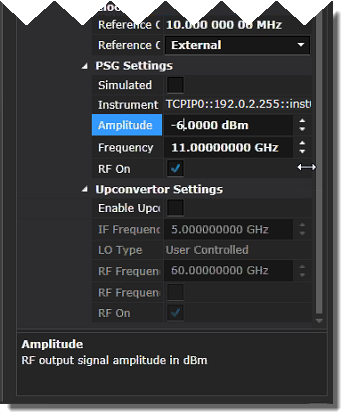
Click Download All Signals and click Run when the download is finished.


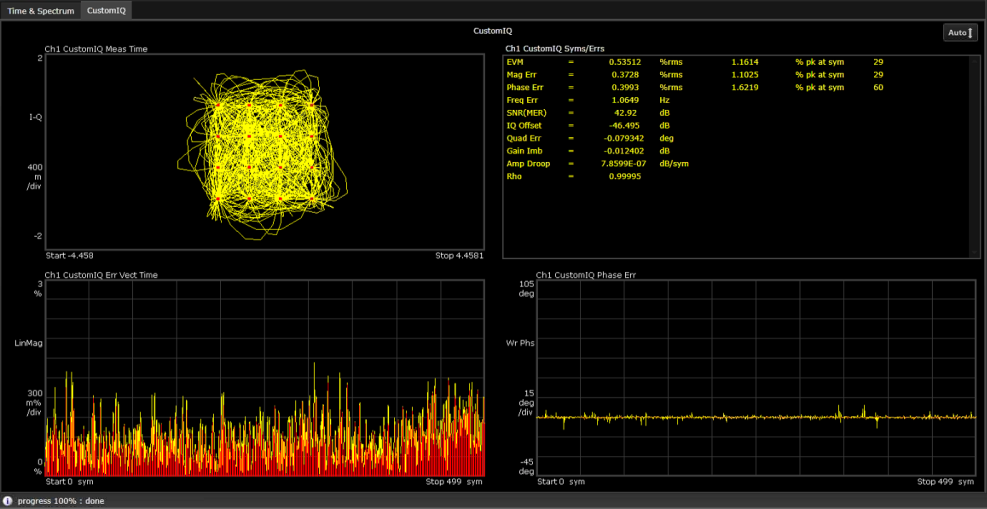
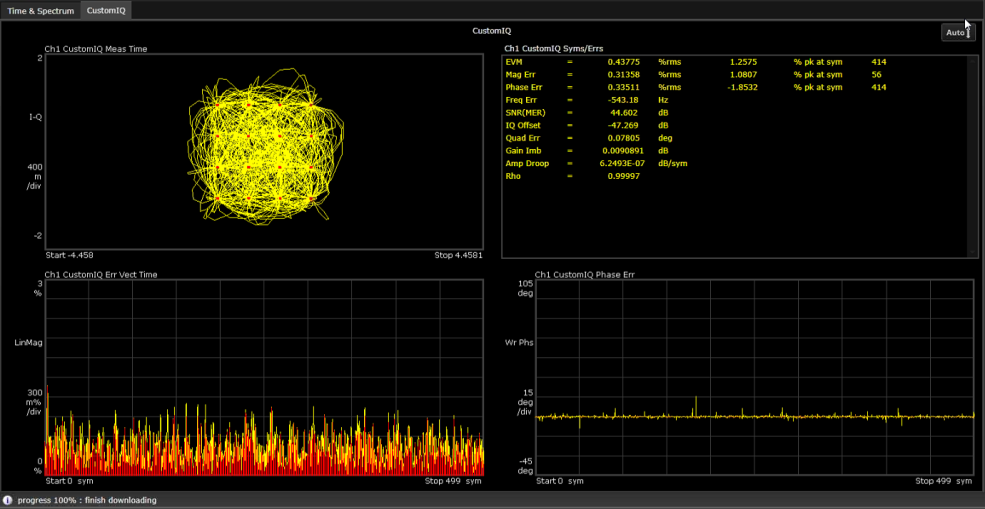
The measurement results show that the Signal Optimizer picked up the best calibration point to correct the signal at 6 dB amplitude.
Set the Amplitude to 0 dB. Notice the degraded IQ constellation and EVM.
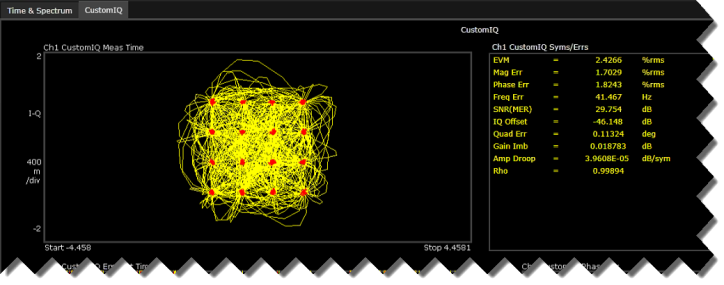
Click Download All Signals and click Run when the download is finished.


This time, the Signal Optimizer used the 0 dB calibration point to correct the signal.
Stop the measurement.

This concludes the tutorial. The Keysight Signal Optimizer has many more great features. For more information, see Other Resources as well as the rest of the help system.