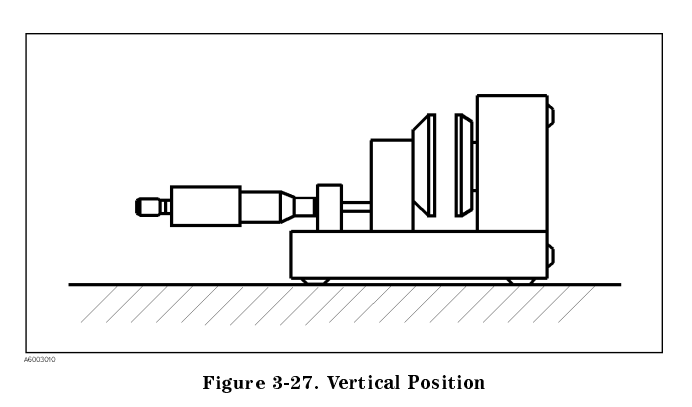
Contact Method (Vertical)
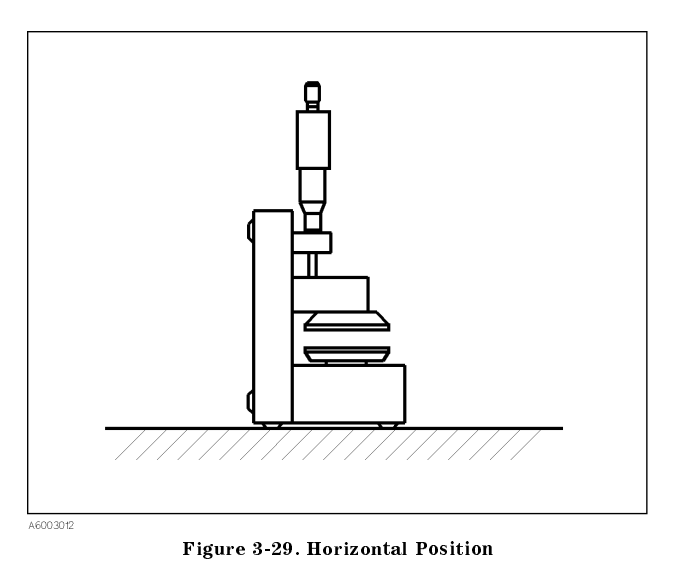
Non-Contact Method (Horizontal)
The Calibration Wizard for Opt. 005 is used to perform calibration for the following configurations:
See Also: Opt. 005 Equipment
Click Calibration then Configure Cal to start the Calibration Wizard.
Note: Before performing the calibration steps, be sure to use the appropriate fixture position for the method used. (See below.)
Contact Method (Vertical) |
Non-Contact Method (Horizontal) |
|
|
Calibration steps must be done in order from 1 through 5.
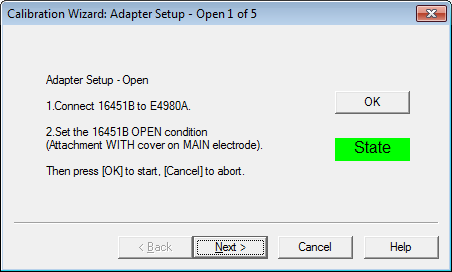
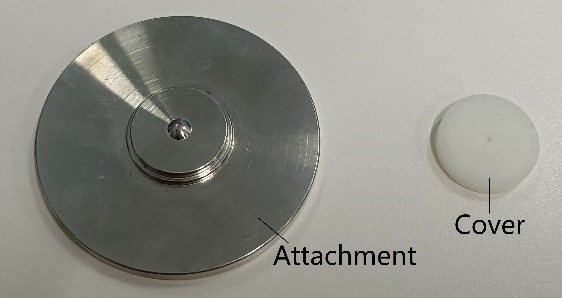
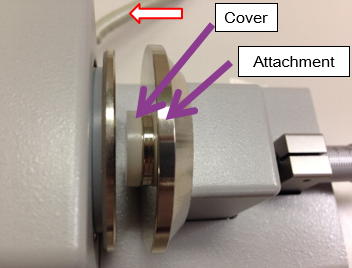
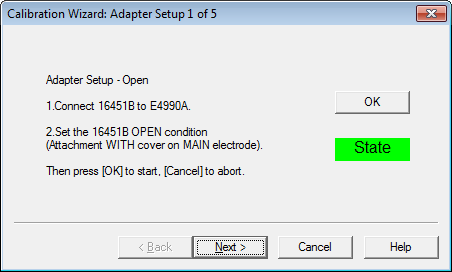
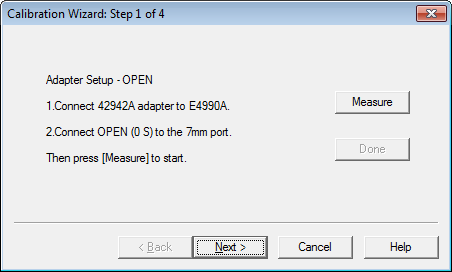
Step 1 |
|
|
HRESULT Open() Or HRESULT AdapterSetup() |
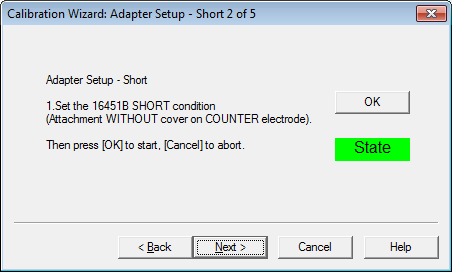
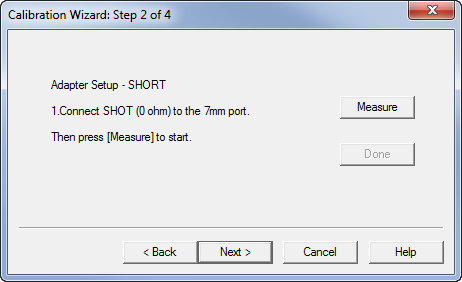
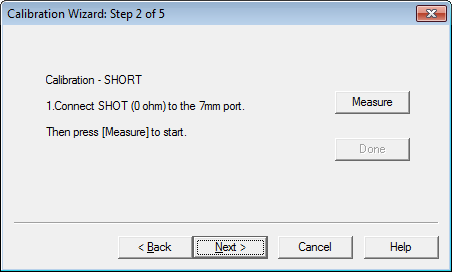
Step 2 |
|
|
HRESULT Short() Or HRESULT AdapterSetupShort() |
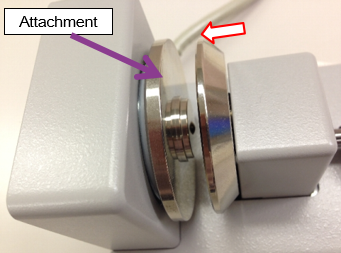
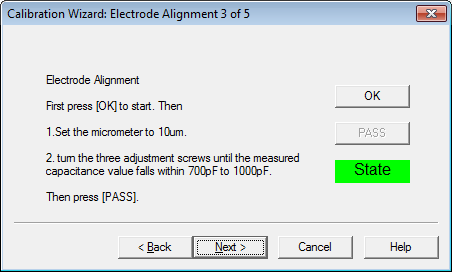
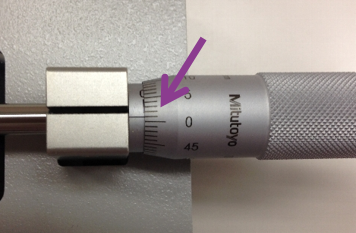
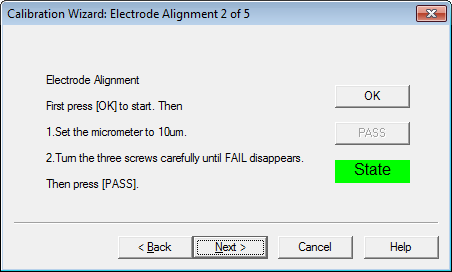
Step 3 |
|
Note: This step is only for Electrode A and B. If the electrode of the 16451B is C or D, the Electrode Alignment step is not needed. |
Click
OK:
Click
PASS: |
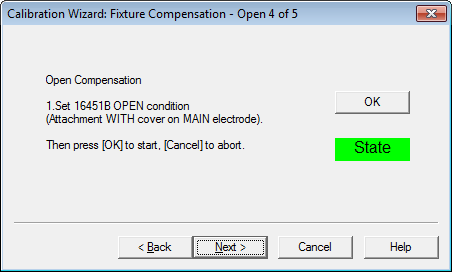
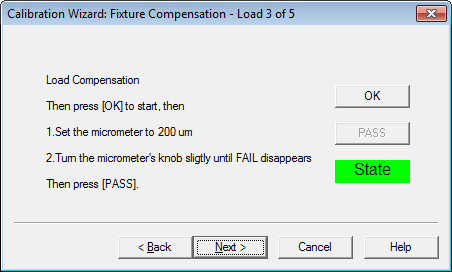
Step 4 |
|
|
HRESULT OpenCompensation() |
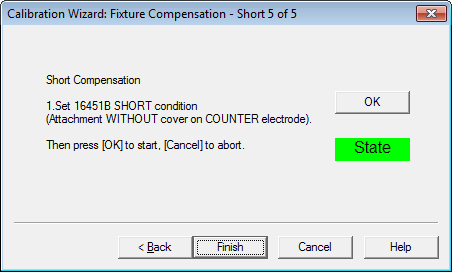
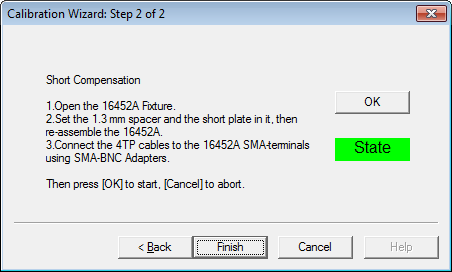
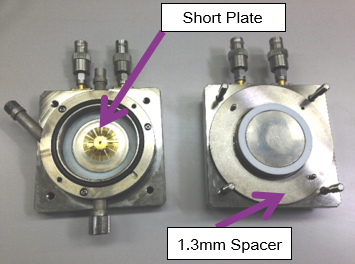
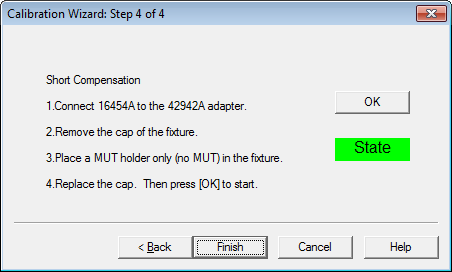
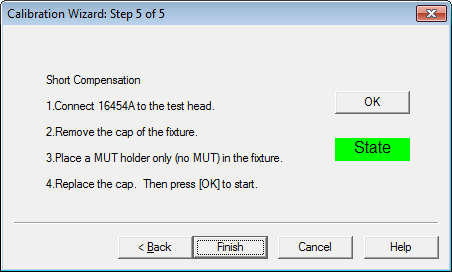
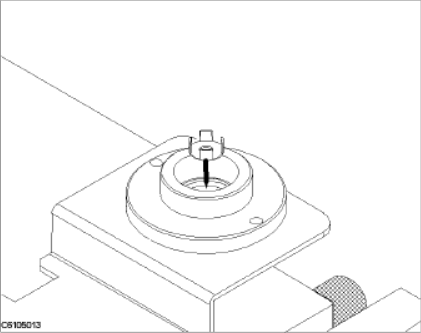
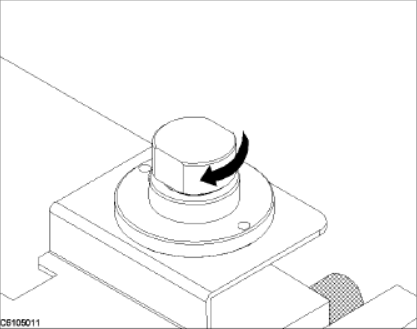
Step 5 |
|
|
HRESULT ShortCompensation() |
Step 6 |
When completed, click on the Finish button. |
|
Note: Before performing the calibration steps, be sure to use the appropriate fixture position for the method used. (See below.)
Contact Method (Vertical) |
Non-Contact Method (Horizontal) |
|
|
Calibration steps must be done in order from 1 through 5.
Step 1 |
|
|
HRESULT Open() Or HRESULT AdapterSetup() |
Step 2 |
|
Note: This step is only for Electrode A and B. If the electrode of the 16451B is C or D, the Electrode Alignment step is not needed. |
Click OK:
Click
PASS: |
Step 3 |
|
|
Click OK:
Click
PASS: |
Step 4 |
|
|
HRESULT OpenCompensation() |
Step 5 |
|
|
HRESULT ShortCompensation() |
Step 6 |
When completed, click on the Finish button. |
|
Note: Refer to the 16452A users guide for detailed information about typical air capacitance value (Step 2 below) and how to check the residual short value.
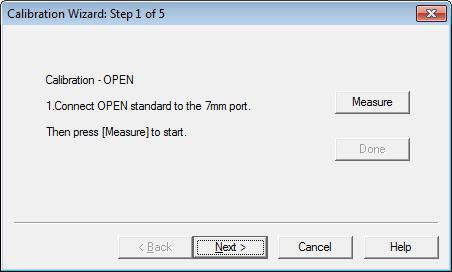
Step 1 |
|
|
HRESULT Open() Or HRESULT AdapterSetup() |
Step 2 |
|
|
HRESULT ShortCompensation() |
Step 3 |
When completed, click on the Finish button. |
|
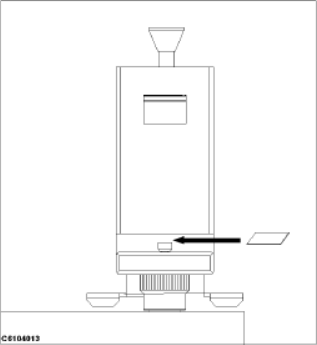
Calibration steps can be done in any order.
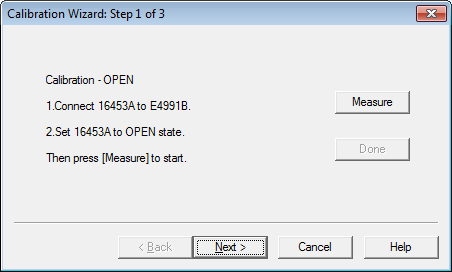
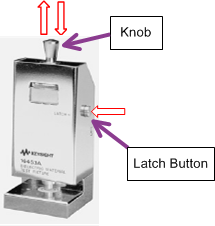
Step 1 |
|
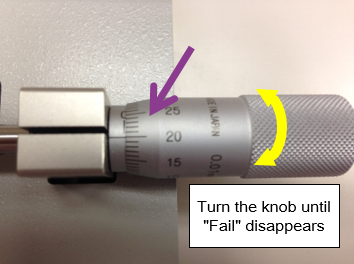
While pulling up on the knob, press the latch button then release the knob. The knob should remain in the up position. |
HRESULT Open() Or HRESULT AdapterSetup() |
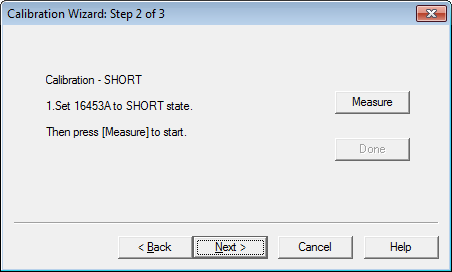
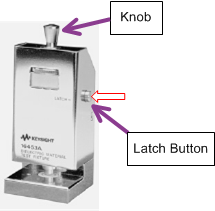
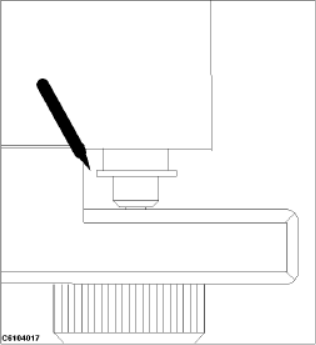
Step 2 |
|
Release the latch button so that the upper electrode makes contact with the lower electrode. |
HRESULT Short() Or HRESULT AdapterSetupShort() |
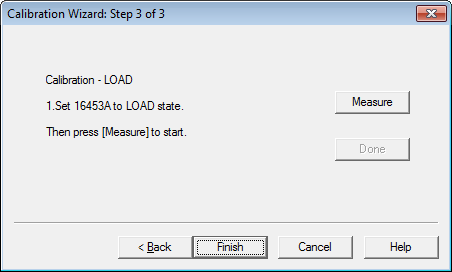
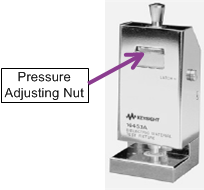
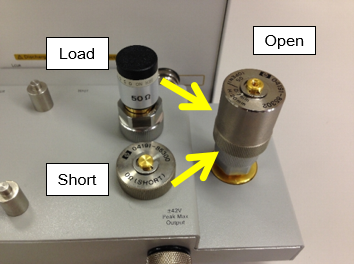
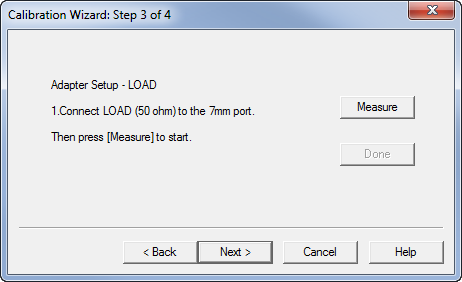
Step 3 |
|
|
HRESULT Load() |
Step 4 |
When completed, click on the Done button. |
HRESULT Done() |
Step 1 through Step 3 can be done in any order.
|
E4990A |
E4991B |
|
|
Step 1 |
|
|
|
HRESULT Open() Or HRESULT AdapterSetup() |
Step 2 |
|
|
HRESULT Short() Or HRESULT AdapterSetupShort() |
|
Step 3 |
|
|
HRESULT Load() |
|
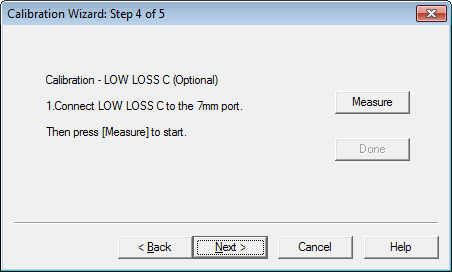
Step 4 (Optional) |
Not applicable to E4990A |
|
HRESULT LLC() |
|
Step 5 |
When completed, click on the Done button then attach the fixture to the test port. |
When completed, click on the Done button then attach the fixture to the test port. |
HRESULT Done() |
|
Step 6 |
|
|
|
HRESULT ShortCompensation() |
Step 7 |
When completed, click on the Finish button. |
When completed, click on the Finish button. |
|