The VNA uses a personal computer and a Windows operating system. The following are common tasks that you may need to perform on the VNA computer.
Internal and External Speakers (N52xxB only)
Other Administrative Task Topics
View or change Full Computer Name
Your VNA has a unique computer name that identifies it on a network. To view or change the computer name, you must first minimize the VNA application.
|
Windows 7 |
|
On the desktop, click Start. |
|
Right-click on Computer then select Properties. |
|
Scroll down to Computer name, domain, and workgroup settings. |
|
To make changes, click Change Settings. |
|
Windows 10 |
|
Click Start > Settings then go to System > About. |
|
Click Rename PC button. |
|
Type the new name for your computer. |
|
Click Next. |
|
A dialog is displayed prompting you to restart your computer now or later. If you want to change to the new name now, click the Restart now button to restart your computer. If you don't want to restart your computer now, click the Restart later button. Your computer's name will be updated the next time you restart it. |
Note: To add your computer to a domain, or to set up the networking configuration, contact your company's I.T. department. This setup is custom for each company.
To restore the VNA application, click Network Analyzer in the task bar at the bottom of the screen.
If your VNA is connected to a LAN, you can view the IP address and other networking information.
|
Windows 7 |
|
Minimize the VNA application |
|
On the desktop, click Start. |
|
In the Search field, type cmd, then click OK. |
|
At a DOS prompt, type ipconfig /all. |
|
Windows 10 |
|
Click Start > Settings. |
|
Click on the Network & Internet icon. |
|
Click the View your network properties link. |
Random Access Memory (RAM) is the amount of working memory in your computer.
The amount of RAM in your VNA may limit your ability to upgrade firmware.
To view the amount of VNA RAM, you must first minimize the VNA application.
|
Windows 7 |
|
On the desktop, click Start. |
|
Right-click on Computer then select Properties. |
|
The amount of RAM appears under System |
|
Windows 10 |
|
Click Start > Settings. |
|
Click System then select About |
To restore the VNA application, click Network Analyzer in the task bar at the bottom of the screen.
The speed of the VNA processor (CPU) is a factor in determining how quickly the VNA processes data. Also, the CPU speed in your VNA may limit your ability to upgrade firmware.
Orn the VNA click Help, then About Network Analyzer. Learn more.
Or, you can do the following to check your VNA CPU speed:
Minimize the VNA application.
Then do the following:
|
Windows 7 |
|
On the desktop, click Start. |
|
Right-click on Computer then select Properties. |
|
The CPU speed appears under System |
|
Windows 10 |
|
Click Start > Settings. |
|
Click System then select About |
To restore the VNA application, click Network Analyzer in the task bar at the bottom of the screen.
Check Solid State Drive (SSD) Capacity
To view the capacity of drive space, you must first minimize the VNA application.
Then do the following:
|
Windows 7 |
|
On the desktop, click Start. -> Computer. |
|
The amount of free drive space and capacity for each of the partitions appears. |
|
Windows 10 |
|
Click Start > Settings. |
|
Click Storage. |
Learn how to determine your HDD part number (Internet connection required).
To set the time and date on your VNA, you must first minimize the VNA application.
|
Windows 7 |
|
Move the cursor to the lower corner of the screen. |
|
When the taskbar appears, click on the displayed time. |
|
Select Change data and time settings.... This opens the Date and Time dialog box. |
|
Change the date, time, and time zone as appropriate. |
|
Windows 10 |
|
Click Start > Settings. |
|
Click Time & language. |
|
Click Date & time. |
|
Ensure that Set time automatically is switched Off. |
|
Click on the Change button to change the time, date, and time zone as appropriate. |
To restore the VNA application, click Network Analyzer in the task bar at the bottom of the screen.
Internal Speaker (N52xxB only)
There is an internal sound card and speaker in the VNA. However, there is no audio output jack.
There may be times when you might want to control the speaker volume or turn the speaker OFF, such as when he VNA is generating errors. Learn more about errors.
To control the VNA speaker volume:
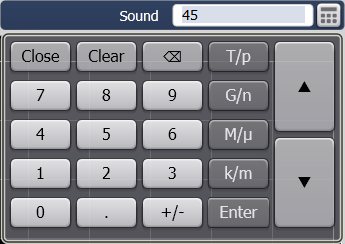
On the VNA press System -> System Setup -> Sound, then click on the keypad icon.

Enter a value between 0 (speaker OFF) and 100 (highest volume).
Windows 10 updates cannot be turned off. There are two ways to control updates:
The VNA is set to Notify before downloading. When Windows finds updates that apply to this computer, users are notified that updates are ready to be downloaded. After going to Windows Update, users can download and install any available updates.