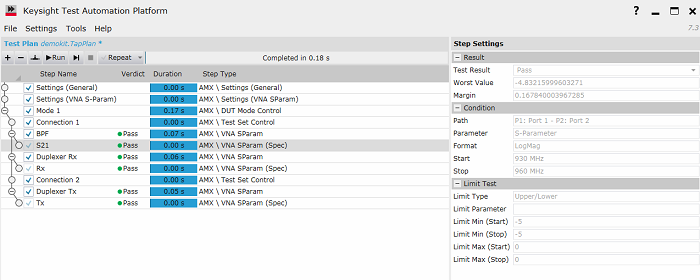
Launch the TAP application from Windows Start menu or desk top icon.
Launch the VNA application from Windows Start menu or desk top icon.
Open the TAP test plan file (.TapPlan) defined by the front end application.
Click ![]() to open the connection.
to open the connection.
Execute the test plan to setup VNA by click Run button. The first execution does only setup and no measurement.
If you want the calibration, the calibration wizard can be executed from Setting > AMX > Launch Cal Wizard....
-
Auto Orientation: The ECal module automatically detects the connection between VNA's test ports and ECal module's ports. Orientation begins to fail at very low power levels or if there is much attenuation in the path between the VNA and the ECal module.
-
If you use this calibration data for future measurement, save the state file and set it at VNA State File.

From the second execution, clicking Run executes the measurement according to the TAP test plan.
Pass/Fail result is displayed for each step. When you select the each test line, the test result ,condition and Limit are displayed in the right window.

Click ![]() again to close the connection.
again to close the connection.
The test result is saved as .csv file under the directory of My document\AMX\output.