This section explains how to set the DUT connection and perform measurement using E4982A.
Other topics about Basic operations
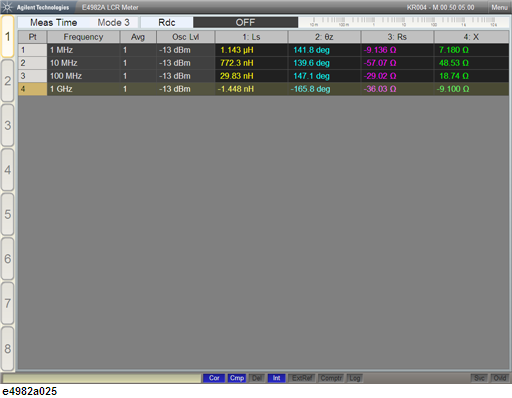
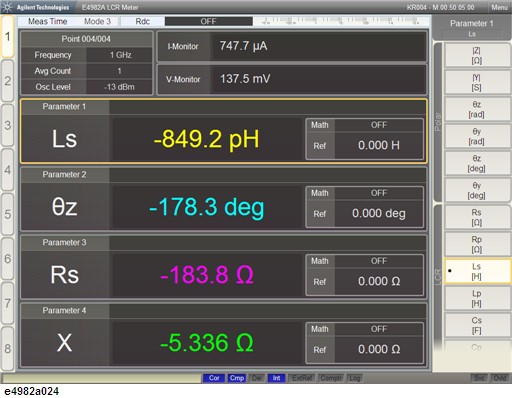
In the above figure, the measurement result is only displayed for the 1 MHz point among the four measurement points (1 MHz, 10 MHz, 100 MHz and 1 GHz) set according to How to set the measurement point (frequency/averaging factor/oscillator level).
Follow these steps to change the measurement point on which you want to perform measurements and display results.
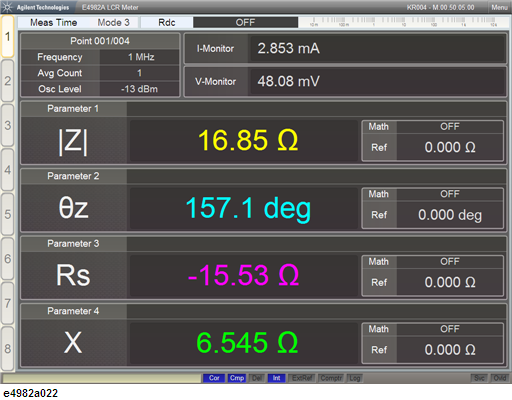
From the E4982A Root softkey menu, select Active Point.
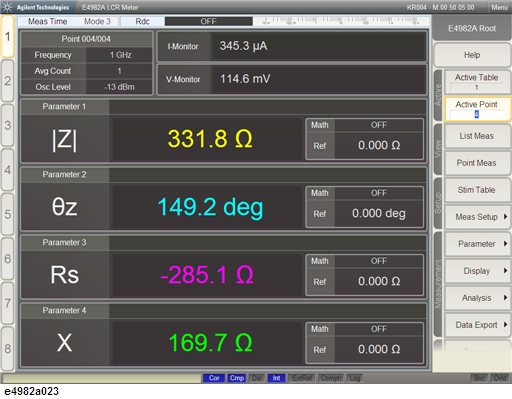
Select the desired measurement point number, which is in this case is 4.
Alternatively, toggle between Stim Prev and Stim Next hardkeys to select the desired measurement point number.
Set which of the four measurement parameters should appear on the display by following these steps.
Select the measurement parameter which you desire to change, in this case Parameter 1 to display the softkey menu of Parameter 1 on the right side of the display.
Select the desired measurement parameter, in this case Ls.
In the above figures, only one of the set measurement points is selected for measurement and display. However, measurement and display can also be executed at all of the set measurement points simultaneously by following the below step.