Other topics about Calibration and Compensation Functions
To start manual calibration, press Cal.
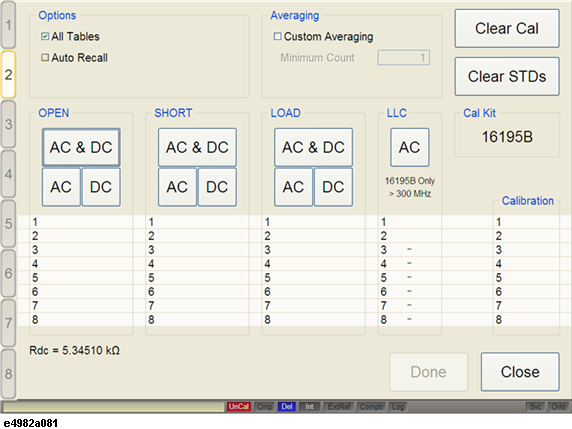
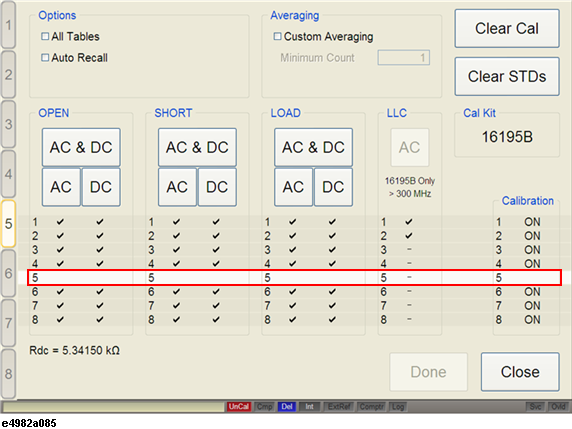
If the E4982A is not calibrated, the following window is observed:
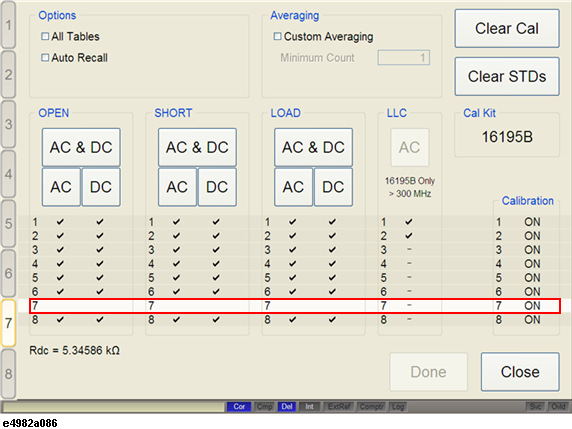
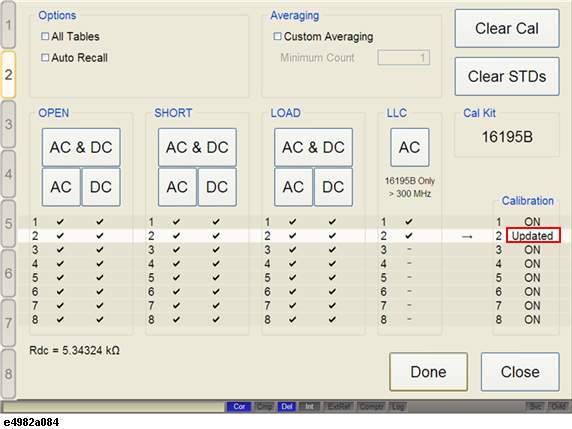
If the E4982A has been previously calibrated, the following window is observed:
When you select the All Tables check box, calibration is performed for all tables.
When you select the Auto Recall check box, calibration data is stored and recalled every time the E4982A is turned ON.
When you select the Custom Averaging check box, calibration is performed the number of times entered in Minimum Count and then averaged.
To execute calibration for Open, Short, and Load, perform either of the following:
Click AC & DC to calibrate AC and DC.
Click AC to calibrate only AC.
Click DC to calibrate only DC.
Use the torque wrench to secure the Open, Short, Load and Low-Loss Capacitor standard.
To be able to save the calibration, AC and DC calibration must be performed.
To execute calibration for Low-Loss Capacitor (LLC), click AC.
Low-Loss Capacitor calibration can only be performed for frequencies above 300MHz.
When connecting the Low-Loss Capacitor, do not turn the knob. Lightly hold the knob to prevent the inner coaxial electrodes from moving when turning the outer connector nut of the Low-Loss Capacitor.
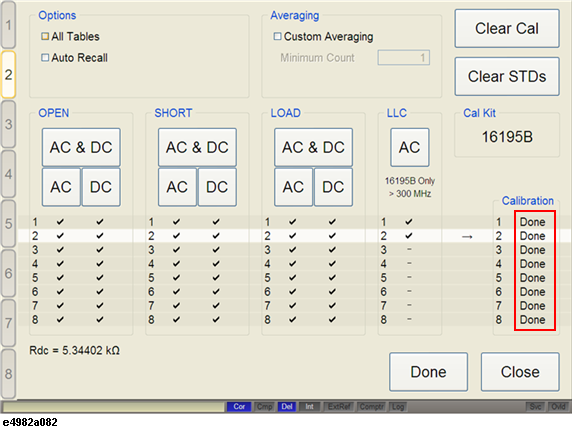
Once all calibration has been performed, click Done to save the calibration. In the Calibration tab, Done is labelled for all saved calibration as shown below.
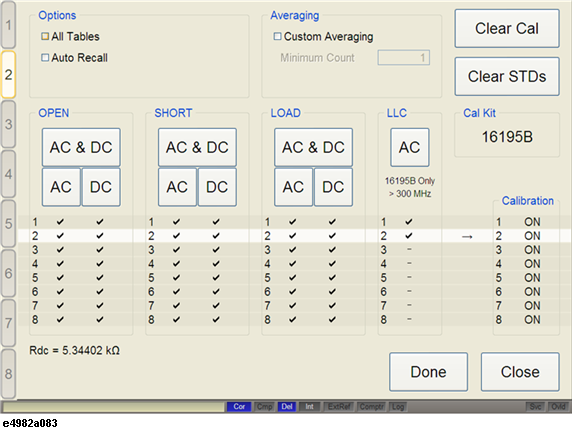
If you execute calibration again, Done is changed to Updated in the Calibration tab as shown below.
Executing Clear Cal clears the calibration data as well as clears the Calibration status to uncalibrated.
Executing Clear STDs clears the calibration data but maintains the Calibration status as calibrated.