Press Meas Setup to activate the softkey menu.
Click Cal/Compen Wizard Settings....
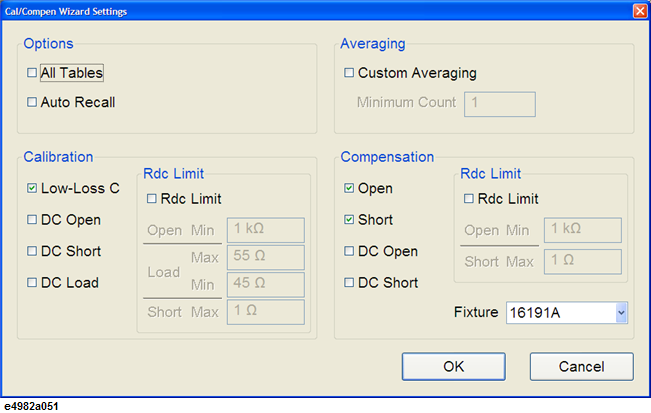
Cal/Compen Wizard Settings dialog box appears.
-
When using the E4982A for measurement, open, short and load calibrations must be performed under any circumstance. The calibration and compensation wizard setting feature has been designed so that, in addition to these three essential settings, your desired calibration and compensation settings may be selected.
On the Options group, confirm that All Tables check box is not selected, so that calibration and compensation is only performed for the measurement point in the selected measurement point table.
-
Auto Recall stores calibration and compensation data and recalls the data every time the E4982A is turned ON. Auto Recall does not recall the data when firmware is restarted.
On the Calibration group, confirm that Low-Loss C check box is selected.
On the Compensation group, confirm that only Open and Short check boxes are selected.
On the Compensation group, select the Fixture model number of the test fixture from the drop down box.
-
When using USER defined fixtures, the electrical length must be registered as described in Registering the Electrical Length of Unregistered Test Fixtures.
-
The fixture you select is for the Compensation Wizard only. In Compensation function, you need to select your desired fixture with the Fixture softkey in the Meas Setup menu or the Fixture tab in the Compensation windows.
Under Averaging, select the Custom Averaging check box.
Enter the minimum averaging count in Minimum Count.
-
If you have set up averaging for individual points in the stimulus table, the custom averaging setting will override the averaging settings for averaging count less than the minimum count set. For averaging count more than custom averaging minimum count, it will perform the averaging as set in stimulus table.
Click OK to close the dialog box.