Removing/Mounting Removable Hard Disk (Option 017 Users Only)
Other topics about Maintenance
This section provides information on how to mount and remove a removable hard disk as well as write the system correction data.
For calibration or repair of the E5072A, send it with the mounted removable hard disk.
If you replace the removable hard disk, make sure to retrieve the system correction data and option data after mounting the hard disk.
-
Back up the license key file for software option before removing the hard disk.
-
Place the license key file after mounting the hard disk.
Follow the steps below to remove a removable hard disk.
-
Turn OFF the power.
-
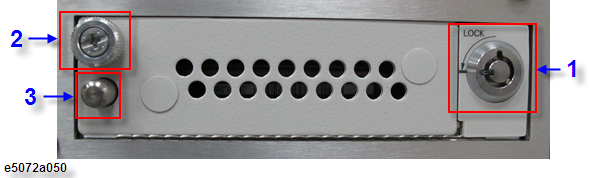
Insert the key (furnished, Keysight Part Number 5188-4426) in the lock (labelled as 1 in figure e5072a050) and turn anti-clockwise.
-
Open the screw in clockwise direction (2 in figure e5072a050).
-
Press the button under the screw (3 in figure e5072a050).
-
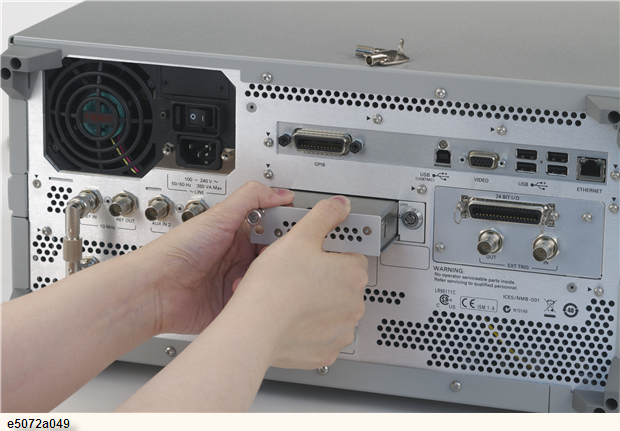
Remove the hard disk.
-
Do not attempt to unlock the key and remove the hard disk when the power is ON. Doing so will turn OFF the power automatically.
Follow the steps below to mount a removable hard disk.
-
Insert the hard disk into the slot.
-
Turn the screw in anti-clockwise direction until it is locked.
-
Turn the key to the right until it is locked.
-
Remove the key.
-
Turn ON the E5072A.
-
The key is available to remove even in Unlocked state. Before power ON, confirm if removable hard disk is locked completely.
The following procedure shows how to write the system correction data stored in the backup memory to the newly mounted removable hard disk.
-
Turn ON the E5072A.
-
Press Macro Setup key.
-
Click Load Project... in the softkey menu.
-
Select RestoreSysCorFile.vba from the D:\Agilent\Service folder and then press the Open button.
-
Press Macro Run key
-
The RestoreSysCorFile dialog box appears.
-
Click OK.
-
Once the program has terminated, restart the E5072A to enable the system correction data.