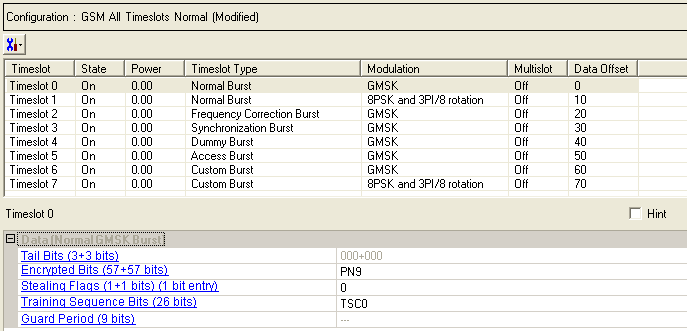
To open the Data node, click Data in the tree view. The figure below shows the Data node.
The timeslots shown below are set to show available timeslot types, not to show a typical test configuration.
Click  to display a drop-down menu in which you can copy a timeslot configuration
from one timeslot to another.
to display a drop-down menu in which you can copy a timeslot configuration
from one timeslot to another.
Use the Data window to define the bits in the bursts. The cells displayed in the Data section are determined by the burst type (Timeslot Type) for the selected timeslot as defined in the Timeslots window. In the window shown above, Timeslot 0 is selected so the data cells provided are for setting up a Normal GSM Burst (the GMSK modulation indicates that this is a GSM burst).

Tail bits are set by the software at 000. This cell is not editable.
Click the Details button  in this cell to open the
  Data Source
Selection
window.
Data Source
Selection
window.
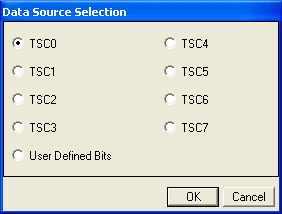
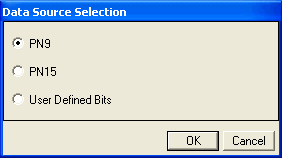
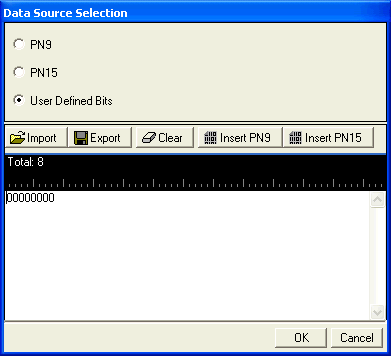
Select ,
or . Select , to create an encrypted data string. (See drop-down figure and description.)
You can enter 1 (control channel burst) or 0 (data channel burst). The default is 0.
Click the Details button in this cell to open the Data Source Selection
window.
Select to
or to use for the training sequence bits. If you have
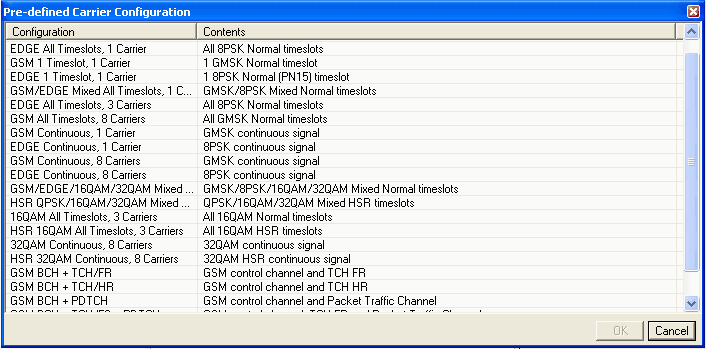
selected
from the Add New
Carrier
drop-down menu, or
from the Pre-defined
Carrier Configuration
dialog box, the default training sequence corresponds to the timeslot
number. For example, the default for timeslot 0 is ,
the default for timeslot 1 is,
and so on.
If you manually change a timeslot to a , the training sequence for that timeslot is automatically set to .
The training sequences are defined as follows:
|
TSC0 |
0970897 |
|
TSC1 |
0B778B7 |
|
TSC2 |
10EE90E |
|
TSC3 |
11ED11E |
|
TSC4 |
06B906B |
|
TSC5 |
13AC13A |
|
TSC6 |
29F629F |
|
TSC7 |
3BC4BBC |
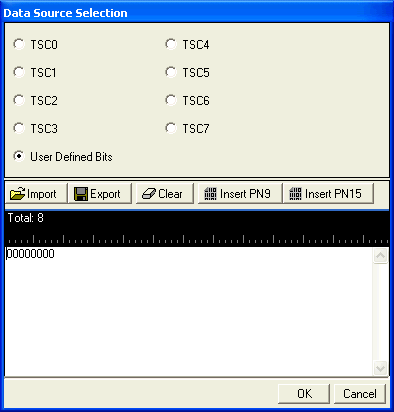
Select to define custom training sequence bits. See the drop-down figure.
Guard period bits are set by the software.
Figure: Guard Period Lengths Between Different Timeslots
|
Burst Transition |
Burst Transition Guard Period Between Timeslots (In terms of normal symbol periods) |
|
|---|---|---|
|
TS0 and TS1 or TS4 and TS5 |
Any other timeslot pair |
|
|
normal symbol period to normal symbol period |
9 |
8 |
 Click
Click  Click
Click  Click
Click  Click
Click