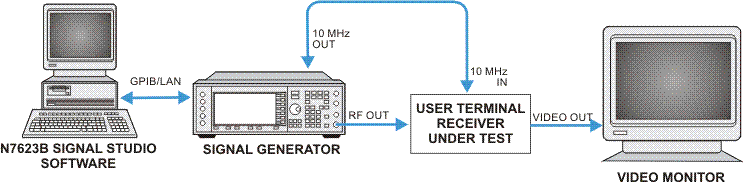
This example shows you how to configure the equipment and Signal Studio software to monitor a ISDB-T format video. A similar procedure can also be used for other formats.
Click from the menu.
In the Waveform Setup (ISDB-T) pane: click n
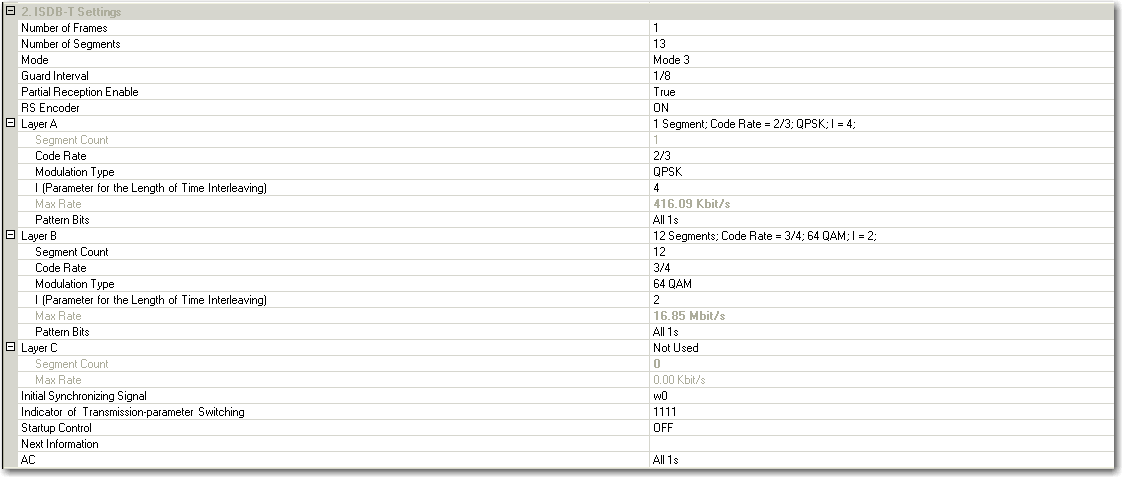
Edit the parameters to set up a waveform with the following characteristics:
In the Waveform Setup (ISDB-T) Carrier pane: click , then in the right
cell, click  to choose
Click and then in the right cell, click  to open the TS File Input Wizard.
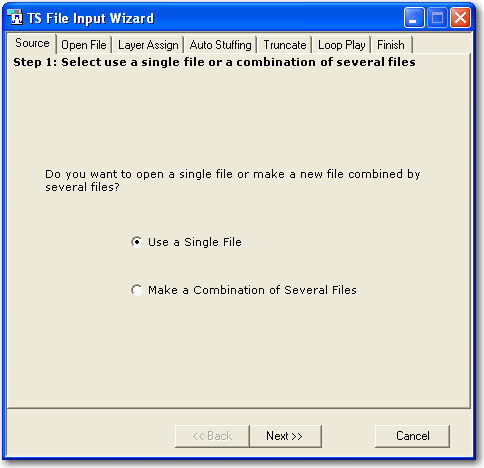
The TS File Wizard is used to customize a user required TS file.
TS File Input Wizard Configuration
Step 1: Select using a file or combination of several files. Typically choose the option. Choose when the File length doesn't meet the testing requirements.
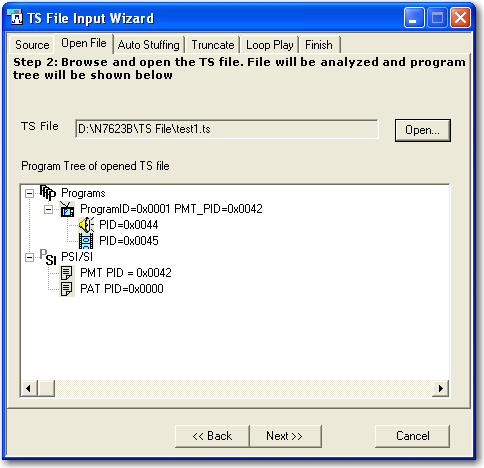
Step 2: (single file): Select the source file.
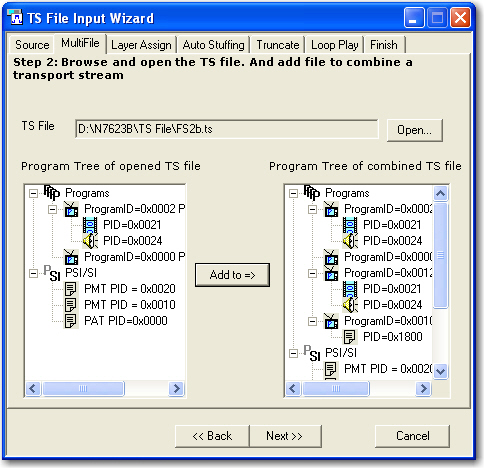
Step 2: (multi file): Select the source file.
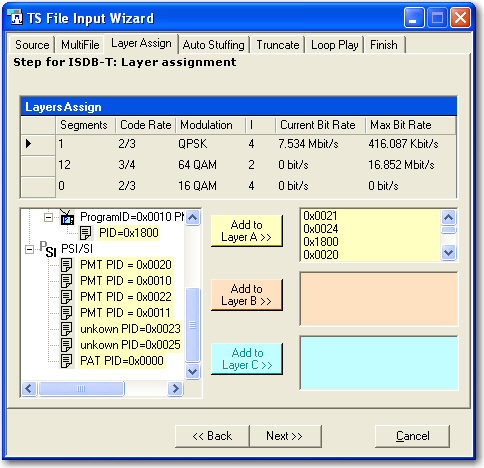
Step 3: Allocate the packet identifiers (PIDs) to each layer. In this step, different PIDs will be assigned to layer A, layer B or layer C.
This PIDs allocation is for ISDB-T only, for the usage of TS wizard in other formats, this step can be skipped.
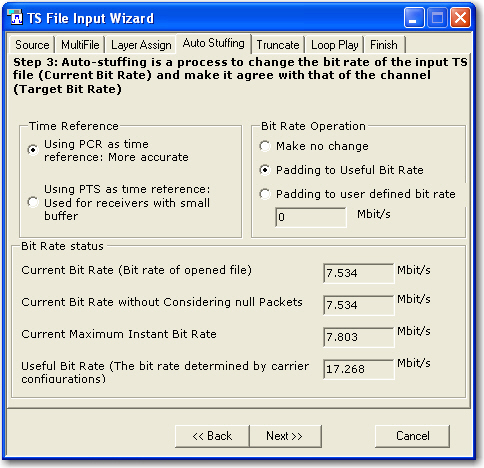
Step 4: Auto-Stuffing
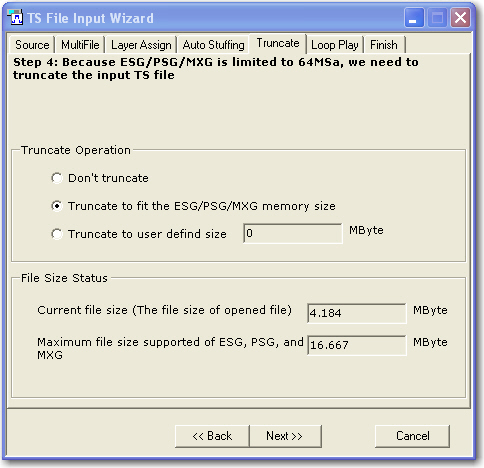
Step 5: Truncate.
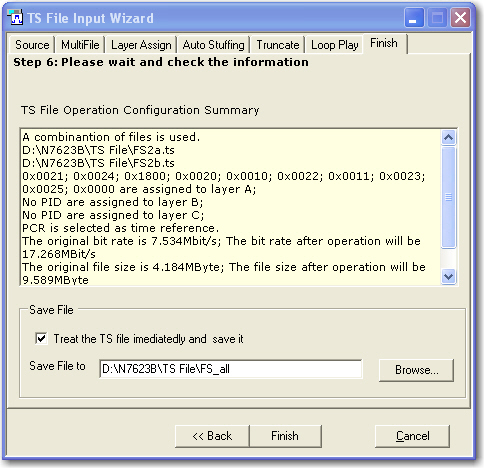
Step 6: Loop Play treatment

Step 7: Wait to over.
Click to complete the TS File Input Wizard.
Click the Instrument node in the tree view, set the MXG/EXG/ESG/PSG’s frequency and amplitude to the values below
Frequency: 474 MHz
Amplitude: -50 dBm
Click Generate a waveform
button  in the tool bar. The software generates an I/Q waveform file
in accordance with the current waveform configuration and signal generation
setup. Waveform generation time varies proportionally to the complexity
of the waveform.
in the tool bar. The software generates an I/Q waveform file
in accordance with the current waveform configuration and signal generation
setup. Waveform generation time varies proportionally to the complexity
of the waveform.
After the waveform is generated, you can examine its characteristics.
View the CCDF plot for the carrier based on the configuration by clicking the carrier in the tree view. For more information, refer to CCDF Plot.
By clicking Waveform Setup in the tree view, you can view plots of the baseband spectrum, I and Q signals, and CCDF curve prior to downloading the file to the signal generator. For more information, refer to CCDF plot and waveform plot.
To download the waveform file
to the signal generator, click Download  in the tool bar if you have configured the
instrument connection. The signal generator automatically begins to play
the digital video waveform. The waveform file, however, cannot be modified
after downloading it to the signal generator.
in the tool bar if you have configured the
instrument connection. The signal generator automatically begins to play
the digital video waveform. The waveform file, however, cannot be modified
after downloading it to the signal generator.