![]()
Prior to this calibration, ALC Dynamic Calibration, Low Band Power Flatness Calibration, and High Band Power Flatness Calibration must have been successfully completed.
|
|
Prior to this calibration, ALC Dynamic Calibration, Low Band Power Flatness Calibration, and High Band Power Flatness Calibration must have been successfully completed. |
This adjustment calibrates the high band modulator and the low band modulator's gain, linearity, and bias. The low band modulator is located on the A8 Output and the high band modulator is located on the A30 Modulator Filter.
There are several subroutines in this program. These subroutines are used to adjust the gain, linearity, and bias on all analog and vector instruments. Other than terminating the RF output with a 50 ohm load, no other equipment is required. The internal ABUS is used to measure the A10 ALC integrator output voltage.
Gain is adjusted for a 0 V difference at the ALC loop integrator output when switching between two RF power levels. Linearity is adjusted to minimize the difference in voltages at the ALC output between three power levels (high, medium, and low). Bias is adjusted for a 0 V difference at the ALC loop integrator output with the power level set to 0 dBm.
On E8267D signal generators, the bias adjustment is repeated at different power levels. Besides terminating the RF output into a 50 ohm load, the digital adjustments require a function generator connected to the I input.
|
Test Equipment |
Preferred Model |
Alternate Model(s) |
|
50 Ohm terminator |
Depending on the DUT RF Output Connector, choose: 85138B (2.4mm) |
20 dB attenuator |
|
|
|
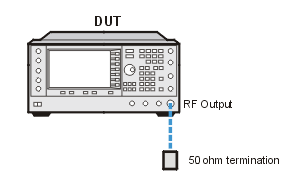
Connect all test equipment as shown.
Connect GPIB cables to all GPIB-controlled test equipment.
While performing this adjustment, follow all instructions on the controller display.
Setup for ALC Mod Driver Bias Calibration
If this adjustment fails, perform the following steps in order:
Check the equipment setup (see above). If the setup is incorrect, make the necessary corrections and rerun the adjustment.
If this adjustment fails with the equipment set up properly, refer to the troubleshooting section of the signal generator's service guide. If you do not have a printed copy of the service guide (Option OBW), one is available either on the CD-ROM that came with your signal generator shipment or on the Keysight Website.
If you cannot correct the problem using the troubleshooting procedures in the Service Guide, obtain service from Keysight Technologies. Refer to Contacting Keysight Technologies.
