
This topic describes the procedure for performing a TDoA directional-finding measurement to locate emitters.
TDoA is used for direction finding by measuring the time difference of signal arrival at multiple receivers to locate emitters.
You can use one of the following modes for TDoA measurement.
Live Mode - Use Live mode to locate emitter(s) in real-time at a specific point in time (single) or over a period of time (continuous). See Setting up and Running a TDoA Measurement in Live Mode
Offline Mode - Use Offline mode to analyze recordings with emitter data after an incident has occured. This mode is useful for post-incident analysis and does not require live signal data. See Analyzing TDoA Recordings in Offline Mode
Add receivers required for your measurement.
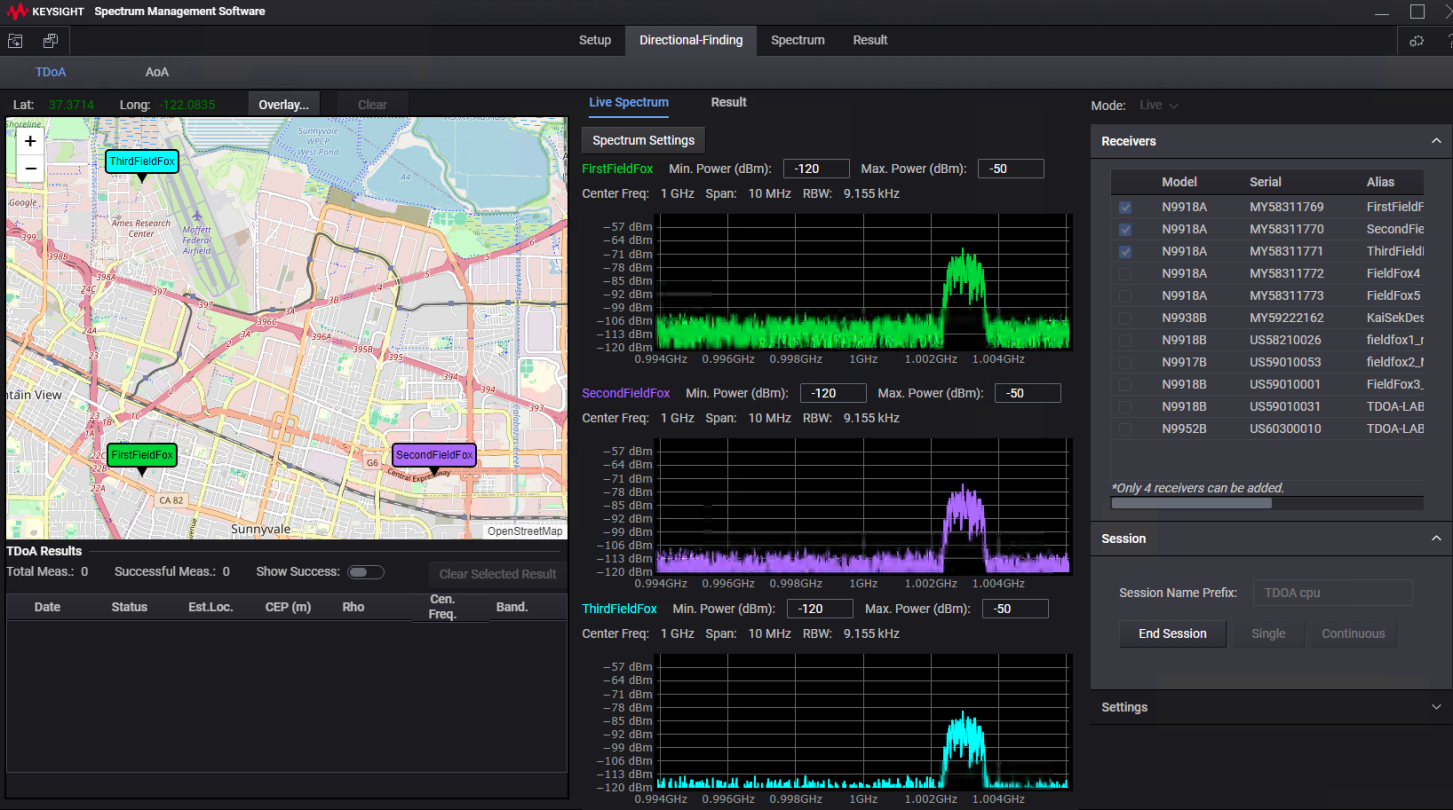
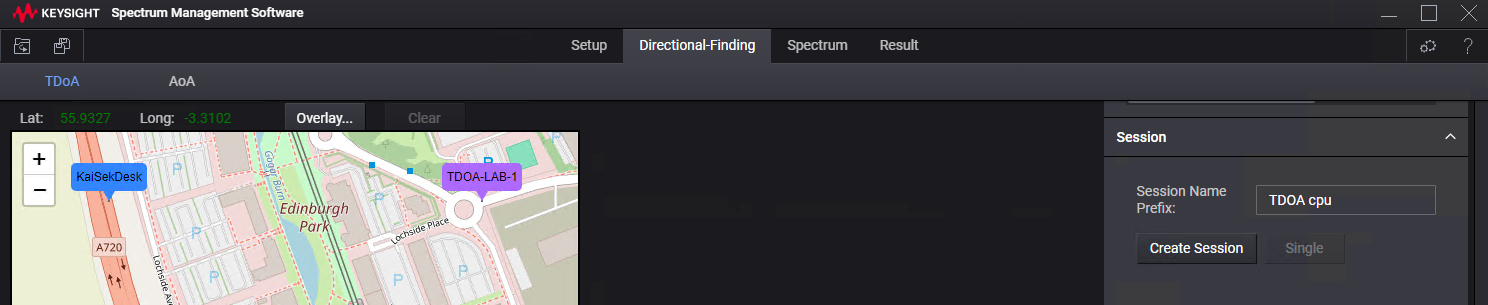
Click the Directional-Finding tab and then select TDoA.
From the Mode listbox, ensure that Live is selected.
From the Receivers section on the right, select the checkboxes for receivers that you want to use in your TDoA measurement.
The selected receivers appear on the map on the left. The Map displays the current latitude and longitude of the center of the screen displayed in the map.
From the Session section on the right, click Create Session.
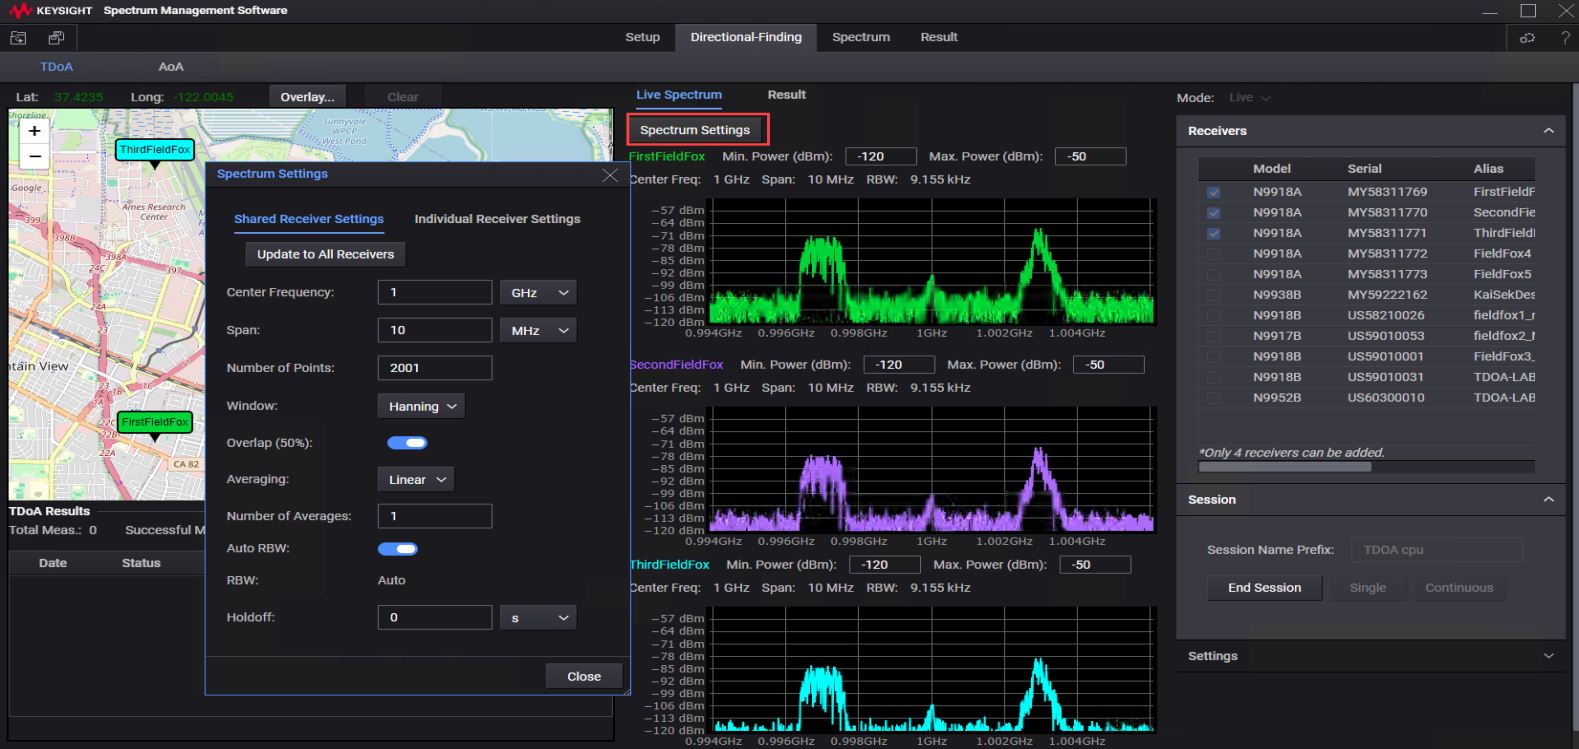
Click Spectrum Settings in the middle pane to adjust spectrum and receiver settings as per your specific requirements.
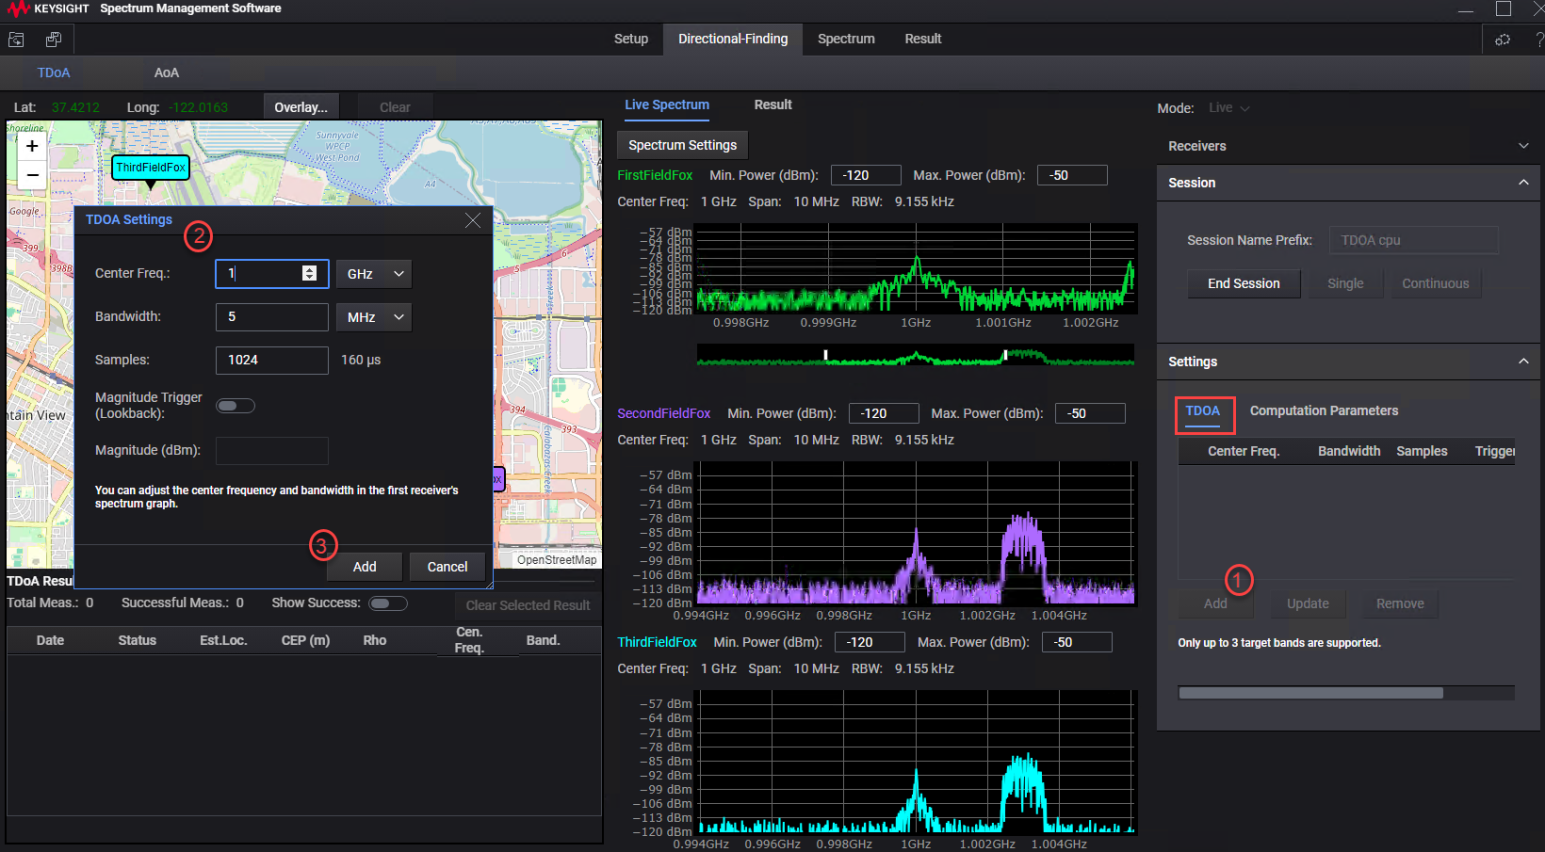
In the TDOA tab of the Settings section on the right, click Add to open the TDOA Settings dialog box. Use this dialog box to define target bands to be used to acquire emitter(s). Adjust the band settings, such as center frequency and bandwidth. The changes that you make in the TDOA Settings dialog box are simultaneously reflected in the receiver's graph shown in the middle. Finally, click Add to add this band.
You can add up to three target bands in a session.
From the Session section on the right, click Single to run a single TDoA measurement to locate target emitter. Click Continuous if you want to continuously run the TDoA measurement to track the emitter over time until the Stop button is clicked.
When the measurement is completed, the targeted area is labeled as "Emitter" on the map as displayed in the example screen below.
Example of a successful target acquisition (i.e., target labeled "emitter") with Single TDoA measurement

Example of successful target (emitter) tracking with Continuous TDoA measurements until Stop is clicked

Click End Session to conclude the session after locating emitter.
If there are other receivers near the main receivers that are detected, but not active, they are grayed out on the map.
Click the Directional-Finding tab and then select TDoA.
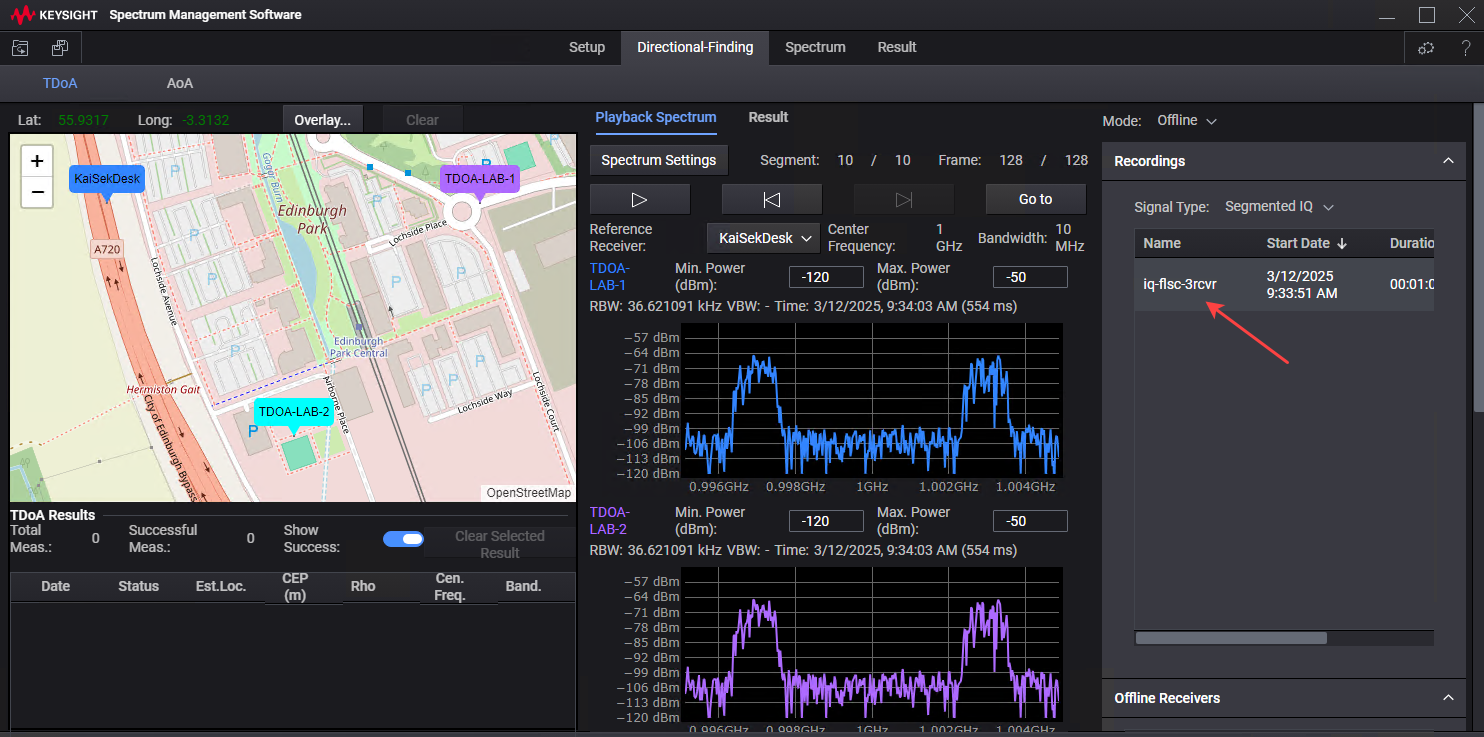
From the Mode listbox, ensure that Offline is selected.

From the Recordings section on the right, select the recording of the TDoA measurement that you want to analyze.
Initiate a session by clicking the Create Session button.
After a session is created, the rest of the steps are same as the steps described for the Live measurement in this topic.
View the recoding results on the map, including the positions of the receivers and the estimated location of the emitter.

Click End Session to conclude the session after analyzing the recording.