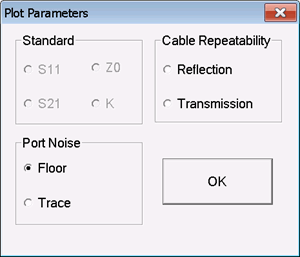
Scale / Format tab
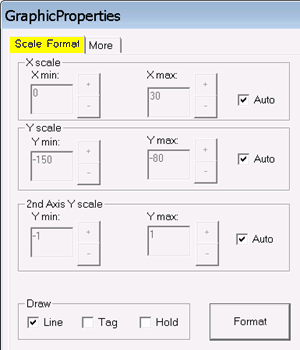
To manually change scale on the X, Y, or 2nd Y axis:
-
Clear (uncheck) Auto.
-
Enter or use the +/- buttons to set the Min and Max scale of the plot. Each rectilinear plot has 10 vertical and 10 horizontal divisions.
Draw
Choose one or more of the following:
-
Line - Data points are connected with a line.
-
Tag - Each data point is highlighted.
-
Hold - Traces remain visible after plotting new traces. The scale becomes fixed, although the plot can be rescaled manually. This is useful for comparing similar traces.
Format
More tab
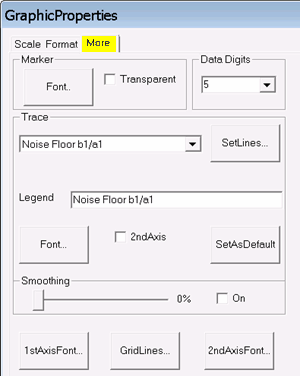
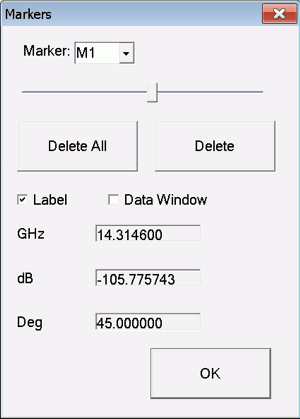
Marker
Font - Select the size and font for the marker readout.
Transparent - Check to make the traces and grid show through the marker label.
Data Digits - Select the resolution of the readout.
Trace
Select the trace for which the following settings will be made.
Set Lines - Sets the trace width, color, and type.
Legend - Edit the legend that appears in the upper left corner of the chart.
Font - Select the size and font for the trace title.
2nd Axis - Check to associate this trace with the 2nd (right) Y-axis.
Set as Default - Check to make the settings apply to all traces.
Smoothing
Drag the slider to achieve the desired amount of trace smoothing.
On - Check to quickly turn ON / OFF the smoothing value.
Buttons
1st Axis Font - Click, then set the size, color, and font for the primary Y-axis.
Grid Lines - Click, then set the style, color, and thickness of the grid lines.
2nd Axis Font - Click, then set the size, color, and font for the 2nd Y-axis.
|