|
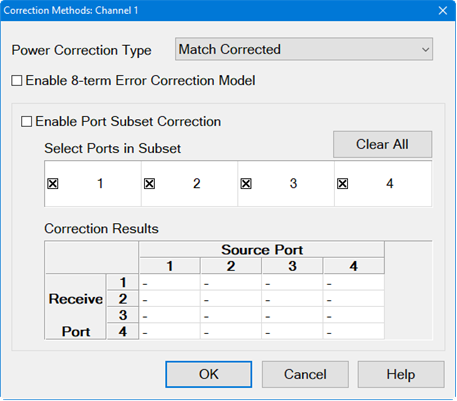
The following dialog applies to the Spectrum Analyzer applications only.
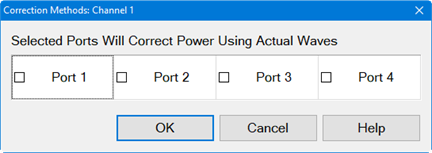
The following dialog applies to the Modulation Distortion, Modulation Distortion Converters and Intermodulation Distortion applications only.
Note: Actual Wave and 8-term error correction method in IMD/IMDX is a Licensed Feature. Learn more about Licensed Features.
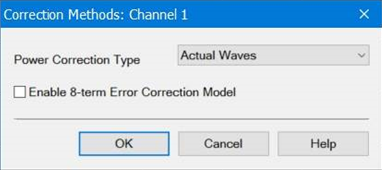
Power Wave Correction Type
Match Corrected - These waves are calculated from the actual waves and the S-parameters of the DUT to determine the waves if the VNA test ports were perfectly matched. However, you may not want match correction in the following cases:
- When making non-traditional measurements, such as high-power or multiport configurations. Because of added components or reconfigurations, the mismatch measurement may not be valid.
- When you have a remote program that already accounts for the match effects of the sensor.
Actual Waves - These are the full error corrected actual waves at device reference planes.
Response Corrected - These are raw measurements scaled with the response terms and do not include any match correction.
Selected Ports Will Correct Power Using Actual Waves (Spectrum Analyzer applications only) -
- Selected ports are corrected using both incident receiver and test receiver.
- Waves on selected ports are corrected using the 8-term error correction model. See description below.
8-term Error Correction Model
Enable 8-term Error Correction Model - Check to enable the 8-term error correction model for measurement calibration.
Note: In trigger hold mode, acquired data may be inaccurate after transitioning from 10 to 8 term model. In this case, it is recommended to trigger a new sweep. The reverse transition (8 to 10 term model) is safe and does not require the new sweep.
The VNA may correct S-Parameters by using either the 12-term or the 8-term error correction model. (The 12-term model is also known as the 10-Term model if the two crosstalk terms are ignored.) Changing the model will affect the S-Parameter and wave measurements.
When measuring a DUT, the VNA will stimulate the DUT in the forward and reverse direction, measure the waves, then calculate the S-Parameters of the DUT. A 2-port VNA forward flow diagram is shown below and will be used to compare the two correction models.

For an 8-term model, the forward direction state will measure the waves (a0, b0, a3, b3) and will calculate the corrected waves (a1, b1, a2, b2) at the DUT test ports. For a 12-term model, the VNA will measure the waves (a0, b0, b3) and will calculate the corrected waves (a1, b1, a2, b2) at the DUT test ports. The 12-term model does not need to measure the a3 wave because its value is calculated from the b3 wave and the Port 2 load match characterized during calibration.
The following table describes the tradeoffs between the 8-term and 12-term models:
|
Model
|
Advantages
|
Disadvantages
|
|
12-Term
|
Measures fewer waves so it may be faster and have lower noise.
|
VNA load match changes after calibration will result in errors.
|
|
8-Term
|
VNA load match changes after calibration will not result in errors.
|
Measures more waves so it may be slower and have higher noise.
|
The VNA uses the 12-term model by default because it is fast, low noise, and typically the VNA load match is very stable. However, there are several cases where the 8-term model is a good choice:
-
Load Pull measurements vary the load match to determine its effect on the DUT's S-parameters. The 8-term error model is immune to these intentional changes in VNA load match.
-
High power test setups often include external couplers, preamps, and attenuators. During calibration the preamps and attenuators may be removed to avoid damaging the cal standards and to optimize signal levels. These components are reattached following calibration. If the components are removed and added on the VNA-side of the couplers, the 8-term model will correct for any changes.
- A preamp may be added behind the couplers of one port to increase the output power. When that port is used as the load-side of the measurement, the load match presented by the output of the preamp may not be very stable over time. The 8-term error model will correct for this load match instability.
Port subset correction
Enable Port Subset Correction - Enabling port subset correction to reduce the number of corrected ports.
Select Ports in Subset - Selects which ports should be included in a full N-port correction. Un-selected ports will be corrected on a “best effort” basis: In other words, these ports will be corrected with an enhanced response calibration if the error terms are available in the calset.
Clear All button - De-selects all ports from correction. The button will change to Select All to include all ports for correction.
To learn more about Port subset correction, go to Port Subset Correction (Devolve Calibration).
Correction Results
Correction results are displayed in this table. This is the same table displayed when the user right-clicks on the Cal pane of the status bar at the bottom of the screen. The following indicate the correction applied:
F1 - 1-port calibration.
eR - Enhanced response.
Blank - No correction applied.
F - Multiport calibration.
|
