In
the tree view, click  Instruments.
A table
appears in the right pane with LAN and GPIB connectivity parameters for
up to ten signal generators.
Instruments.
A table
appears in the right pane with LAN and GPIB connectivity parameters for
up to ten signal generators.

Enter the signal generator connection information.
Turn on the signal generator and the computer, if necessary.
Run the Signal Studio software, and establish communication between the software and the signal generator.
In
the tree view, click Instruments.
A table
appears in the right pane with LAN and GPIB connectivity parameters for
up to ten signal generators.
Enter the signal generator connection information.
For GPIB, select GPIB in the Type cell. Enter the computer's GPIB board setting in the GPIB BOARD# cell and the signal generator GPIB address in the GPIB ADDR cell. Repeat this step for any additional signal generators you want to connect.
For LAN, select LAN in the Type cell. Enter the signal generator hostname or IP address in the Host Name or IP cell. Repeat this step for any additional signal generator you want to connect.
Click the State check box of each signal generator connection you want to activate.
Validate the connections.
To validate
the connection for a specific signal generator, click anywhere in its
row. An indication arrow ![]() moves to the row of the signal generator
you selected. Click Test Connection
and observe the messages in the Result
and Note cells.
moves to the row of the signal generator
you selected. Click Test Connection
and observe the messages in the Result
and Note cells.
To validate the connections for multiple signal generators, click Test All Connections and observe the messages in the Result and Note cells.
If any connections fail or for help with error messages, refer to Troubleshooting.
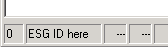
The current signal generator connection number (indicated by the arrow) and the instrument ID (LAN or GPIB) appear in the status bar, located at the bottom-left corner of the main window, as shown below.
After completion of the above steps, you can install the software license.