If you want to create a waveform with a valid standard-compliant MAC PDU, it may be easier to use the MAC PDU mode instead of the Physical mode.
The following example shows how to use the MAC PDU Editor to create a user-defined MAC PDU in an uplink or downlink burst.
|
|
If you want to create a waveform with a valid standard-compliant MAC PDU, it may be easier to use the MAC PDU mode instead of the Physical mode. |
Step 1: Select Parameters in the Burst Editing Window
Step 2: Edit the MAC PDU Definition
Step 3: Validate the Entered Data
Step 1: Select Parameters in the Burst Editing Window
Click any burst in the tree view to bring up the burst editing window.

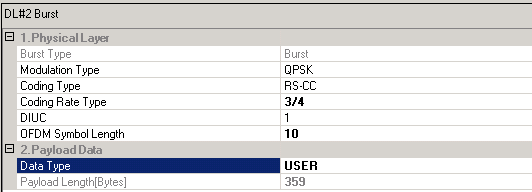
In the burst editing window, change the Coding Rate Type to 3/4 and the OFDM Symbol Rate to 10. Note that the payload data length is 359 bytes.
Click the down arrow on the far right of the Data Type cell to open the Data Type Entry window.
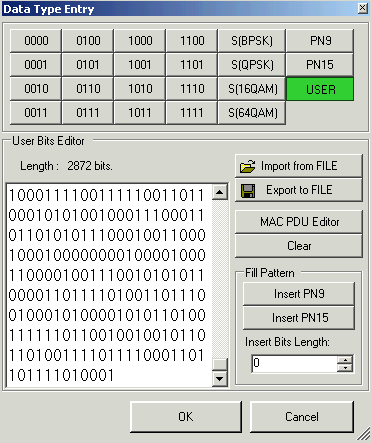
Select USER and then MAC PDU EDITOR to open the MAC PDU Definition window.

Step 2: Edit the MAC PDU Definition
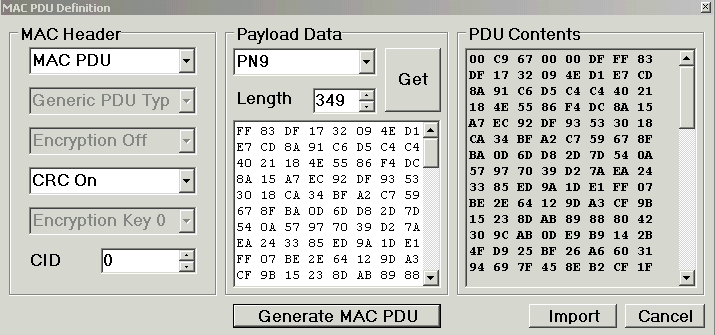
In the MAC PDU Definition window, leave the MAC Header default selections.
Select PN9 for the Payload Data Type.
Enter a value of 349 for the Length. The length value must equal the Payload Length from the burst window, not including 6 bytes for the MAC header and 4 bytes for the CRC (if they are selected).
|
|
It is possible to use the MAC PDU Editor to create multiple MAC PDUs for one data burst. You will need to divide the total payload length among the MAC PDUs. |
Click Get to generate the payload data bytes.
Click Generate MAC PDU to add the header and CRC bytes.
Click Import to copy the data into the User Bits Editor and close this window.
Step 3: Validate the Entered Data
Verify that the User Bits Editor contains 2872 bits or 359 bytes.

Click OK to close the Data Type Entry window and return to the burst editing window.
Related Website