Install Floating License Manager on the PC you want to use as the floating license server. If the PC used as the floating license server is a server-only machine and does not need the Signal Studio software, you can unzip/unpack the Signal Studio installer package and run just the Floating License Manager installer. Do one of the following:
Install the Floating License Manager only (recommended if the PC is used as a dedicated floating license server)
-
Launch the Signal Studio installer.
-
Click OK when you see a message about unpacking the fileset.
-
Uncheck "When done unzipping open: .\autoplay.exe" and click Unzip to unpack the Signal Studio fileset to the default location.
-
When finished, Click OK, then close the WinZip Self-Extractor.
-
Launch the Floating License Manager installer.
Install Signal Studio software with the Floating License Manager
Floating License Manager is installed with the Signal Studio software; however, installing the entire Signal Studio software package and the accompanying licensing services is not necessary if your PC is to be used as a dedicated floating license server. In this case, follow the steps to install the Floating License Manager only.
-
Launch the Signal Studio installer.
-
Follow the steps and use the default option selections to install both the Signal Studio software and the Floating License Manager.
Launch the Floating License Manager from the Windows Start menu.
Select Start floating license server with a license file from the Floating License Manager's startup menu.
Click the Add button and browse to the location where you store the license files.
Select the license files that you want to add to the license server and click Open.
Click Next. Floating License Manager's License Server Setup Wizard will configure the license server. A dialog will appear to indicate that the license server is being configured.
Click Finish when you see a message that the licenses have been installed and configured successfully.
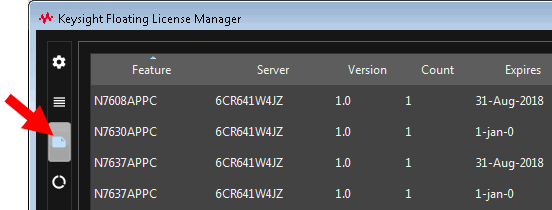
Click the Licenses icon to check the available licenses on the newly created server.

The licenses have been installed on the floating license server.