Multiport / Multi-Channel Measurement Tutorial
The capability demonstrated here was previously known as Option 400 - Advanced Measurement Capability. This includes:
-
Multiport Measurement capability - This allows you to make measurements on any arbitrary pair of ports of a 4-port Keysight network analyzer.
-
Touchstone and .sNp File Import - Learn more.
-
S parameter Display - Learn more.
This capability is now included with your N1500A "AU" subscription service. Learn more.
The following tutorials demonstrate the use of Multiport and Multi-channel measurements to use two different sample holders connected between two different pairs of ports on a 4-port PNA.
A standard section of X-band waveguide is connected between ports 1 and 2. At the same time a 50 Ω transmission line (P/N 85051-60007) will be connected between ports 3 and 4.
Both measurements are made in two different channels.
Set Up Measurement 1
Set up the first measurement and measure a Freespace air sample as described in Waveguide Calibration and Measurement Example.
Measurement 1 is between ports 1 and 2 of the PNA.
-
To select the Opt.001 Measurement Method, click Preferences, then Transmission Line and Free Space Measurements
-
Click Measure, then Define Measurement, then Lookup Table.
-
Select X-Band Waveguide, then click Apply.
-
Click the Sample Holder tab.
-
For Sample thickness, enter .354 inch.
-
Click the Select Ports tab.
-
Select 1st port = 1, then Select 2nd Port = 2.
-
Click OK.
Perform the calibration
Perform a calibration following the appropriate procedure for your network analyzer to perform a 2 port Waveguide Calibration.
On the PNA, in the Calibration completed page of the Calibration Wizard, click Save as a User CalSet and enter a descriptive name such as "Ports12 XBand WG".
Trigger a measurement
Trigger a measurement of the empty sample holder fixture. The MUT in this instance is air, a commonly-available material. The results should be at εr’ ~ 1.0.
With these results you can now either insert another MUT into the sample holder between ports 1 and 2 or continue on with the tutorial to make measurements with a sample holder connected between ports 3 and 4.
Set Up Measurement 2
For this measurement, we will use a 7.0 mm Coaxial airline.
Measurement 2 is between ports 3 and 4.
-
Click Measure, then Channels, then New. Channel 2 is created.
-
Click Measure, then Define Measurement, then Lookup Table
-
Select 7.0 mm Coaxial airline, then click Apply
-
Click the Sample Holder tab.
-
For Sample thickness, enter .001 inch
-
Click the Select Ports tab.
-
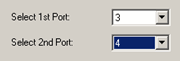
Select 1st port = 3, then Select 2nd Port = 4.
-
Click OK.
-
The instrument presets and displays a S33 measurement in Polar format.
-
The Status Bar indicates that ports 3 and 4 are now the active measurement ports as shown in the red circle in the following image.

Perform a calibration
Perform a 2 port calibration on the PNA between ports 3 and 4.
Again, at the end of the PNA Cal Wizard save the Cal Set as a user cal set with a descriptive name that can be easily remembered.
Trigger a measurement between Ports 3 and 4
As before, trigger a measurement of the empty sample holder fixture connected between ports 3 and 4. The MUT in this instance is air, a commonly-available material. The results should be at εr’ ~ 1.0.
A 2nd trace is created for this new port selection, as shown in the following image. The red circle shows the port numbers of the active trace. In this case the active trace is Tr2 and it is the measurement of air made using the 7 mm airline between ports 3 and 4.
Click the Tr1 icon in the left pane to select the measurement of air in the X-band waveguide made between ports 1 and 2 on the PNA. The indicator will display Port 1, 2.
Switching between port setups to take multiple measurements
We will now make another measurement with our X-band waveguide on ports 1 and 2.
Select the ports 1 and 2 chart to change the Active Channel.