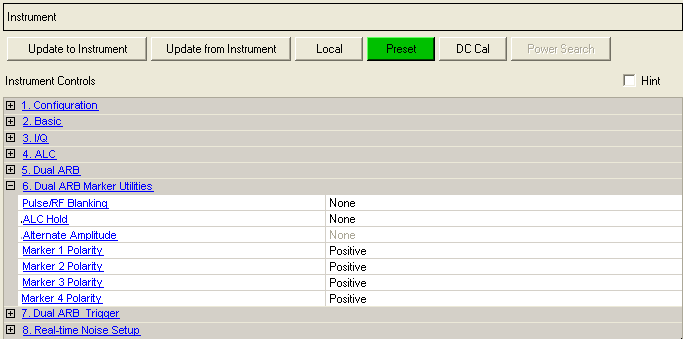
The following figure is a composite of all supported instruments, so some parameters may not apply to your instrument.
Choice: None | Marker 1–4
Default: None
Double-click or use the drop-down menu to select an RF blanking function. Pulse/RF Blanking turns off the RF output signal during specific conditions determined by the marker.
– disables RF blanking.
through – selects a marker to activate RF blanking.
RF blanking incorporates ALC hold, so you do not need to select ALC hold when using RF blanking.
Do not blank longer than 100 ms to avoid exceeding the ALC hold limit.
Marker 3 and Marker 4 settings are overridden if Parameter Optimization is enabled.
Choice: None | Marker 1–4
Default: None
Double-click or use the drop-down menu to select a marker for ALC hold. Use ALC hold when you have a waveform signal that has idle periods, or when the increased dynamic range with RF blanking is not desired.
– disables ALC hold.
through – assigns a marker for the ALC hold function.
When the specified marker polarity is positive and the marker signal is low (no marker points), ALC hold is on, and the output power level does not respond to changes to the signal amplitude. When the marker signal is high, the ALC samples the waveform points and averages the waveform amplitudes to set the ALC circuitry for the next ALC hold period.
RF blanking incorporates ALC hold, so there is no need to select ALC hold when using RF blanking.
Limit ALC Hold to no more than 100 ms, as the ALC Level may degrade.
The hold selection remains until you reconfigure it, preset the instrument, or cycle the instrument power.
Incorrect ALC settings can cause a sudden unleveled condition to occur. An unleveled RF output can damage a DUT or connected instrument. Ensure that you set markers such that the ALC obtains a sample that accounts for the high power levels within the signal.
Marker 3 and Marker 4 settings are overridden if Parameter Optimization is enabled.
Choice: None | Marker 1–4
Default: None
Double-click or use the drop-down menu to select a marker for enabling the alternate amplitude function.
When using the Alternate Amplitude function, do not attempt to use the timeslot power in the Timeslot node, to adjust the timeslot's power. The Alternate Amplitude feature has priority over the Timeslot node's Power parameter.
It is not recommended that the Alternate Amplitude function be used with waveform sequences. If the Alternate Amplitude function is used with waveform sequences, the last waveform in the sequence's result is used to calculate the Alternate Amplitude settings and is then applied to all of the other waveforms in the sequence. This behavior may or may not be correct for all the other waveforms in the sequence.
The alternate amplitude function is unique to the ESG E4438C with standard electronic attenuator (not compatible with Option UNB mechanical attenuator or Option 506). Refer to the ESG E4438C's Data Sheet and the User's Guide.
The Alternate Amplitude function is not compatible with the MXG, EXG, EXT, or PXB.
– disables the alternate amplitude function.
through – assigns a marker for the alternate amplitude function.
Marker 3 and Marker 4 settings are overridden if Parameter Optimization is enabled.
When the specified marker polarity is positive and the marker signal is low (no marker points), alternate amplitude is off. When the marker signal is high, the alternate amplitude function is on.
Configure the alternate amplitude parameters from the Amplitude hardkey menu of the signal generator.
For more information about alternate amplitude and marker settings, refer to the Amplitude, Marker, and Timeslot Graph Settings and to the instrument's User's Guide.
This parameter is not available for all instrument model numbers and may be grayed out.
Choice: Positive | Negative
Default: Positive
Double-click or use the drop-down menu to select the active polarity for Marker 1.
– the marker signal is high during the on marker points.
– the marker signal is high during the period of off marker points.
Choice: Positive | Negative
Default: Positive
Double-click or use the drop-down menu to select the active polarity for Marker 2.
– the marker signal is high during the on marker points.
– the marker signal is high during the period of off marker points.
Choice: Positive | Negative
Default: Positive
Double-click or use the drop-down menu to select the active polarity for Marker 3.
– the marker signal is high during the on marker points.
– the marker signal is high during the period of off marker points.
Choice: Positive | Negative
Default: Positive
Double-click or use the drop-down menu to select the active polarity for Marker 4.
– the marker signal is high during the on marker points.
– the marker signal is high during the period of off marker points.