Memory Setup
Use the Memory 1, 2, 3, or 4 Setup dialog to load saved Responses into the selected Memory, view the Memory on the graph, and to customize the display of the memory's plots. Loading a response into a Memory automatically and immediately saves a memory response file (for example, ResponseMemory1.rspx).

To open this dialog:
- Click the arrow buttons in the Response/Memory Selection bar to select the Memory.
- Click Setup.

These same settings can also be accessed in the Response Memories dialog.
Dialog Contents
 Click to turn the display of the loaded Memory plots on or off.
 Click to give the loaded Memory plots a custom name or reset the name to its default value.

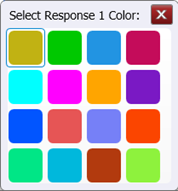 Click to change the color of the Memory plots. After selecting the color, close the Color dialog.
![]() Click these buttons to load a saved Response file (*.rspx) into the selected Response memory, reload a file already in memory, or clear file data from the memory. By default, Response files are saved in the \Responses user data folder.
Click these buttons to load a saved Response file (*.rspx) into the selected Response memory, reload a file already in memory, or clear file data from the memory. By default, Response files are saved in the \Responses user data folder.
 Click to load the currently displayed Response into the selected Response memory.
 Select to display response flatness measurements.
| Measurement | Display Flatness Measurements Setting |
|
|---|---|---|
|
|

|
|
| Maximum | ■ | |
| Minimum | ■ | |
| Average | ■ | |
| Bandwidth | ■ | ■ |
| Peaking | ■ | ■ |
| Gain Frequency 1 | ■ | ■ |
| Zero Frequency 1 | ■ | ■ |
| Pole Frequency 1 | ■ | ■ |
| Footnotes: | ||
| 1. Displayed if Model Measurements selected in PLL Model Settings dialog. | ||
 Click to open the PLL Model Settings dialog from which you can display model plots and configure the model.