Getting Started
This topic describes how to quickly get started using the Battery Test and Emulation application.
Run the Battery Test and Emulation application by clicking the ![]() icon in the left panel.
icon in the left panel.
See Process Overview for a high-level description of the battery emulation process.
Graphical Overview of Battery Test and Emulation Application
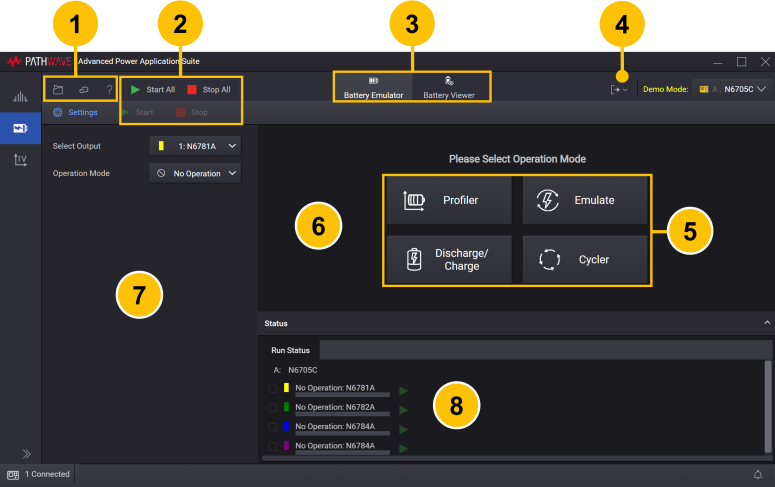
| 1 | File, Options, and Information and Technical Support menu. | |
| 2 | Run the application (Start) or run the application on all channels (Start All). Stop the application (Stop) or stop the application on all channels (Stop All). |
|
| 3 | Select Battery Emulator or Battery Viewer function. | |
| 4 | Export measurement data and images. | |
| 5 | Select an operation mode. This only displayed at start-up. | |
| 6 | Display the battery chart information for the selected operating mode. | |
| 7 | Settings panel. Configure the selected output and operation mode settings. | |
| 8 | Status panel. Select and configure the output(s) of the connected instrument. |
The following steps show you how to quickly get started. They describe how to connect to an N6705 DC Power Analyzer, an N7900 Advanced Power System, and an RP7900 Regenerative Power System. In the example given, a battery is connected to the instrument and a discharge profile is created. The final step involves saving and exporting the discharged battery profile data.