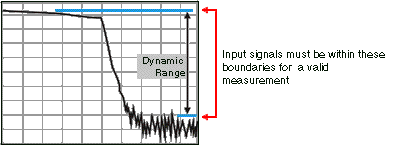
Dynamic range is the difference between the analyzer receiver's maximum input power and the minimum measurable power (noise floor). For a measurement to be valid, input signals must be within these boundaries.
Increasing dynamic range is important if you need to measure very large variations in signal amplitude, such as filter bandpass and rejection. The dynamic range is shown below for an example measurement.
To help reduce measurement uncertainty, the analyzer dynamic range should be greater than the response that the DUT exhibits. For example, measurement accuracy is increased when the DUT response is at least 10 dB above the noise floor. The following methods can help you increase the dynamic range.
Other topics about Optimizing Measurements
Increase the DUT input power so that the analyzer can more accurately detect and measure the DUT output power. However, use caution - too much power can damage the analyzer receiver or cause compression distortion.
Caution! Receiver input damage level: +15 dBm.
See how to increase input power to the device
Tip: You can further increase dynamic range by using an external booster amplifier to increase the input power to the DUT. See High Power Amplifier Measurements.
Reduce the Receiver Noise Floor
You can use the following techniques to lower the noise floor and increase the analyzer's dynamic range.
Reduce crosstalk between the PNA receivers when measuring signals close to the noise floor. See Receiver Crosstalk.)
Use Sweep Averaging - learn more about Sweep Average
Reduce the IF Bandwidth - learn more about IF Bandwidth.
In Segment sweep mode each segment can have its own IF bandwidth. For example, when measuring a filter:
In the passband, the IF bandwidth can be set wider for a fast sweep rate, as long as high-level trace noise is kept sufficiently small.
In the reject band, where noise floor contributes significantly to measurement error, the IF bandwidth can be set low enough to achieve the desired reduction in average noise level.
The simplest method to improve dynamic range is to remove a RCVR 'n' IN front-panel jumper and route the DUT output directly into that PNA receiver. This bypasses the directional coupler and limits the ability to provide Full Error Correction because the signal can not be applied in the reverse direction.
Refer to the PNA specifications to learn the dynamic range that is available with direct receiver access.
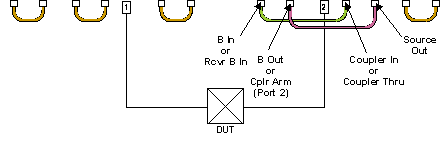
Another method to improve dynamic range is to reverse the signal path in the test-port coupler and bypass the loss typically associated with the coupled arm.
As shown in the following graphic, the signal is applied to Port 2. The signal bypasses the coupled arm via the jumper cable connected to the Coupler Thru (or Coupler In) and the Receiver B In (or B In) ports.
When making measurements in reverse direction, the system dynamic range is degraded by 15 dB.
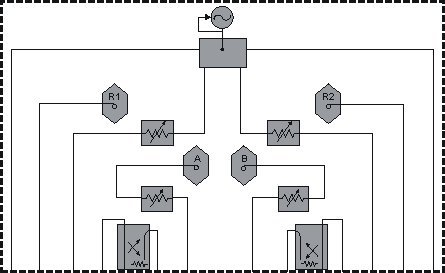
Note: Your analyzer's block diagram may contain different components than shown below. To see the block diagram for your PNA model, see the bottom of the specs/data sheet.
|
|
|
|
Front-panel Jumpers (image)