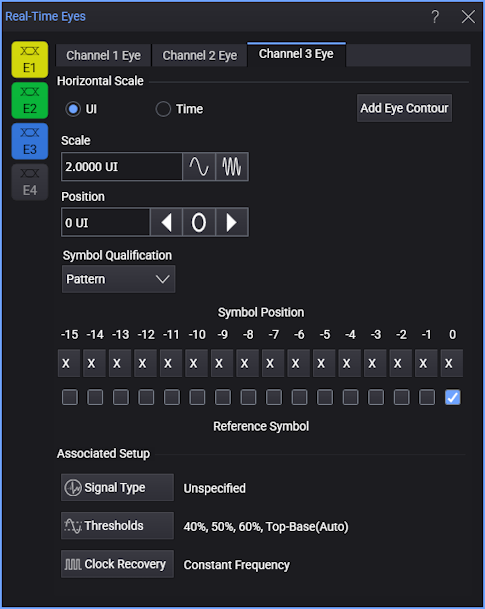
Real-Time Eyes Dialog Box
The Real-Time Eyes dialog box lets you set up the real-time eye display for signals. For any defined waveform (that is, a channel, math function, waveform memory, etc.), there is a button for enabling the real-time eye view of that waveform.
You can open this dialog box by choosing Setup > Real Time Eye... from the main menu or by clicking the "+" add button in the Signal Management dialog box.
The buttons on the left side of the dialog box let you quickly enable or disable individual real-time eye views.
There are tabs across the top contain settings for the individual real-time eye views that are enabled.
(For a description of the clock recovery settings, see Clock Recovery.)
Horizontal Scale
Because the real-time eye is displayed in its own grid, you can specify its scale and position separately in terms of UIs (unit intervals) or Time.
For UIs, the Scale setting specifies the number of unit intervals to show across the display. For Time, the Scale setting specifies the time per division.
The Position setting specifies the center display location.
Only the center UI is valid for the recovered clock edge. You can display up to 10 UIs to show context before and after the center UI.
Symbol Qualification
The symbol qualification options let you specify the symbols that are included the real-time eye display.
-
All — Shows all symbols in the real-time eye.
-
De-emphasis — Shows only de-emphasis symbols in the real-time eye (symbols that do not follow a transition).
-
Transition — Shows only symbols that occur after transitions in the real-time eye.
-
Pattern — Lets you qualify the real-time eye so that only symbols that occur in the specified pattern are displayed.
This option is useful, for example, when different DFE equalizations are applied depending on the preceding symbols, and you want to evaluate the DFE for a certain symbol combination.
-
Symbol Position — These buttons let you specify symbol values in the pattern or X (don't care).
-
Reference Symbol — Selects the position of symbol 0 in the pattern. Depending on which check box you select for symbol 0, the pattern can include symbols before, after, or both before and after symbol 0.
-
With PAM4 type signals, the De-emphasis and Transition symbol qualification options are not available, and symbol values can be "0", "1", "2", or "3".
With PAM3 type signals, the De-emphasis and Transition symbol qualification options are not available, and symbol values can be "0", "1", or "2".
Add Eye Contour
This button opens a dialog box where you can set up eye contours. See Eye Contour Group Setup.
Associated Setup
These buttons launch other setup dialog boxes that are important when setting up real-time eyes. For more information on these associated settings, see: