3. A Trigger is Required
A trigger signal must be provided to the oscilloscope using one of the following methods.
On an N1000A Oscilloscope
 Connect a synchronous clock signal to the front-panel
 Trigger connector. Click Setup > Trigger to open the Trigger dialog and specify Front Panel. This is the most often-used method (as well as the default) source for triggering. You can also press the front-panel Trigger Level knob to select
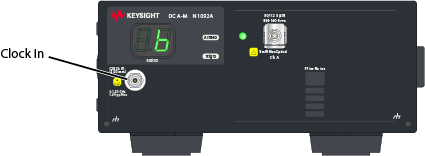
On an N109x-series DCA-M Oscilloscope
Connect the clock signal to the DCA-M's front-panel Clock In connector as shown in this picture. Click Setup > Trigger to open the Trigger dialog and specify Clock In. If the DCA-M has option CDR (clock recovery) installed, you can recover the clock from the data signal as described in the next section, "Trigger Signal is Unavailable".
Trigger Signal is Unavailable
If a trigger signal is not available, use clock recovery to recover the clock. Click Setup > Trigger and select the module that has clock recovery.
On an N1000A DCA-X, use an N1060A Precision Waveform Analyzer module to recover a clock from the input signal.
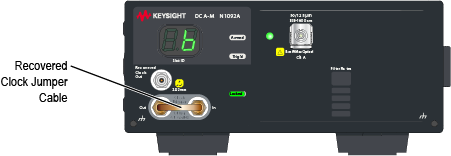
On an N109x-series DCA-M with Option CDR (clock recovery) oscilloscope, you can recover the clock from the input signal. In this case, confirm that the jumper cable shown in this picture is installed.
Trigger on Module's Data Input
Split the incoming data signal and route half of the data to the oscilloscope's trigger input. Route the other half to the module's input connector. Due to jitter and pattern dependencies, this technique shows incomplete eye diagrams and approximately 75% of waveforms are never observed in a PRBS.
Select Free Run
In Oscilloscope and Eye/Mask modes, you can also select Free Run. This selection causes the oscilloscope to trigger as soon as the trigger is armed; an external trigger is not used. Free run is asynchronous to the data and can be used to quickly examine a signal's amplitude without any timing information.