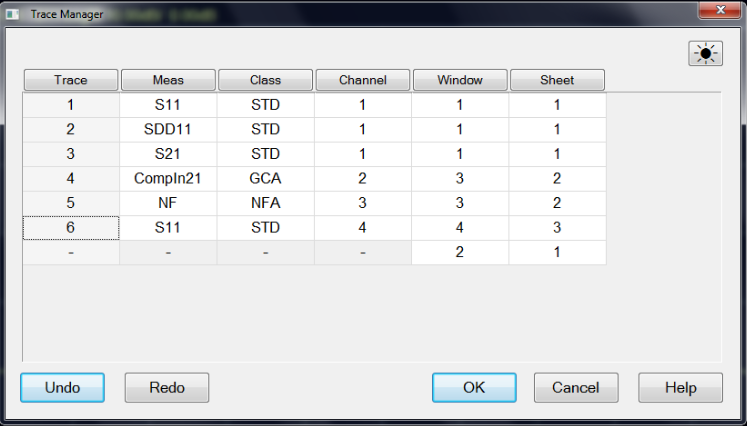
Trace Manager allows the user to see and modify all traces/channels/windows/sheets/formats in one table. The changes are updated immediately.
There is one row for each trace. By Clicking on a column heading will display the rows in ascending or descending order as defined by that column.
A row is selected by clicking on any cell in the row and the popup menu for the cell will appear. Multiple rows can be selected by click-drag-release. All selected rows will be highlighted and popup menu for the column will appear.
Undo Reverse back to the previous settings
Redo Change the settings again.
Trace Column
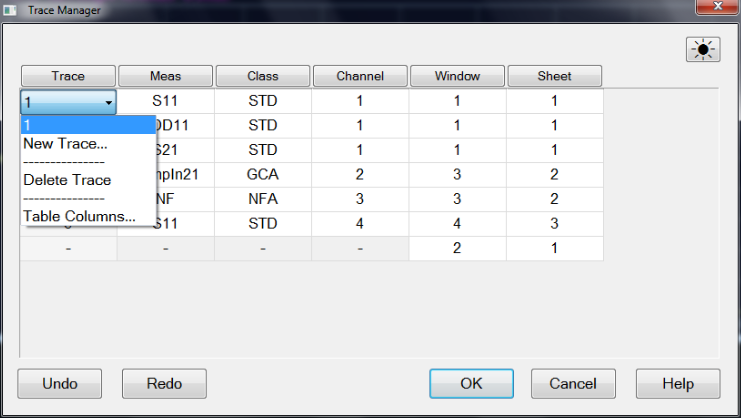
User is not able to edit trace numbers. User may select multiple rows; this allows user to delete multiple traces using the popup menu.
There is a special case where the trace entry in the row is empty. This is used to show when there is an empty window. If the users select this row and choose "Delete Trace", it will delete the empty window; this is a convenient feature; it is deleting a null trace.
New Trace To add a new trace. Selecting the cell will open the "Meas" dialog.
Delete Trace The selected trace will be deleted.
Table Columns A pop up dialog is opened which allows user to define the columns visible in the table. The default table column is: Meas/Class/Channel/Windows/Sheet.
Meas Column
Selecting the cell will open the "Meas" dialog. User cannot select multiple rows from a Meas cell.
Class Column
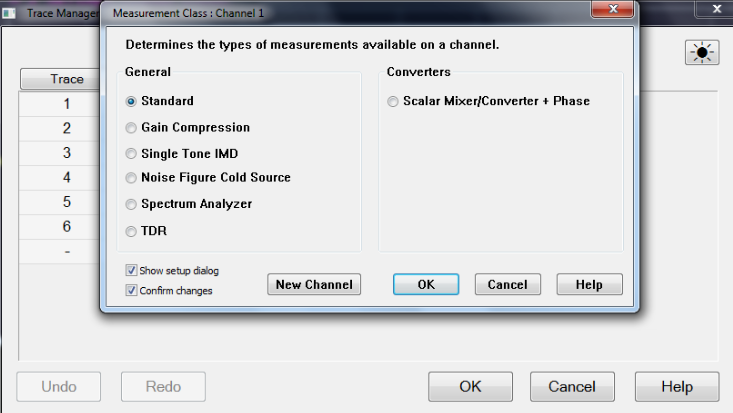
Selecting the cell will open the "Measurement Class" dialog. User cannot select multiple rows from a Class cell.
When the measurement class is changed, all traces numbers on the currently active channel will be assigned to the new measurement class. The window and sheet settings will be the same, but the "Meas" setting will be changed to default values for the selected class.
Channel Column
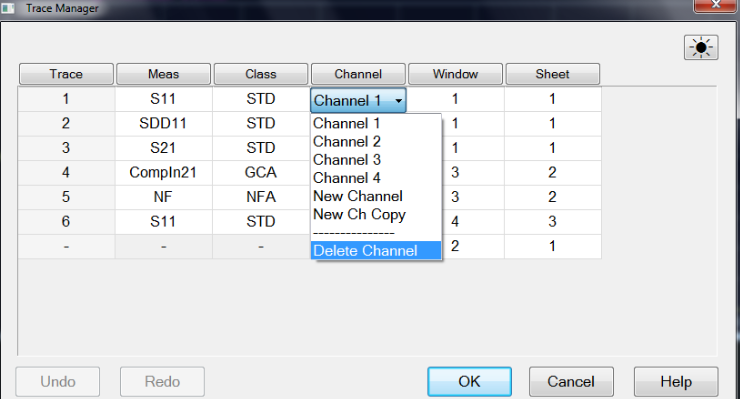
Selecting the cell will open a pulldown, and will select the row. User can click and drag to select multiple rows.
User may use the pulldown to reassign the active trace to another channel and delete the active channel.
When the channel for a trace is changed, the "Meas" setting will likely be changed.
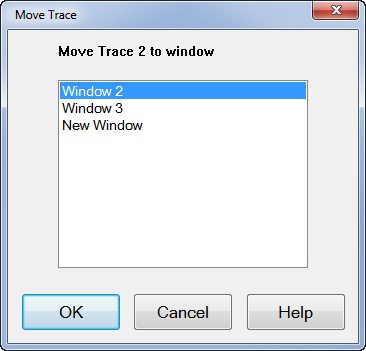
Window Column
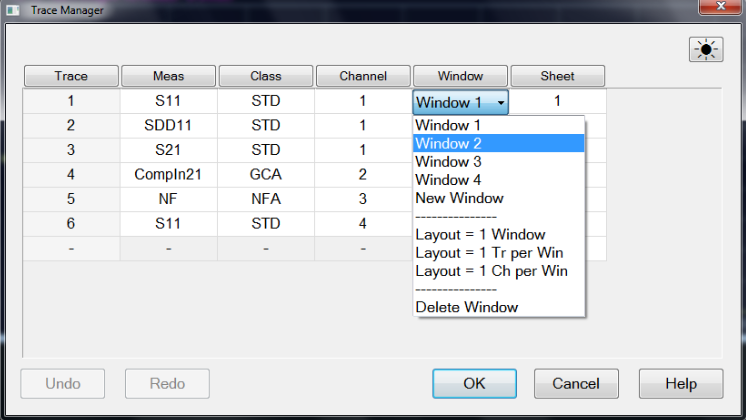
Selecting the cell will open a pulldown, and will select the row. User can click and drag to select multiple rows.
Changing the layout of the windows will reset window titles.
User may use the pulldown to reassign the active trace to another window, delete the active window and all traces on that window and change the layout of the windows.
If the active row has no trace assigned, then the window pulldown will not allow user to change the window number.
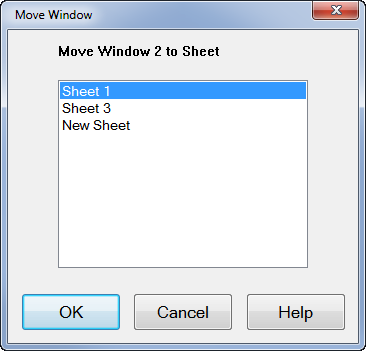
Sheet Column
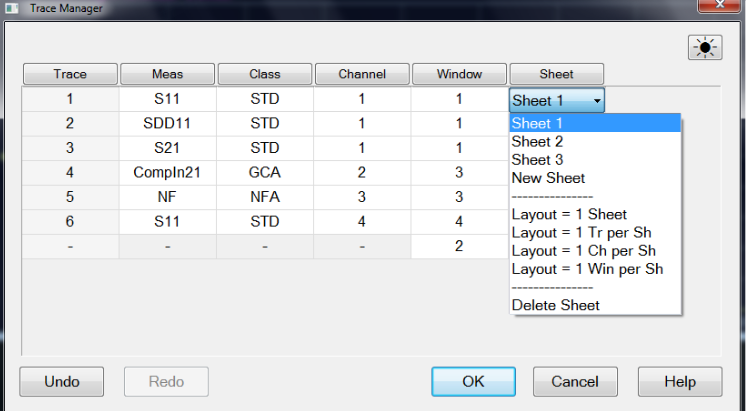
Selecting the cell will open a pulldown, and will select the row. User can click and drag to select multiple rows.
User may use the pulldown to reassign the active trace to another sheet, delete the active sheet and all traces on that sheet and change the layout of the sheets.
If the active row has no trace assigned, then the sheet pulldown will not allow user to change the sheet number.
Format Column
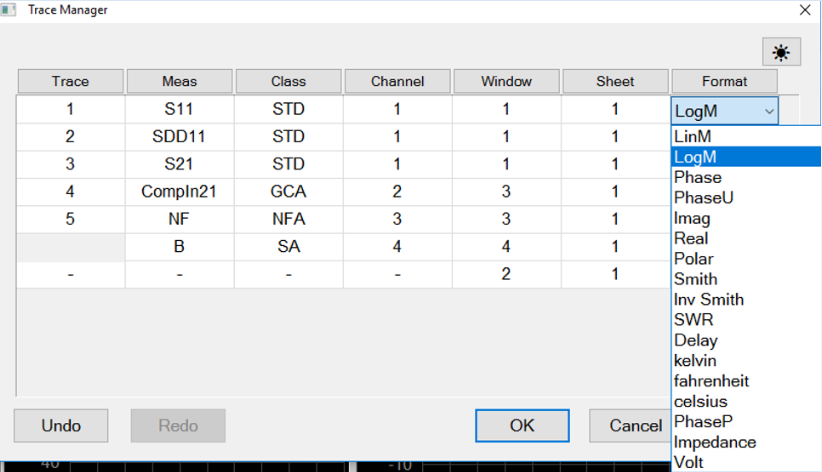
Selecting the cell will open a pulldown, and will select the row.
User may use the pulldown to select the trace formats. When the measurement class is SA, the selectable formats are only LinM and LogM.