Acquisition Waveform Setup
Use the Acquisition Setup dialog box's Waveform tab to define the way you want the instrument to acquire data from the input waveform.
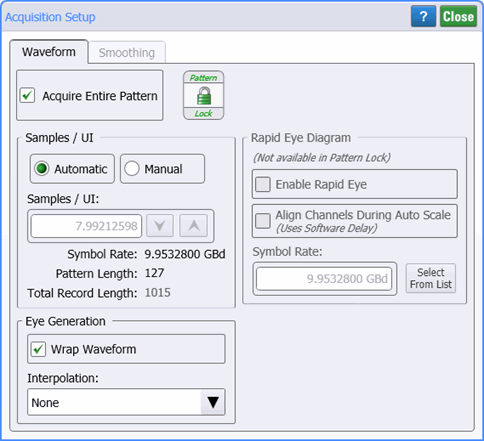
You can select the waveform's record length as Samples/Waveform or Samples/UI, unless you've selected to Acquire Entire Pattern (requires pattern lock) in which case only Samples/UI is allowed. A Pattern Lock button is provided in the dialog.
Samples/Waveform is the number of waveform samples acquired across a single sweep. Changing the Samples/Waveform (or Samples/UI) affects the following items:
- Sweep time (display update rate)
- Histograms
- Measurements
In addition, you can select Automatic or Manual for the record length. Automatic, the default setting, sets the record length to optimize the single record length versus total database update rate. Automatic is the recommended setting when using:
- Color grade or gray scale waveforms
- Histograms
- Eye mask tests
Manual allows you to define a record length between 16 to 10,485,760 Samples/Waveform (or 1 to 4096 Samples/UI). The default value is 2048 Samples/Waveform or 4096 Samples/UI. Increasing the number:
- Reduces the time spacing between the measurement points. The time spacing between measurement points can affect interpolation between the points used to make measurements.
- Increases the time required to capture a single sweep.
Note: The optimum record length is based on the width of the display graticule (2048 points). Therefore, in Automatic, a multiple of the graticule width is selected as the record length. This results in an even distribution of data points sampled from the input waveform. For example, Automatic may select 4096 points (two times 2048) as the record length. Manually setting the record length to a value other than a multiple of 2048 results in an uneven histogram of the waveform.
Acquire Entire Pattern
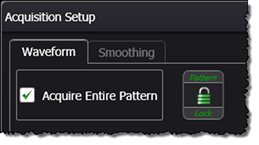 In Oscilloscope Mode and Eye Mode, you can select Acquire Entire Pattern which captures the entire pattern waveform. Pattern Lock must be turned on before the Acquire Entire Pattern selection becomes available. On each waveform acquisition, data from the entire pattern is acquired. (Normally, only data from the displayed portion of the pattern is acquired.) The Minimum Timebase Position control establishes the start of the pattern and the Symbol Rate and Pattern Length determine the time duration.
Long patterns may require some noticeable time to be acquired. When acquiring the entire pattern, the Pattern Navigation Display shown here is displayed at the top of the display.

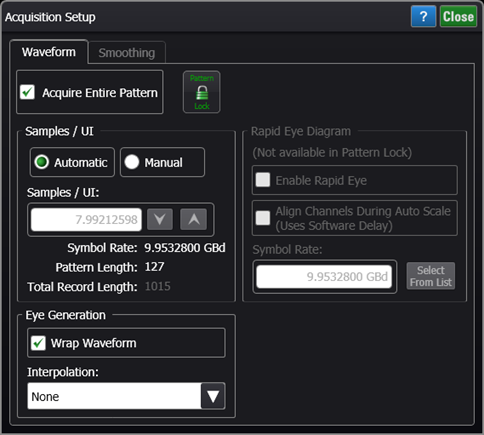
As shown in the following picture, when Acquire Entire Pattern is selected, Samples/UI is available. In Eye/Mask mode, the Eye Generation selections are displayed in the dialog.
Wrap Waveform
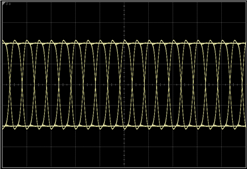
In Eye Mode with Pattern Lock on and Acquire Entire Pattern selected, Wrap Waveform is displayed. Select Wrap Waveform to view an eye diagram. Since the displayed eye diagram is built from a pattern lock, you can apply waveform averaging via the Smoothing controls. When Wrap Waveform is not selected, a single-valued pattern waveform is displayed. In Eye/Mask mode you can save the pattern in an ASCII file (*.csv) or internal format file (*wfmx). Click File > Save > Waveform and select either Pattern Waveform or Waveform Files (internal).
Wrap Waveform OFF
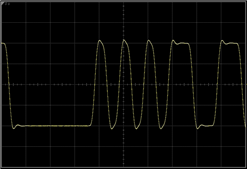
Wrap Waveform ON
In Jitter Mode, the waveform record length setting can not be changed.
 In Eye/Mask mode with pattern lock on, Acquire Entire Pattern selected, and Wrap Waveform selected, you may notice that the Sample/UI entry is a real number instead of an integer. FlexDCA uses a real number so that, if wrapped, the entire eye diagram is filled in without needing to interpolate between sample points. With an integer entry, the samples for each symbol in the pattern would occur at the same time offset as measured from the start of each symbol. With Wrap Waveform on, the samples for each symbol would be aligned and would be drawn on the display at the same horizontal offset (although their amplitude may vary). As a result, the eye diagram would take much longer to be filled. An integer number can be manually entered, if needed.
Rapid Eye Diagram
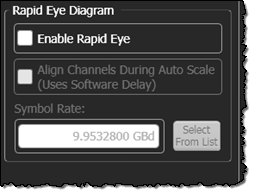
On the right side of the dialog, you'll find settings for the Rapid Eye Diagram feature, which significantly reduces the time required to acquire waveform samples on channels and differential waveforms. It employs several techniques that improve measurement efficiency. To turn on Rapid Eye, first disable pattern lock if it is on. Rapid Eye does not work with pattern lock. Select Enable Rapid Eye to turn on Rapid Eye and then enter the Symbol Rate.
If multiple eye diagrams are displayed, select Align Channels During Auto Scale to enable an Auto Scale to align the eyes. The eye diagrams are aligned using software delay.
Use Rapid Eye with channels or differential waveforms only. Rapid Eye is not compatible with functions.
In FlexDCA, Rapid Eye is not available when pattern locking is on. When pattern lock is on, the Acquire Entire Pattern the feature is available in this dialog which provides as fast as measurement throughput times as Rapid Eye. As a result, if pattern lock is off, use Rapid Eye. If pattern lock is on, use Acquire Entire Pattern.