Lesson 3. Creating a Butterworth User Application Script
In this MATLAB example, you'll learn how to modify the Butterworth filter operator that you created in Lesson 2 to be a MATLAB standalone application. MATLAB standalone applications can be run using the MATLAB Runtime without have to install MATLAB.
MATLAB Applications are created using the MATLAB Compiler. The resulting *.exe file can be run without having MATLAB installed on the N1000A or PC. However, the MATLAB Runtime must be installed on the N1000A or PC where FlexDCA is installed and the MATLAB Runtime version must be the same version as was targeted when the MATLAB Application was created.
Procedure
- Complete Lesson 2. The resulting Butterworth.xml and Butterworth.m files should be in FlexDCA's user functions folder (\Documents\Keysight\FlexDCA\User Functions).
- Using a text editor, open the Butterworth.xml file. Change the content of the file's <Script> element from Butterworth.m to algorithm.exe. We will create algorithm.m which will be compiled into algorithm.exe.
- <?xml version="1.0" encoding="utf-8"?>
- <Function xmlns:xsd="http://www.w3.org/2001/XMLSchema"
- xmlns:xsi="http://www.w3.org/2001/XMLSchema-instance">
- <Script>algorithm.exe</Script>
- <Name>Butterworth</Name>
- <Abbreviation>Butter</Abbreviation>
- <Comments>Creates a Butterworth filter</Comments>
- <FunctionType>1 Source</FunctionType>
- <Control Name = "FilterType">
- <Enumeration>
- <Default>low</Default>
- <Selection>low</Selection>
- <Selection>high</Selection>
- </Enumeration>
- </Control>
- <Control Name = "FilterOrder">
- <Integer>
- <Min>1</Min>
- <Max>4</Max>
- <Units>None</Units>
- <Default>2</Default>
- </Integer>
- </Control>
- <Control Name = "FilterCutoff">
- <Double>
- <Min>10e6</Min>
- <Max>1000e9</Max>
- <Resolution>1000</Resolution>
- <Units>Hertz</Units>
- <Default>7.5e9</Default>
- </Double>
- </Control>
- </Function>
- Make a copy of the Butterworth.m script file and rename the copy algorithm.m. The name of a script file for a standalone application must always be algorithm.m.
- Open the algorithm.m scipt file in MATLAB. Make the following edits to the script as shown in this listing:
- Add the first line in the script as shown in green.
- Add the reference
InputVars.shown in red before every FlexDCA input variable in the script. Do not forget to add the period character "." betweenInputVars.and the variable. For example,SrcDatabecomesInputVars.SrcData. - Add a structure of output variables shown in blue to the end of the script.
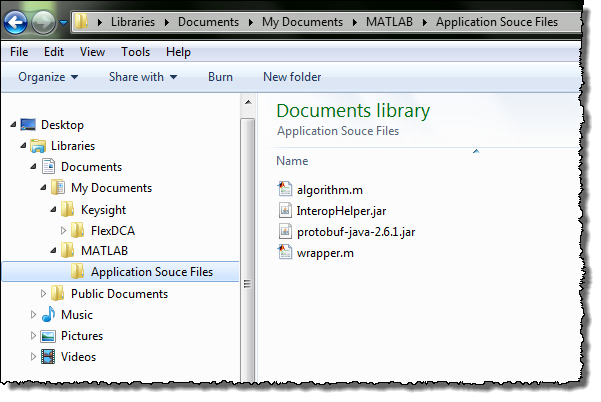
- Create a folder to which you will save the files that will be compiled into your standalone application. The following simplified picture shows a project folder (Application Source Files) created within MATLAB's default project folder. You can give your folder any name that you like. Place the files shown in the picture into your folder. The file are:
- Move the algorithm.m scipt file that you created in the previous step.
- Copy three additional files that are required when compiling a MATLAB scipt into a MATLAB standalone application:
- InteropHelper.jar
- protobuf-java-2.6.1.jar
- wrapper.m.
- Your folder for compiling your script should now have the files shown in the following picture.
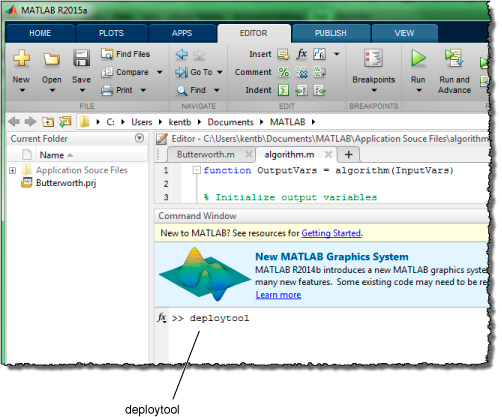
- In MATLAB's Command Window, run the deploytool command to view the Compiler dialog.
- In the Compiler dialog, double click Application Compiler to run the compiler.
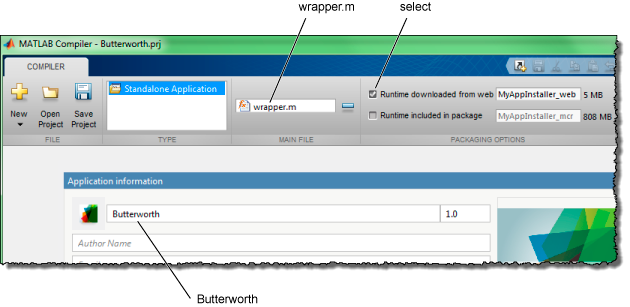
- In the MATLAB Compiler, click the button to add the wrapper.m script from your source folder. Select Runtime downloaded from web as show in this picture. Finally, in the Application information field enter the name for your application. This will be the name given to your .exe file.
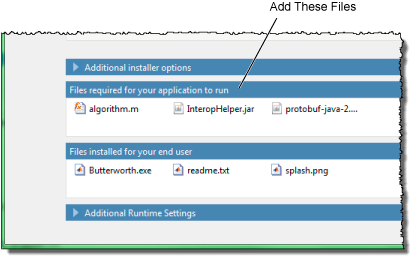
- In the Files required for your application to run field, click the
 button and add the algorithm.m, InteropHelper.jar, and protobuf-java-2.6.1.jar files as shown in the following picture.
 - Save your standalone application project, and click the Compiler's Package button.
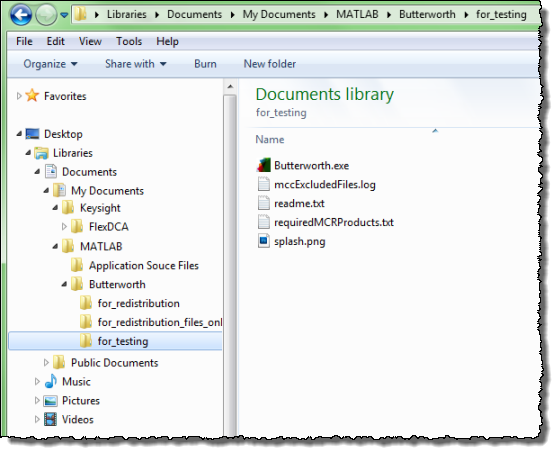
- After the compile completes, close the MATLAB compiler and open File Explorer. MATLAB has placed the compiled files for the application in the MATLAB\Butterworth\for_testing folder as shown in this picture. The executable file is Butterworth.exe. Remember, that at the start of this lesson you edited the Butterworth.xml file's <Script> element to use the Butterworth.exe file.
- Copy the Butterworth.exe file to FlexDCA's user functions folder (\Documents\Keysight\FlexDCA\User Functions).
- On each PC or N1000A where you want to run your executable, perform the following steps:
- Install FlexDCA
- Place the Butterworth.xml and Butterworth.exe files in FlexDCA's user functions folder (\Documents\Keysight\FlexDCA\User Functions).
- Install the correct MCR version.
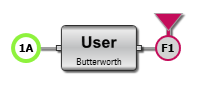
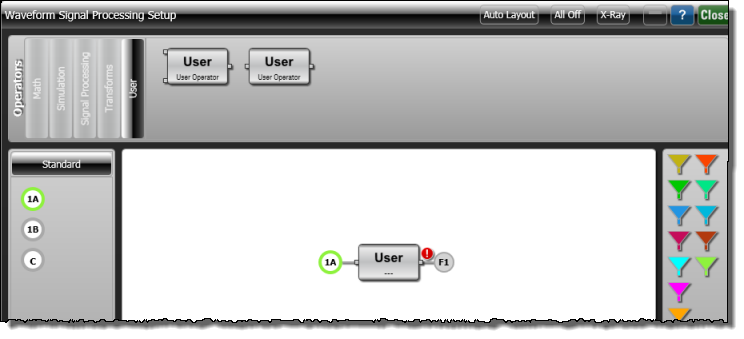
- On FlexDCA's menu, click Measure > Waveform Signal Processing (Math).
- At the top of the Waveform Signal Processing dialog, select the User tab and drag a single-input User operator icon into the operator construction area as shown in the following picture.
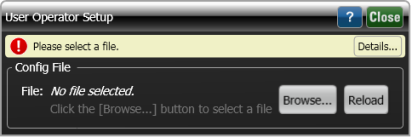
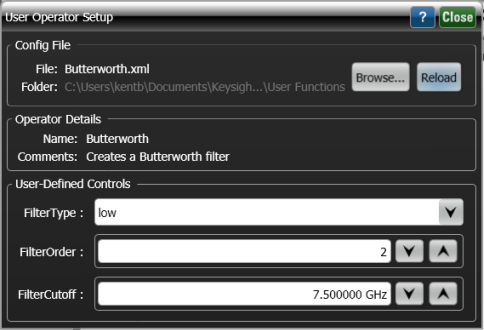
- Click on the user operator to open the User Operator Setup dialog.
- In the dialog, click Browse and select your XML configuration file, Butterworth.xml which points to the Butterworth.exe file.
- In the Waveform Signal Processing dialog, drag a Function Color to the User Operator as shown in the following picture. This will display the output waveform of the function.
All letters in algorithm.m must be typed in lower case. Naming the function Algorithm.m will break the script.
|
|
function OutputVars = algorithm(InputVars) % Initialize output variables FiltData = []; % Output waveform Gain = 1.0; XUnits = 'Same'; YUnits = 'Same'; ErrorMsg = ''; % Gather input data SrcData = InputVars.SrcData; % Input waveform XOrg = InputVars.XOrg; XInc = InputVars.XInc; IsPeriodic = InputVars.IsPeriodic; % Gather user-defined controls N = InputVars.FilterOrder; Fc = InputVars.FilterCutoff; FType = InputVars.FilterType; % Constant output variables FilterDelay = N * 0.112 / Fc; FilterWidth = N / Fc; if ~isempty(SrcData) % Create the filter Wn = 2 * XInc * Fc; [B,A] = butter(N, Wn, FType); numPts = length(SrcData); if IsPeriodic % Perform the filtering circularly using ffts. fftSrcData = fft(SrcData); h = freqz(B, A, numPts, 'whole').'; FiltData = real(ifft(fftSrcData .* h)); % Rotate to remove FilterDelay. shift = round(FilterDelay / XInc); FiltData = circshift(FiltData, [0, -shift]); else startIndex = ceil(FilterWidth / XInc) + 1; if (startIndex > numPts) ErrorMsg = 'Too few points. Pipeline eats up entire waveform.'; else % Perform the filtering FiltData = filter(B, A, SrcData); % Remove filter delay and pipeline FiltData = FiltData(startIndex:end); leadPipeline = FilterWidth - FilterDelay; XOrg = XOrg + leadPipeline; end end end OutputVars = struct(... 'FiltData', FiltData,... 'XOrg', XOrg,... 'XInc', XInc,... 'Gain', Gain,... 'FilterWidth', FilterWidth,... 'FilterDelay', FilterDelay,... 'XUnits', XUnits,... 'YUnits', YUnits,... 'ErrorMsg', ErrorMsg); end |
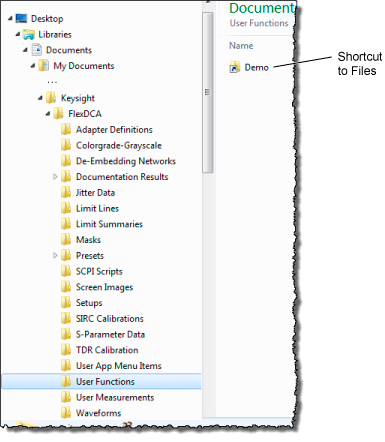
| From the shortcut folder located in \My Documents\Keysight\FlexDCA\User Functions |
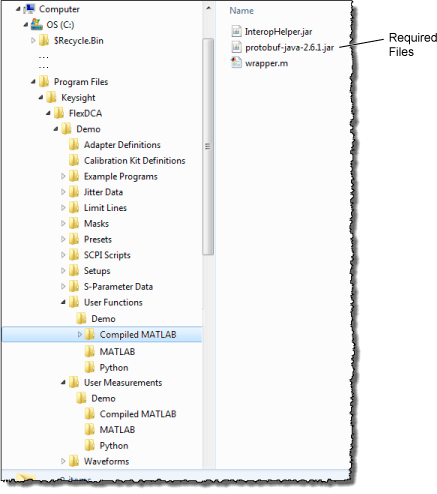
Directly from the folder \Program Files\Keysight\FlexDCA\Demo\ User Functions\Demo Compiled MATLAB |
|---|---|
|
|
Do not place the Butterworth.xml file into this folder.


You may have to wait a few seconds for the waveform to appear and the waring icon (![]() ) to be removed.
) to be removed.