Lesson 2. Creating a "Show Vars" User Operator Script
Instrument
DCA-X
N109x
UXR Scope
Flex Apps:
FlexDCA
FlexRT
This Python example of a user measurement script simply shows the input variables that have been passed from FlexDCA into Python. It illustrates this action and may be useful for troubleshooting. The variables are printed to FlexDCA's Show dialob box and to the text file c:/Temp/Show User Operator Input Vars.txt. After you've been successful with this example, try the Lesson 3. Butterworth User Operator script.
Procedure
- Make sure that you have fullfilled the basic requirements for Python.
- Copy the following XML listing into a text editor. Name the file ShowOperatorInputVars.xml and save it in FlexDCA's user functions folder (\Documents\Keysight\FlexDCA\User Functions).
ShowOperatorInputVars.xml
Drag the mouse over this listing, enter Ctrl-C to copy, and paste it into your text editor!
- <?xml version="1.0" encoding="utf-8"?>
- <Function xmlns:xsd="http://www.w3.org/2001/XMLSchema"
- xmlns:xsi="http://www.w3.org/2001/XMLSchema-instance">
- <Script>ShowOperatorInputVars.py</Script>
- <Name>Show Vars</Name>
- <Comments>Writes input variables and their values
- to the Show Output window and to the file:
- c:/Temp/Show User Operator Vars.txt
- </Comments>
- <FunctionType>1 Source</FunctionType>
- </Function>
|
- Start Anaconda's Navigator application and then start the Python editor, Spyder. In Spyder, enter the following script. Name your script file ShowOperatorInputVars.py and save it in FlexDCA's user functions folder (\Documents\Keysight\FlexDCA\User Functions). Spyder will keep line indentation correct for Python and will help to flag any typing mistakes.
ShowOperatorInputVars.py
Drag the mouse over this listing, enter Ctrl-C to copy, and paste it into the Spyder editor!
def algorithm(variables):
    print 'Input variables from FlexDCA:'
    fout = open('c:/Temp/Show User Operator Input Vars.txt', 'wt')
    for var, value in variables.items():
        s = "  '{0}':  {1}".format(var, value)
        print s
        fout.write(s + '\n')
    fout.close()
    XOrg = 0.0
    XInc = 0.0
    Gain = 2.0
    FilterWidth = 0.0
    FilterDelay = 0.0
    XUnits = 'Same'
    YUnits = 'Same'
    ErrorMsg = ''
    SrcData = variables['SrcData']
    XOrg = variables['XOrg']
    XInc = variables['XInc']
    FiltData = SrcData
    return { "FiltData" : FiltData,
             "XOrg" : XOrg,
             "XInc" : XInc,
             "Gain" : Gain,
             "FilterWidth" : FilterWidth,
             "FilterDelay" : FilterDelay,
             "XUnits" : XUnits,
             "YUnits" : YUnits,
             "ErrorMsg" : ErrorMsg
           }
|
- Place FlexDCA into Oscilloscope mode and display a single waveform.
- On FlexDCA's menu, click Measure > Waveform Signal Processing (Math).
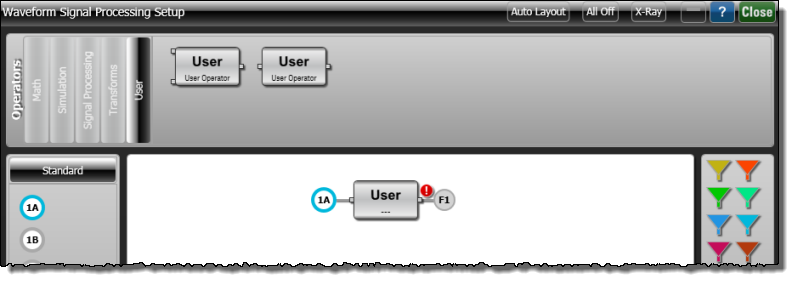
- At the top of the Waveform Signal Processing dialog, select the User tab and drag a single-input User operator icon into the operator construction area as shown in the following picture.
- Click on the user operator to open the User Operator Setup dialog.
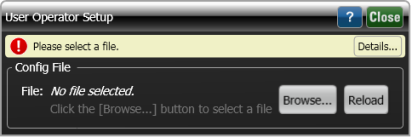
- In the dialog, click Browse and select your XML configuration file, ShowOperatorInputVars.xml.
- In the Waveform Signal Processing dialog, drag a Function Color to the User Operator as shown in the following picture. This will display the output waveform of the function.
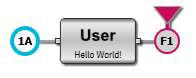
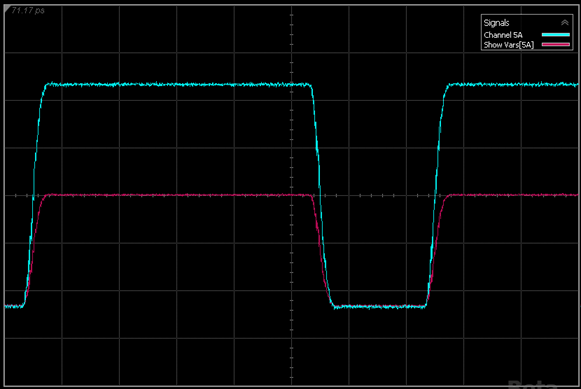
- Click Autoscale and the input and output waveforms should be displayed. Of course, your waveforms will be different from those shown here. The important thing is that both the input and output waveforms are displayed. Notice that the Signals legend identifies the operator's output waveform.
- On FlexDCA's menu, click Measure > Waveform Signal Processing (Math) to open the Waveform Signal Processing dialog if you have closed it.
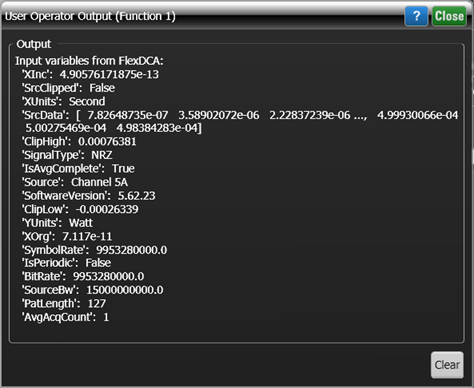
- Click on your operator to open the User Operator Setup dialog, and click the Show Output button. This button only appears on the dialog after the measurement has been started.
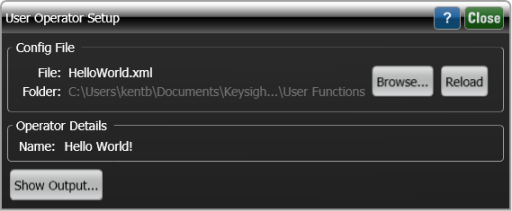
- In the displayed Output dialog, you should see the output of the print statement in your HelloWorld.py script. One Hello World! is printed each time the operator is run. For this picture, FlexDCA was in Single acquisition mode with the Single button clicked three times. You can use this feature to troubleshoot your scripts.